
Introduction to Japanese Milk Bread
Why you’ll love Japanese Milk Bread
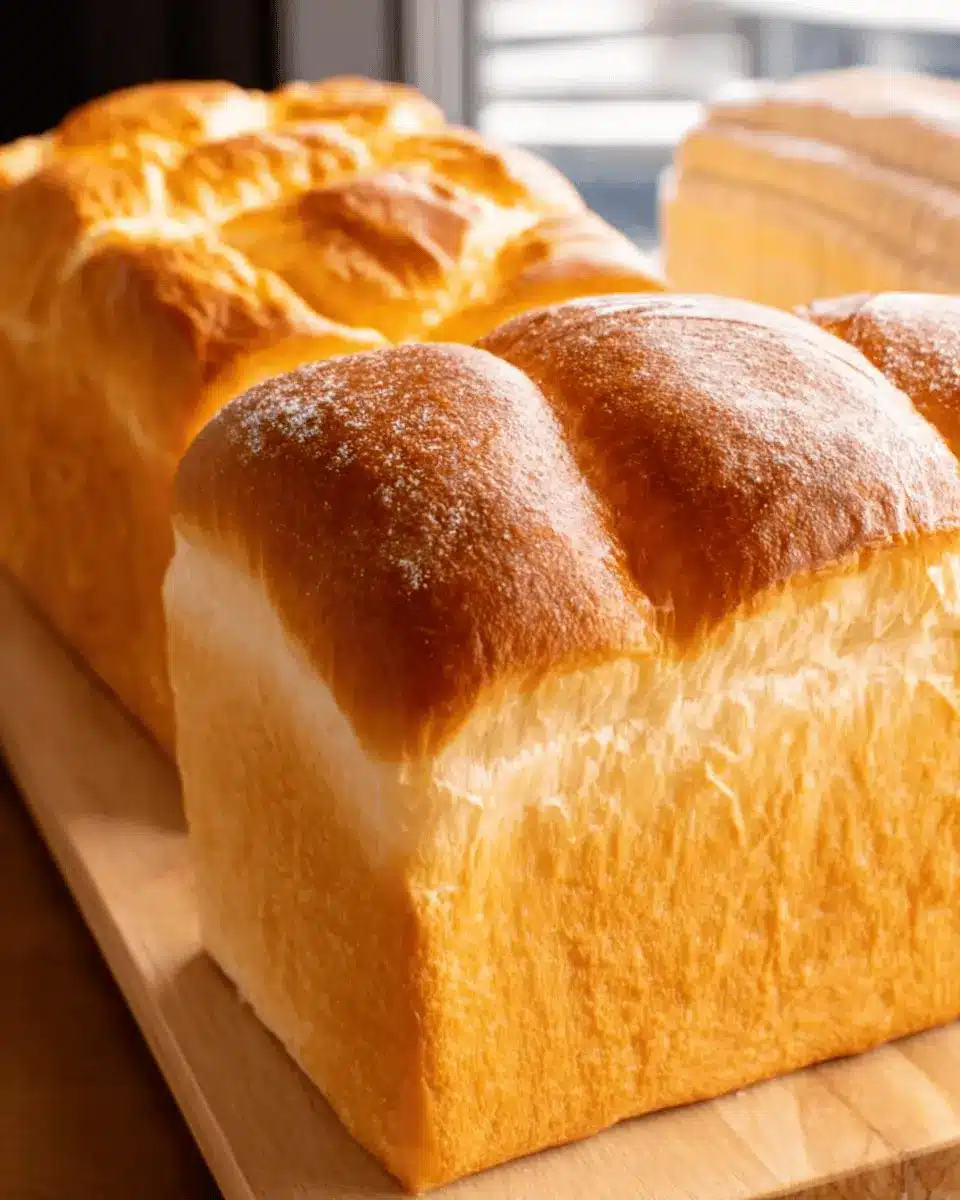
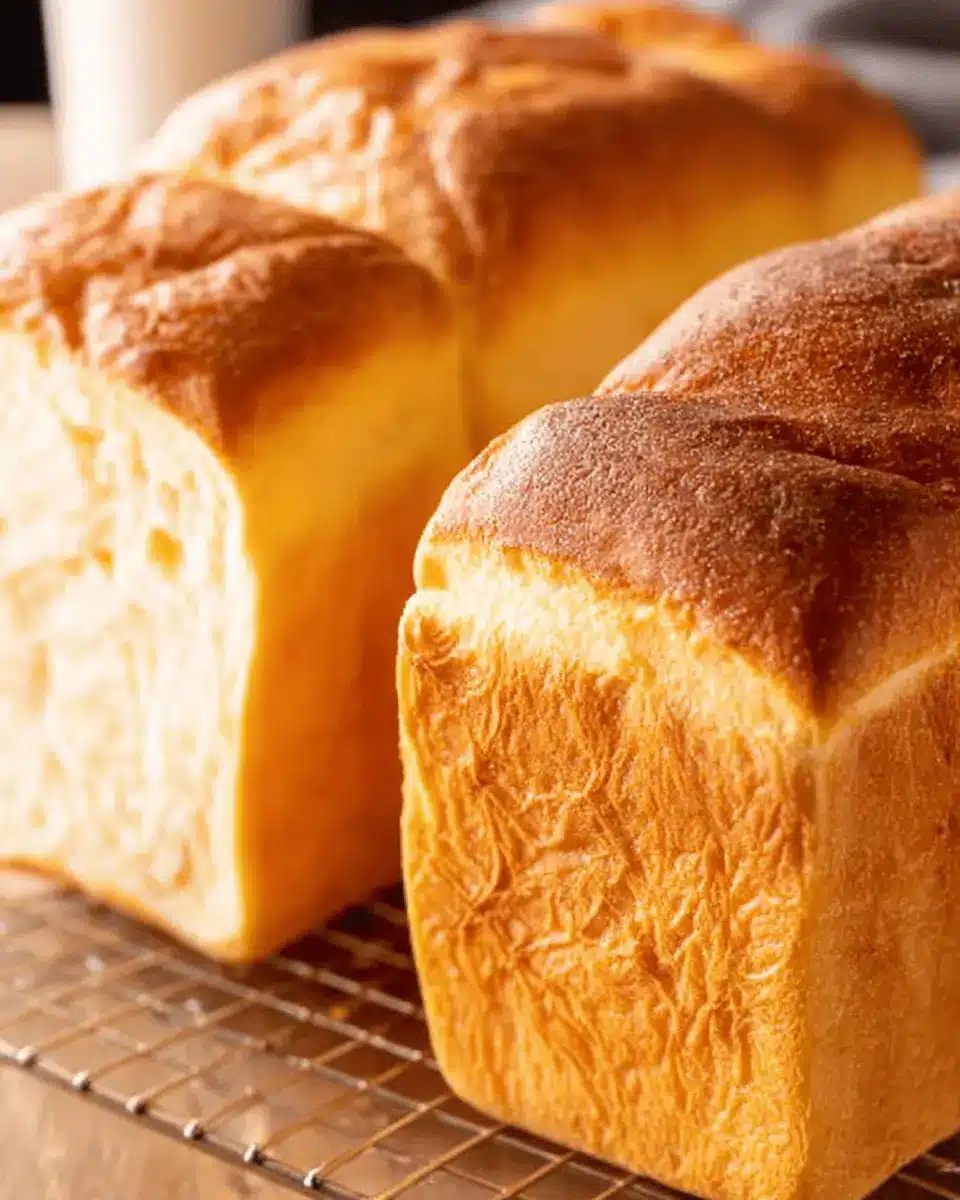
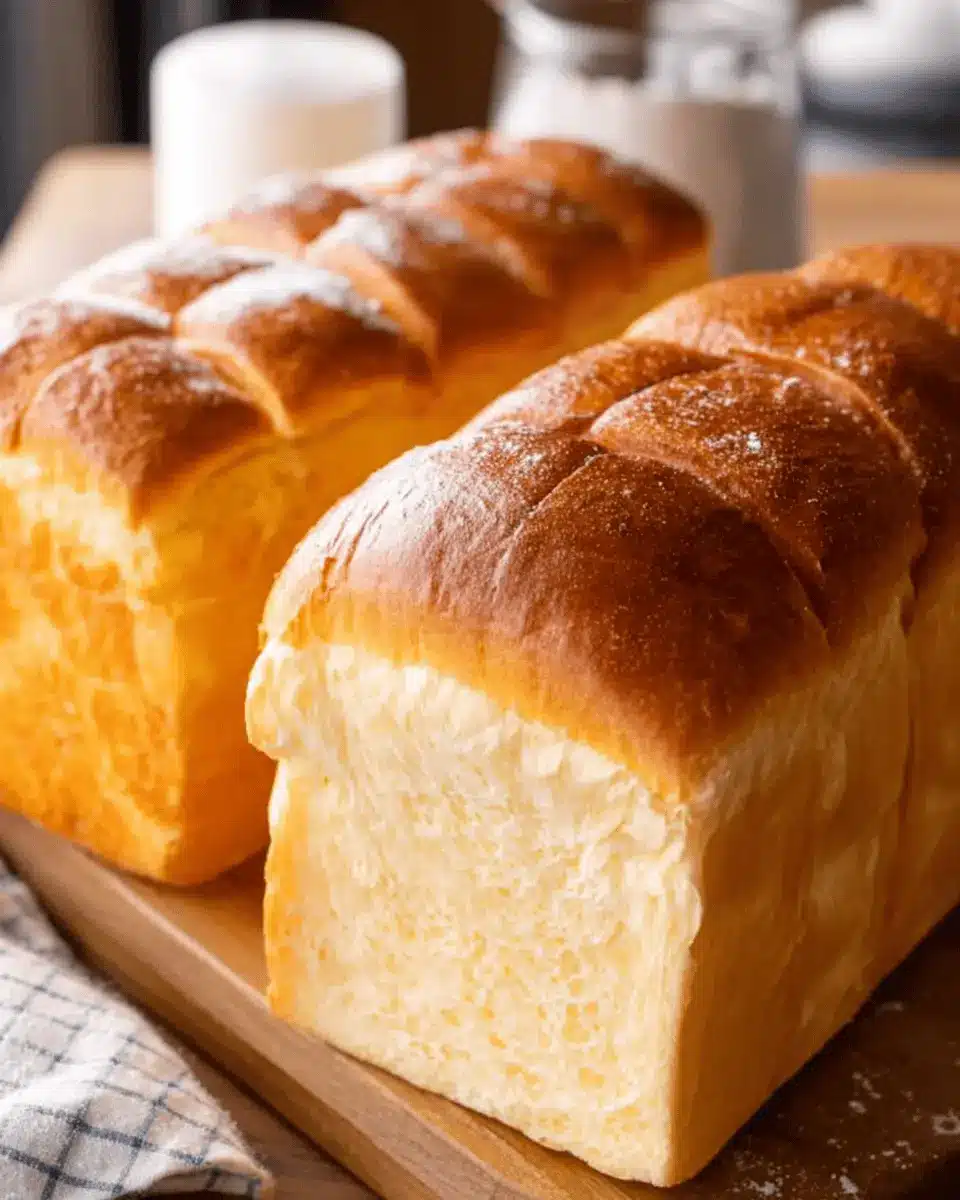
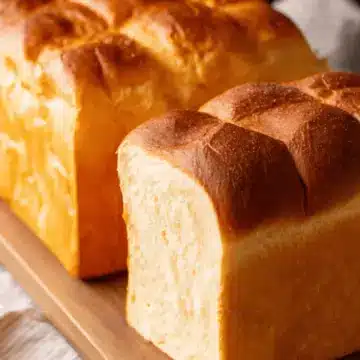
Have you ever laid eyes on a loaf of shokupan, or Japanese Milk Bread? This uniquely soft bread has a delightful milky-sweet flavor that's unlike anything else you've tasted. Its airy texture makes it ideal not only for breakfast toast but also for fluffy sandwiches that elevate everyday meals. Imagine sinking your teeth into a slice that feels like a cloud — sounds delicious, right?
Aside from its irresistible taste and texture, Japanese Milk Bread stands out for its versatility. Use it to create a classic peanut butter and jelly sandwich or layer it with turkey bacon and fresh vegetables for a gourmet twist. Did you know that it’s also great for making French toast or bread pudding? When prepared well, each slice will melt in your mouth.
If you're curious to learn more about the art of bread-making, check out this fantastic guide on dough fermentation for tips from experts. Ready to embark on this exciting baking adventure? Let’s dive into the full recipe for Japanese Milk Bread that will surely impress your friends and family!
Ingredients for Japanese Milk Bread
Essential ingredients you'll need
When crafting the perfect Japanese Milk Bread, also known as shokupan, it’s the quality of your ingredients that truly shines through. Here’s what you need to gather before diving into this delightful baking experience:
- Warm Water: This is crucial for activating yeast. You'll need 250 g for a rectangular loaf.
- Sugar: A touch of sweetness helps nourish the yeast. You'll use about 20 g.
- Kosher Salt: This enhances flavor. Stick with 7 g of Diamond Crystal kosher salt.
- Honey: Adds a lovely depth of sweetness; 10 g will do the trick.
- Instant Yeast: Freshness matters! Use 7 g of instant yeast for a successful rise.
- Bread Flour: Essential for that soft, fluffy texture. You'll want 350 g, ideally a high-protein variety like King Arthur.
- Skim Milk Powder: This contributes to the dough's tenderness—20 g is perfect.
- Unsalted Butter: For richness, include 25 g at room temperature.
For tips on sourcing some of these ingredients, check out King Arthur Baking Company or Bob’s Red Mill.
With these simple yet essential ingredients within reach, you're one step closer to enjoying your homemade shokupan. Trust me, the effort is well worth the delectable results!
Step-by-step Preparation of Japanese Milk Bread
Making Japanese Milk Bread (or shokupan) at home is not just a culinary adventure; it's also a delightful experience that fills your kitchen with a warm, buttery aroma! Follow these carefully crafted steps for that perfectly pillowy, milky-sweet bread.
Gather Your Equipment
To embark on your shokupan journey, you'll need the right tools. Here’s your checklist:
- KitchenAid Stand Mixer (Artisan Series with C-dough hook)
- Rectangular or Square Japanese Loaf Pan
- Digital Kitchen Scale
- Large Bowl
- Dough Scraper
- Rolling Pin
- Plastic Wrap
- Mister
- Wire Rack
Having these essentials ready will streamline your bread-making process and make it more enjoyable.
Mix Your Wet Ingredients
Start by combining your warm water, sugar, salt, and honey in a large bowl. Mix these until the sugar dissolves completely. Add your yeast and let the mixture rest for about 10 minutes until you see bubbles forming—this indicates that your yeast is alive and kicking! This is one of the critical moments, so don’t rush it.
Combine Dry Ingredients and Yeast
In another bowl, weigh out your bread flour and skim milk powder. Create a well in the center, then pour in your bubbly yeast mixture. Be sure to scrape the sides of the bowl to get all that goodness in there. Give it a good stir until it’s all combined.
Knead the Dough
Now comes the fun part—kneading! Attach your dough hook to the mixer and set it on Speed 2 for about two minutes to blend everything. Gradually increase the speed to 4 and knead for another 4 minutes. You’ll want your dough to become smooth and elastic; this is when gluten develops, which is key to achieving that signature shokupan texture.
First Rise and Bulk Fermentation
Once kneaded, shape your dough into a ball and place it in a lightly oiled bowl. Cover it with plastic wrap and let it rise in a warm place until it triples in size, which could take around 40 minutes to an hour. Keep an eye on it; this is where the magic happens!
Shape the Dough
After the dough has risen, punch it down to remove excess air. Divide it into equal pieces, shape them into tight balls, and allow them to rest briefly under a damp towel. This is essential for achieving a uniform loaf.
Final Rise
Place your shaped dough into the greased loaf pan, ensuring they sit snugly together. Cover and let them rise again until they are about 80-90% of the pan height. This usually takes around 30 minutes.
Bake the Bread
Preheat your oven to 425°F (220°C). Once your dough has risen, bake it for about 30 minutes. The smell that fills your kitchen will be incredible! When done, cool it on a wire rack before slicing.
With these step-by-step instructions, you’ll be well on your way to enjoying your homemade Japanese Milk Bread. For more tips and tricks, consider checking out resources like King Arthur Baking for additional baking wisdom. Happy baking!
Variations of Japanese Milk Bread
Whole Wheat Japanese Milk Bread
For those looking to incorporate more whole grains into their diet, whole wheat Japanese milk bread is a fantastic option. This variation maintains the signature softness while adding a nutty flavor and nutritional benefits. Simply substitute a portion of the bread flour with whole wheat flour in your shokupan recipe. You might find that using a mix of all-purpose and whole wheat flour yields the best texture, offering the delicate crumb characteristic of traditional shokupan while enhancing its health benefits.
Japanese Milk Bread with Herbs and Cheese
If you’re in the mood for something savory, consider Japanese milk bread with herbs and cheese. By folding in your favorite herbs, such as rosemary or thyme, and a generous amount of cheese, you can create a delightful loaf that’s perfect for sandwiches or enjoyed on its own. Imagine a warm, cheesy slice topped with tomato and basil—pure bliss! This variation is a wonderful twist that’s sure to impress your friends at brunch or elevate any mealtime experience.
Feel free to experiment with these variations, and don’t hesitate to share your delectable creations! For more insights on Japanese bread culture, you can explore resources from Just One Cookbook or Nami's blog. Happy baking!
Cooking Tips and Notes for Japanese Milk Bread
Maintaining the Right Temperature
To achieve the perfect Japanese Milk Bread, temperature is crucial. Use warm water (about 104ºF or 40ºC) to activate the yeast effectively. However, in summer, consider room temperature or cooler water to avoid overheating the dough. A dough temperature of 79–82ºF (26–28ºC) is ideal for optimal yeast activity during fermentation. To create a warm environment, try placing boiling water in a baking dish on the oven's rack when rising your dough.
Tips for Kneading
Kneading is key for Japanese Milk Bread's characteristic softness. Aim to knead the dough in your stand mixer at speeds 2–6, holding it steady to avoid mishaps. After about 15 minutes of kneading, your dough should be shiny, smooth, and pull away cleanly from the bowl. Interested in kneading techniques? Check out this tutorial on kneading bread dough.
With these tips, you’ll be on your way to mastering the art of shokupan!
Serving Suggestions for Japanese Milk Bread
How to Enjoy Your Bread Fresh
Freshly baked Japanese Milk Bread is a delight on its own! To savor its soft texture, simply slice and toast it lightly. Top with a smear of butter and a drizzle of honey or your favorite jam. You can also enjoy it with a warm bowl of miso soup for a comforting breakfast experience. For a hearty snack, try it with avocado, a sprinkle of salt, and a squeeze of lime juice—it's a match made in culinary heaven!
Creative Sandwich Ideas Using Japanese Milk Bread
The versatility of Japanese Milk Bread shines in sandwiches. Here are a few flavorful combinations to inspire your lunch:
-
Turkey Bacon and Avocado: Layer crispy turkey bacon with slices of creamy avocado, fresh spinach, and a touch of mayo for a savory treat.
-
Chicken Ham and Cheese: Stack slices of chicken ham with melted cheese and some arugula for a gourmet twist on the classic ham and cheese.
-
Vegetable Delight: Fill your sandwich with cucumber slices, pickled radishes, and a spread of miso mayonnaise for a refreshing vegetarian option.
These sandwiches highlight the fluffy nature of the bread while adding delightful textures and flavors, making every bite enjoyable! For more ideas, check out Bon Appétit’s guide to sandwich recipes that will elevate your lunch game.
Time Breakdown for Japanese Milk Bread
Preparation Time
Getting started on your Japanese Milk Bread involves measuring and mixing the ingredients, which takes about 1 hour. This time is essential for achieving the perfect dough texture and flavor profile.
Rising Time
The dough needs to rise for approximately 2 hours and 5 minutes in total. This includes the initial bulk fermentation, where it triples in size, ensuring a light and fluffy bread.
Baking Time
Once your dough has properly risen, baking it will take around 30 minutes. This step is crucial for developing a beautiful golden crust and enhancing the lovely aroma.
Total Time
In total, you’ll spend about 3 hours and 35 minutes from start to finish. This can seem like a long time, but the hands-on work is minimal, and the result is a deliciously soft loaf ideal for any meal. For more detailed instructions, be sure to check out the full recipe!
Nutritional Facts for Japanese Milk Bread
When you indulge in a slice of Japanese Milk Bread, it's good to know what you're enjoying! Here’s a quick look at the nutritional content per serving:
Calories per serving
With approximately 1645 calories in the entire loaf, a single slice provides around 130 calories—perfect for your breakfast or snack.
Protein content
Each serving contains about 52 grams of protein in the whole loaf. This makes it a great choice for a post-workout meal or a wholesome breakfast option.
Sodium level
The sodium content is around 1355 mg for the entire loaf, contributing to the bread's flavor. Keep this in mind if you're watching your salt intake.
By considering these nutritional aspects, you can fully enjoy the deliciousness of Japanese Milk Bread while keeping your dietary goals in check! For more details about enjoying this delightful bread in your meals, check out these health benefits of whole grains and the importance of protein.
FAQs about Japanese Milk Bread
Why is my bread not rising?
If your Japanese Milk Bread is stubbornly refusing to rise, there are a couple of common culprits. First, ensure your yeast is fresh; expired yeast can lead to disappointing results. Additionally, the dough needs a warm environment for fermentation. If your kitchen is chilly, consider placing the dough in a warm spot or using an oven set to proof mode (around 100°F/38°C). If you see no bubbles after 10 minutes of proofing, it's worth trying a new batch of yeast.
Can I use different types of yeast?
Yes, you can! While instant yeast is preferred for this shokupan recipe due to its ease of use, you can substitute it with active dry yeast. Just use the same amount or slightly more (up to 25%) and remember to proof it in warm water first before adding it to your dough—this helps activate it.
How should I store my leftover bread?
To keep your Japanese Milk Bread fresh, store it in a plastic bag at room temperature for 1-2 days. If you want to preserve it longer, slicing and freezing is a great option; it's best consumed within two weeks, but it can last up to a month in the freezer. Just be sure to let it cool completely before storing!
Conclusion on Japanese Milk Bread
In summary, Japanese Milk Bread (Shokupan) is a delightful addition to any kitchen. Its airy texture and subtly sweet flavor make it ideal for breakfast or sandwiches. Give this recipe a try, and see why this bread is beloved in Japan. You won’t look back once you taste it!
Japanese Milk Bread (Shokupan)
Equipment
- KitchenAid Stand Mixer (Artisan Series)
- Rectangular Japanese Loaf Pan
- Square Japanese Loaf Pan
- Digital Kitchen Scale
- large bowl
- Dough scraper
- Dredge shaker
- Rolling pin
- Mister
- Bread Loaf Bags
- plastic wrap
- Kitchen Towel
- Wire Rack
- Small baking dishes
- Dough hook attachment for stand mixer
- Pastry brush
- paper towels
Ingredients
For 1 Rectangular Shokupan Loaf
- 250 g warm water (104ºF, 40ºC)
- 20 g sugar
- 7 g Diamond Crystal kosher salt
- 10 g honey
- 7 g instant yeast (1 packet)
- 350 g bread flour
- 20 g skim milk powder or nonfat dry milk powder
- 25 g unsalted butter (at room temperature)
For Greasing
- 0.5 teaspoon neutral oil (for the bowl)
- 10 g unsalted butter (at room temperature, for the pan)
For 1 Square Shokupan Loaf
- 167 g warm water
- 14 g sugar
- 4.5 g Diamond Crystal kosher salt
- 7 g honey
- 4.7 g instant yeast
- 235 g bread flour
- 14 g skim milk powder or nonfat dry milk powder
- 17 g unsalted butter
Instructions
To Make the Dough
- Gather all the ingredients and weigh them precisely.
- Combine the warm water, sugar, salt, and honey in a large bowl.
- Add yeast to the mixture and set aside.
- Mix bread flour and dry milk powder in a stand mixer bowl and make a well in the center.
- Pour the yeast mixture into the well.
- Knead the dough in a stand mixer.
- Use the windowpane test to check dough elasticity.
- Lightly dust with flour and slam and fold the dough to develop gluten.
- Let the dough rise until tripled in size.
- Deflate the dough and divide it into equal pieces.
- Make dough balls and cover with a damp towel to rest.
- Shape the dough into rectangles and roll them up.
- Place dough rolls into the greased loaf mold.
- Cover and let rise until nearly the height of the mold.
- Preheat the oven and prepare for baking.
- Bake the shokupan and cool on a wire rack.


Leave a Reply