
Introduction to Homemade Garlic Knots
Why Homemade Garlic Knots Are a Game Changer for Young Professionals
If you’ve ever walked into your favorite pizzeria and been tempted by the warm, garlicky goodness of homemade garlic knots, you’re not alone. For young professionals juggling busy schedules, making these delicious knots at home is a total game changer. You get the satisfaction of fresh-baked bread without the hassle of going out or ordering in.
Why is this a perfect option for you? Let’s break it down:
-
Quick Prep with Maximum Flavor: With just a few simple ingredients and a little time, you can whip up a batch of these delightful knots. The process involves waiting for the dough to rise, but in the meantime, you can tackle other chores or simply unwind.
-
Customize to Your Taste: Unlike store-bought varieties, making your own garlic knots allows you to play around with flavors. Want to add that extra kick? Throw in some red pepper flakes or sprinkle with fresh herbs. The options are endless!
-
Meal Companion or Snack: These knots not only make a great side for pasta dishes but also serve as a perfect snack. Pair them with homemade marinara sauce for a delightful treat.
For more culinary inspiration, check out this guide on baking bread. Including homemade garlic knots in your kitchen repertoire is a delicious way to elevate your meal game!
Ingredients for Homemade Garlic Knots
When it comes to crafting the perfect homemade garlic knots, having the right ingredients is key. Let’s break down what you’ll need for both the dough and the delicious toppings.
Essential ingredients for the dough
- Warm Water: 1 and ⅓ cups, ideally between 100–110°F, to activate the yeast.
- Instant Yeast: 2 and ¼ teaspoons of Platinum Yeast from Red Star will help your dough rise perfectly.
- Granulated Sugar: Just a tablespoon helps feed the yeast and enhances flavor.
- Olive Oil or Melted Butter: 3 tablespoons to add moisture and a nice richness.
- Salt: One teaspoon is vital for flavor.
- Garlic Powder: For an extra hint of garlic within the dough (you’ll love this addition!).
- All-Purpose Flour: About 3 and ½ cups, this is the base for your dough.
Topping ingredients for that extra flavor
- Unsalted Butter: This is essential, at 5 tablespoons, melted and ready to coat.
- Fresh Garlic: 3 minced cloves will bring that deep garlic flavor.
- Italian Seasoning: A teaspoon of this mix adds a lovely herbal aroma.
- Salt: A pinch (¼ teaspoon) to balance everything out.
- Optional Enhancements: After baking, consider adding grated Parmesan cheese or chopped fresh parsley for an elevated finish.
With these ingredients, your homemade garlic knots will be bursting with flavor! If you want tips on where to find quality ingredients, check out this guide!
Preparing Homemade Garlic Knots
Creating the perfect homemade garlic knots is a delightful process that fills your kitchen with mouthwatering aromas. Whether you’re planning a cozy dinner or simply craving a snack, these knots are sure to impress. Let’s walk through each step to ensure your garlic knots turn out soft, flavorful, and irresistibly good.
Step 1: Prepare the Dough
Start by whisking together warm water (aim for between 100–110°F), instant yeast, and granulated sugar in the bowl of your stand mixer. If you don’t have a mixer, you can easily use a mixing bowl and a wooden spoon. Allow this mixture to rest for about five minutes so the yeast can activate – you should see small bubbles forming. This is an excellent time to reflect on how rewarding homemade bread can be.
Step 2: Knead the Mixture to Perfection
Once your yeast mixture is bubbly and aromatic, it’s time to get kneading. Add the olive oil or melted butter, salt, garlic powder, and half of the flour. Beat the mixture for 15 seconds before adding the remaining flour. Knead the dough either with the dough hook for five minutes or by hand on a floured surface. It should be slightly tacky yet soft. Don’t forget the windowpane test: stretch a small piece of dough; if it doesn’t tear easily and light can pass through, you’re good to go!
Step 3: Let the Dough Rise Like You Mean It
Transfer the kneaded dough into a lightly oiled bowl, covering it tightly with plastic wrap or a clean kitchen towel. Let it rise at room temperature until it doubles in size, which will take about 1 to 2 hours. For a warmer environment, warm your oven to 150°F, turn it off, then place the bowl inside with the door slightly ajar. This will create the perfect little haven for your dough.
Step 4: Shape Those Knots with Love
Once your dough has risen, it’s time to shape it into those delightful knots. Punch it down gently to release the air and then roll it out into a log that’s approximately 16 inches long. Cut the dough into 16 strips and roll each into an 8-inch rope. Tie each rope into a knot, tucking the ends underneath if you like for a neater appearance. Place your shaped knots on lined baking sheets, and let them puff up for another 30 to 45 minutes.
Step 5: Bake to a Golden Brown Finish
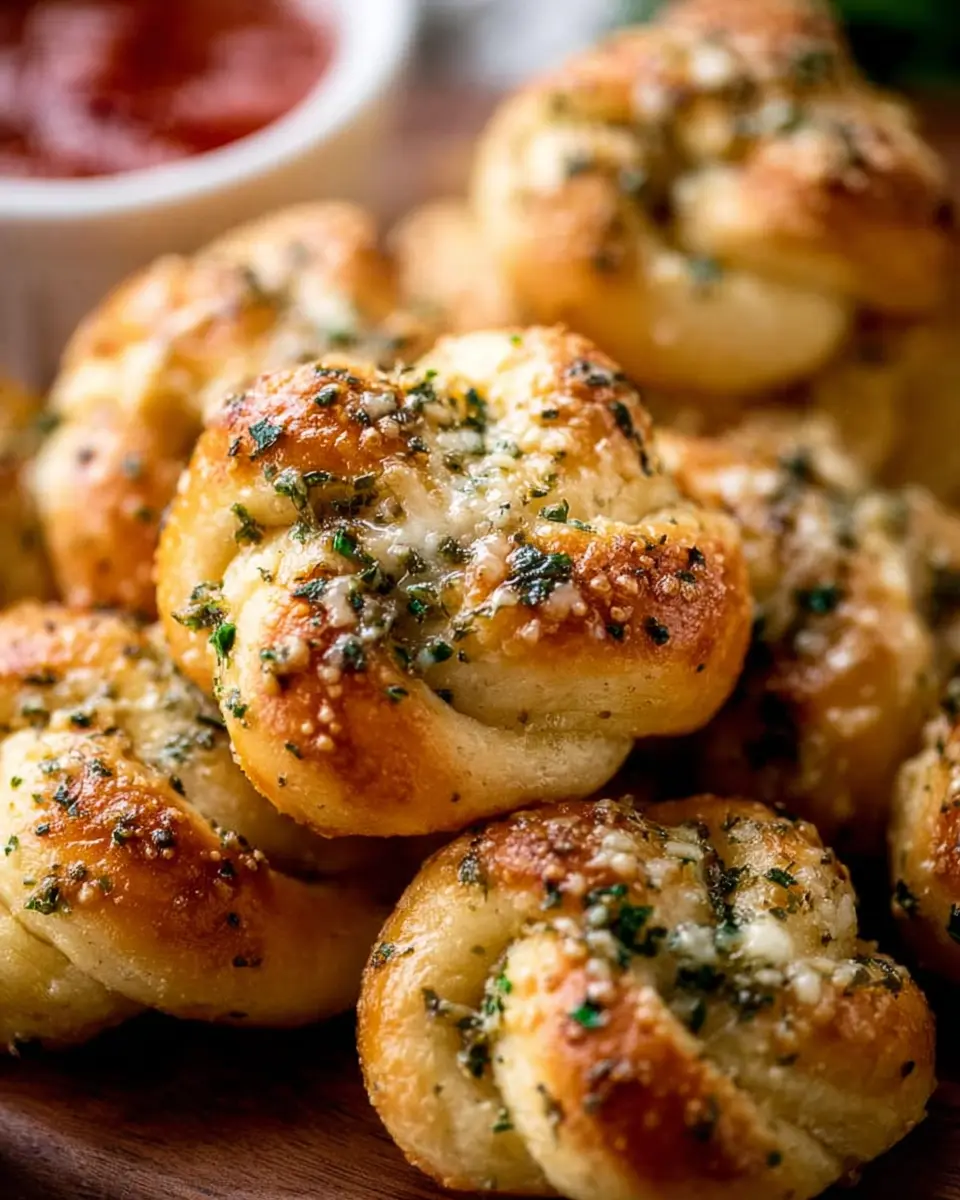
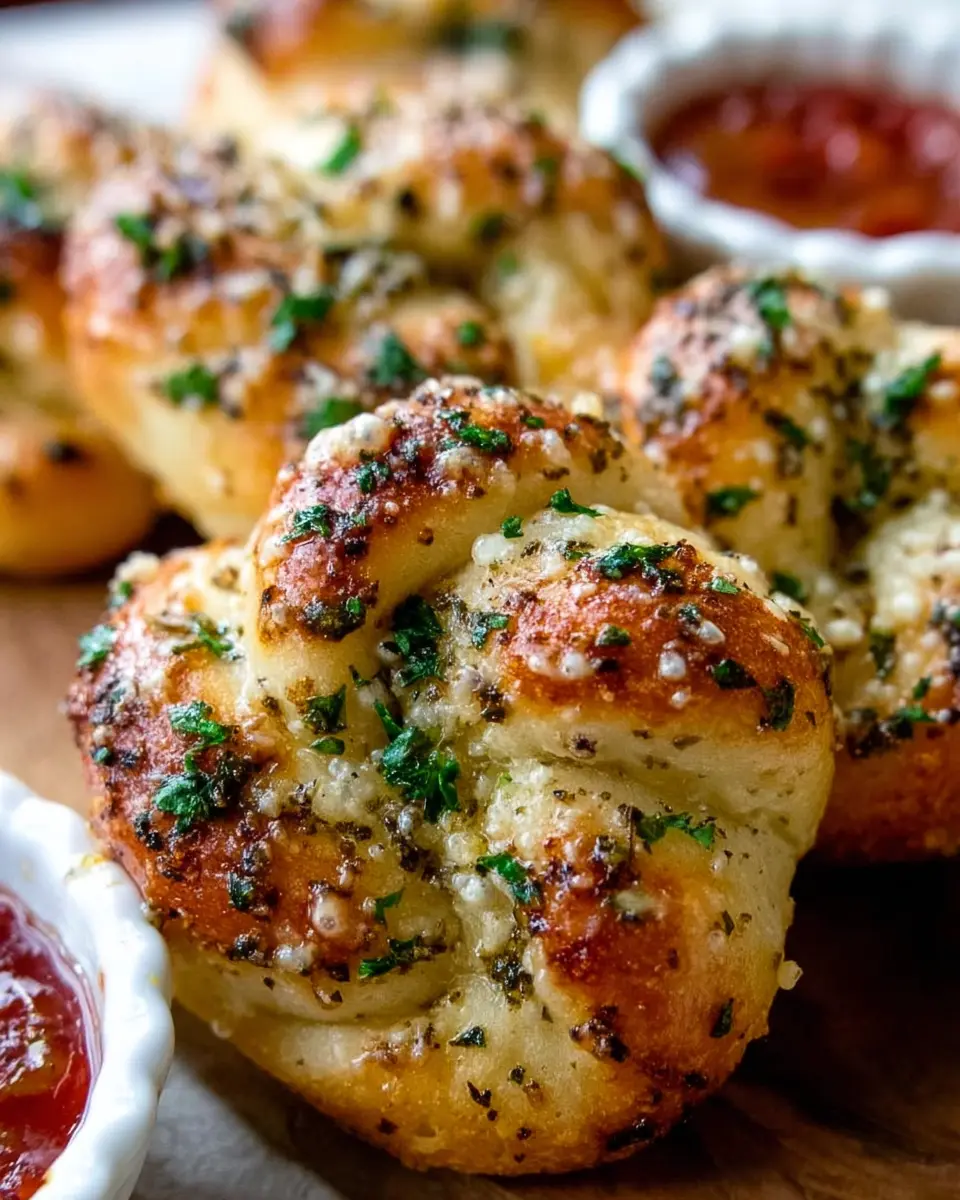
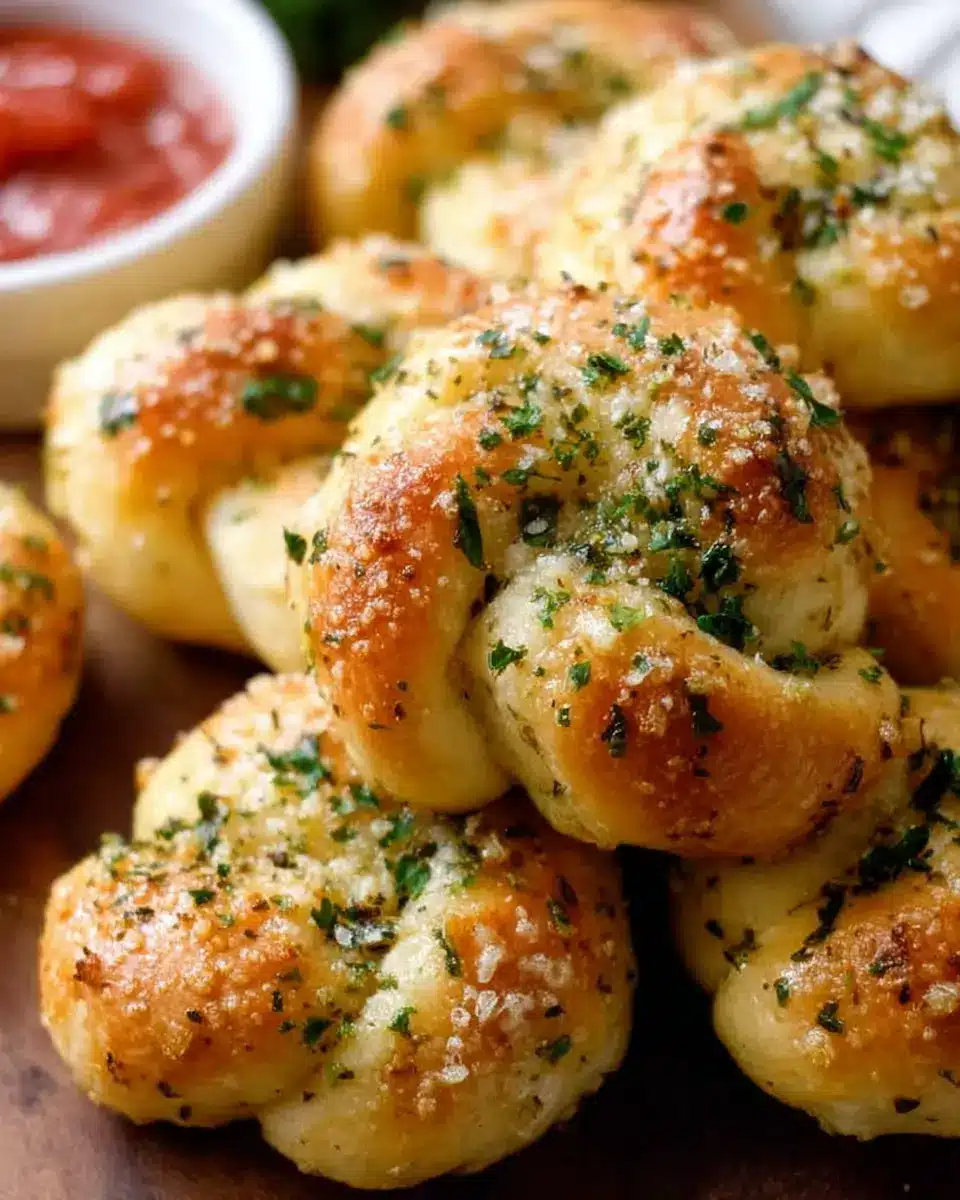
Preheat your oven to 400°F as your knots rise. After they’ve had a final puff, brush them with a mixture of melted butter, minced garlic, Italian seasoning, and a pinch of salt before baking for about 20–23 minutes. Keep an eye on them – you want that gorgeous golden brown hue! Once baked, brush the knots with more garlic butter and sprinkle with Parmesan cheese and chopped parsley for that extra touch of flavor.
And there you have it! You’re on your way to savoring delicious homemade garlic knots that are perfect as a side dish or a snack. For more tips and tricks, check out King Arthur Baking for expert advice on baking and yeast. Your culinary adventure awaits!
Variations on Homemade Garlic Knots
Cheesy garlic knots with extra flavor
For a decadent twist, try adding gooey cheese to your homemade garlic knots. Simply incorporate shredded mozzarella or parmesan into the dough or sprinkle it on top before baking. This not only enhances the flavor but also offers a delightful cheesy pull that’s hard to resist.
Herb-infused garlic knots for a twist
Elevate your homemade garlic knots by infusing them with fresh herbs. Mix in chopped rosemary, thyme, or basil for a fragrant touch, or experiment with dried herbs like oregano. These additions not only give your knots a unique flavor profile but also make them visually appealing—perfect for impressing guests!
Want to learn more about enhancing your baked goods? Check out The Kitchn’s guide on flavor pairings.
Cooking Tips and Notes for Homemade Garlic Knots
Troubleshooting Common Dough Issues
Making homemade garlic knots can be rewarding, but dough mishaps occasionally happen. If your dough is too sticky, sprinkle a teaspoon of flour until it feels soft but not dry. For dry dough, add a splash of water, kneading it in gradually. Remember, patience is key—dough needs love to rise properly!
Storing and Reheating Your Garlic Knots
Once you've enjoyed your delicious garlic knots, you'll want to keep them fresh! Store leftovers covered at room temperature for up to two days or in the refrigerator for a week. For longer storage, freeze them for up to three months. To reheat, simply pop them in the microwave for a few seconds or warm them in the oven for a crispy refresh. For more tips on reheating baked goods, check out Love and Olive Oil’s Storage Guide.
Serving Suggestions for Homemade Garlic Knots
Dipping Sauces to Accompany Your Knots
Homemade garlic knots are perfect for dipping! Try pairing them with classic marinara sauce for a traditional twist, or opt for a creamy garlic aioli for something rich and flavorful. You can also experiment with pesto, ranch, or even a spicy Sriracha sauce for a unique kick. The possibilities are endless!
Pairing with Pasta or Salad for a Complete Meal
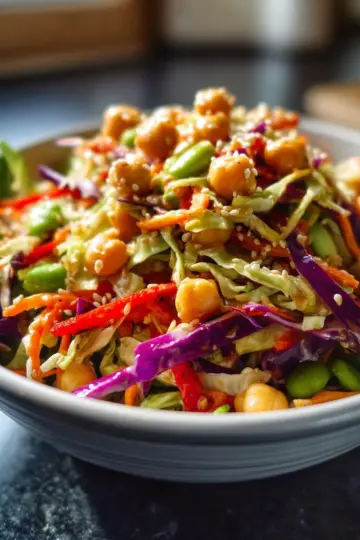
For a satisfying meal, serve your homemade garlic knots alongside a simple pasta dish or a fresh garden salad. Pairing with spaghetti marinara or a zesty Caesar salad creates a delightful balance. Not only does this enhance your dining experience, but it also makes your meal feel more complete and satisfying. Enjoy the garlic knots as an appetizer or side dish; either way, they'll steal the show! For more salad ideas, check out this fresh salad guide.
Time Breakdown for Homemade Garlic Knots
Preparation Time
Get started on your homemade garlic knots with a prep time of about 3 hours. This includes the time needed to mix, knead, and let the dough rise until it doubles in size.
Rising Time
Most of that 3 hours is dedicated to rising—expect about 1 to 2 hours for the dough to reach its fluffy potential. If you're in a hurry, consider using your oven for a warm rise!
Baking Time
Once shaped, your garlic knots need around 20-23 minutes in the oven. Watch them closely as they turn golden brown—a sure sign they’re ready to shine.
Total Time
In total, you'll spend about 3 hours and 25 minutes from start to finish. But don't worry, much of that time is hands-off, perfect for multitasking while dreaming about those delicious garlic knots!
For more garlic goodness, check out this guide on working with yeast for best results.
Nutritional Facts for Homemade Garlic Knots
Calories
Each serving of these homemade garlic knots contains approximately 150 calories, making them a delightful addition to any meal without excessive guilt.
Carbohydrates
Packed with flavor, each knot contributes about 28 grams of carbohydrates. Perfect for those looking to enjoy something tasty while balancing their daily intake.
Protein
While not a primary protein source, these knots offer around 3 grams of protein per serving. Pair them with a protein-rich dip or side to enhance your meal!
For more information about macronutrients and how they play a role in a balanced diet, check out resources from the American Heart Association.
FAQ about Homemade Garlic Knots
Can I use whole wheat flour for a healthier version?
Absolutely! You can substitute up to half of the all-purpose flour with whole wheat flour for a nuttier flavor and added fiber. Just keep in mind that the knots may be a little denser than the classic version, but they'll still be delicious!
How do I freeze leftover garlic knots?
To preserve the freshness of your homemade garlic knots, allow them to cool completely and then store them in an airtight container or a freezer-safe bag. They can last up to three months in the freezer. Just thaw them at room temperature and reheat in the microwave or oven for a quick snack!
Can I make these knots ahead of time?
Yes, you can! If you prefer to enjoy freshly baked garlic knots without the hassle, shape them according to the recipe, then cover and refrigerate for up to 24 hours. When you're ready to bake, simply let them sit at room temperature for about 30 minutes before popping them in the oven.
For more tips on baking, check out resources like the King Arthur Baking Company.
Conclusion on Homemade Garlic Knots
Embracing the joy of homemade food
Making homemade garlic knots is not just about the delicious result; it's also a delightful experience in your kitchen. As you mix, knead, and bake, feel the joy of bringing something special to the table. The aroma fills your home, and sharing these knots with loved ones creates lasting memories. Enjoy every bite!
For more baking inspiration, you can explore resources like King Arthur Baking for expert tips and techniques.

Homemade Garlic Knots
Equipment
- Stand Mixer
- mixing bowl
- dough hook
- Pizza cutter
- baking sheets
Ingredients
Homemade Dough
- 1 cups warm water between 100–110°F, 38–43°C
- 2 teaspoons instant yeast Platinum Yeast from Red Star (1 standard packet)
- 1 tablespoon granulated sugar
- 3 tablespoons olive oil or melted butter
- 1 teaspoon salt
- ½ teaspoon garlic powder
- 3.5 cups all-purpose flour spooned & leveled, plus more for hands and work surface
Topping
- 5 tablespoons unsalted butter melted
- 3 garlic cloves garlic minced; or ½ teaspoon garlic powder
- 1 teaspoon Italian seasoning
- ¼ teaspoon salt
- ¼ cup grated Parmesan cheese optional after baking
- 2 tablespoons chopped fresh parsley optional after baking
Instructions
Making the Dough
- Whisk the warm water, yeast, and granulated sugar together in the bowl of your stand mixer or a large mixing bowl. Cover and allow to rest for 5 minutes.
- Add the olive oil (or butter), salt, garlic powder, and half of the flour. Beat for 15 seconds, then add the remaining flour. Beat on low speed for 2 minutes.
- Knead the dough for an additional 5 full minutes, or knead by hand on a lightly floured surface for 5 full minutes.
- Lightly grease a large bowl and place the dough in it, turning to coat all sides in the oil. Cover with foil or a towel and allow to rise for 1–2 hours or until doubled in size.
Shaping and Baking
- Use floured hands to shape the dough into a 16×5-inch log. Slice into 16 1-inch strips, roll each into 8-inch ropes, and tie each into a knot.
- Lightly cover the shaped knots and let them rest for at least 30-45 minutes.
- Preheat oven to 400°F (204°).
- Combine the melted butter, garlic, Italian seasoning, and salt for the topping. Brush on the knots and reserve some for after baking.
- Bake for about 20–23 minutes or until golden brown. Remove and brush with remaining garlic butter.
- Serve plain or with marinara sauce for dipping.


Leave a Reply