
Introduction to Sticky Honey Garlic Chicken Tenders
If you're craving something delightfully finger-licking good, look no further than sticky honey garlic chicken tenders. These tenders pack a flavor punch that’s hard to resist. But why settle for fast food when you can whip these up in your own kitchen?
Why Homemade Food Beats Fast Food
When it comes to homemade meals, the benefits are undeniable. For starters, fresh ingredients mean you know exactly what’s going into your food. So, you can skip the preservatives and excess sodium often found in fast food. Plus, making your own meals allows for greater customization—feel free to add that extra dash of garlic or spice to suit your taste!
Not to mention, preparing dishes like our chicken tenders can be a fun and rewarding experience. Cooking at home not only saves you money, but it also enables you to control portion sizes, contributing to a healthier lifestyle. Research shows that people who cook at home tend to make better food choices overall (check out this article for more insights).
So grab your apron and join us as we delve into making these sticky honey garlic chicken tenders that are sure to impress! Keep reading for the full recipe and cooking tips.
Ingredients for Sticky Honey Garlic Chicken Tenders
What you need for the chicken tenders
To whip up these delightful sticky honey garlic chicken tenders, you’ll start with some pantry staples. Here’s what you’ll need:
- 2 pounds (907 g) boneless, skinless chicken breast or chicken tenderloins
- 1 cup (60 g) panko bread crumbs (you can also use regular bread crumbs)
- 2 large eggs
- ¾ cup (100 g) all-purpose flour
- 1 teaspoon (5 ml) kosher salt
- Fresh cracked black pepper to taste
- Optional seasonings like garlic powder or smoked paprika for an extra flavor boost
These ingredients combine to create juicy, tender chicken that's crispy on the outside!
The ingredients for the honey garlic sauce
Now for the star of the show: the honey garlic sauce! This is what makes your chicken tenders irresistibly sticky and sweet. Gather the following:
- ½ cup (120 ml) ketchup
- ½ cup (120 ml) honey
- ¼ cup (60 ml) soy sauce (or fish sauce for a deeper flavor)
- 1 tablespoon (15 ml) chili garlic sauce (adjust based on your heat preference)
- 2 tablespoons (15 ml) fresh lime juice or rice vinegar
- 1 teaspoon cornstarch
This simple yet flavorful sauce will turn your chicken tenders into a crowd-pleasing dish perfect for any occasion!
Preparing Sticky Honey Garlic Chicken Tenders
Creating sticky honey garlic chicken tenders at home is not only simple, but the delicious results are well worth the effort. Let’s dive into the steps to prepare these flavor-packed, finger-licking tenders that are perfect for any meal!
Preheat the oven and prepare your baking sheets
Start by preheating your oven to 425°F (220°C). This high heat ensures that your chicken tenders turn out crispy, while also allowing that sticky honey garlic sauce to caramelize beautifully. While the oven is warming up, line one or two baking sheets with parchment paper to prevent sticking and for easy cleanup. If you don’t have parchment paper, a light spray of non-stick cooking spray will work as well.
Cut and season the chicken
Now it’s time to prepare the chicken. If you're using boneless, skinless chicken breasts, slice them into even strips, about 1-2 inches wide. Remember, uniformity here is key—this helps the chicken cook evenly. For a burst of flavor, season the strips with kosher salt, fresh cracked black pepper, and feel free to sprinkle in any additional seasonings you love, such as garlic powder or smoked paprika. Every little bit helps in enhancing that tasty profile in your sticky honey garlic chicken tenders.
Set up your dredging stations
To get that perfect coating, set up an assembly line. You’ll need three shallow bowls:
- Flour bowl: Combine all-purpose flour, a sprinkle of salt, and cracked pepper.
- Egg wash bowl: Beat a couple of eggs until foamy.
- Panko bread crumbs bowl: Fill this with panko bread crumbs (or regular if preferred).
This setup makes dredging easy and efficient, ensuring that each chicken strip is well-coated for that delightful crunch!
Coat the chicken tenders
Begin the dredging process by taking a chicken strip and coating it in the flour mixture. Shake off any excess before dipping it into the egg wash. Finally, place it in the panko, pressing down gently to help the crumbs stick. Lay each coated strip on your prepared baking sheet, ready to bake. Repeat this for all your chicken!
Bake the chicken tenders
Once all your chicken strips are coated, pop them into the oven. Bake for about 15 minutes, then flip the strips over for even cooking. Bake for another 5-10 minutes until they’re golden brown and cooked through. If you want to check if they’re done, use a meat thermometer—a temperature of 165°F ensures they’re safe to munch!
Make the sweet and sticky sauce
While those tenders bake to perfection, whip up the sauce. In a bowl, whisk together ketchup, honey, soy sauce (or fish sauce for a zesty kick!), and a splash of lime juice or rice vinegar. The chili garlic sauce adds a wonderful heat, but feel free to adjust it to your preference. Finally, mix in a teaspoon of cornstarch to thicken the sauce—this step creates that glossy sheen we all love in sticky sauces!
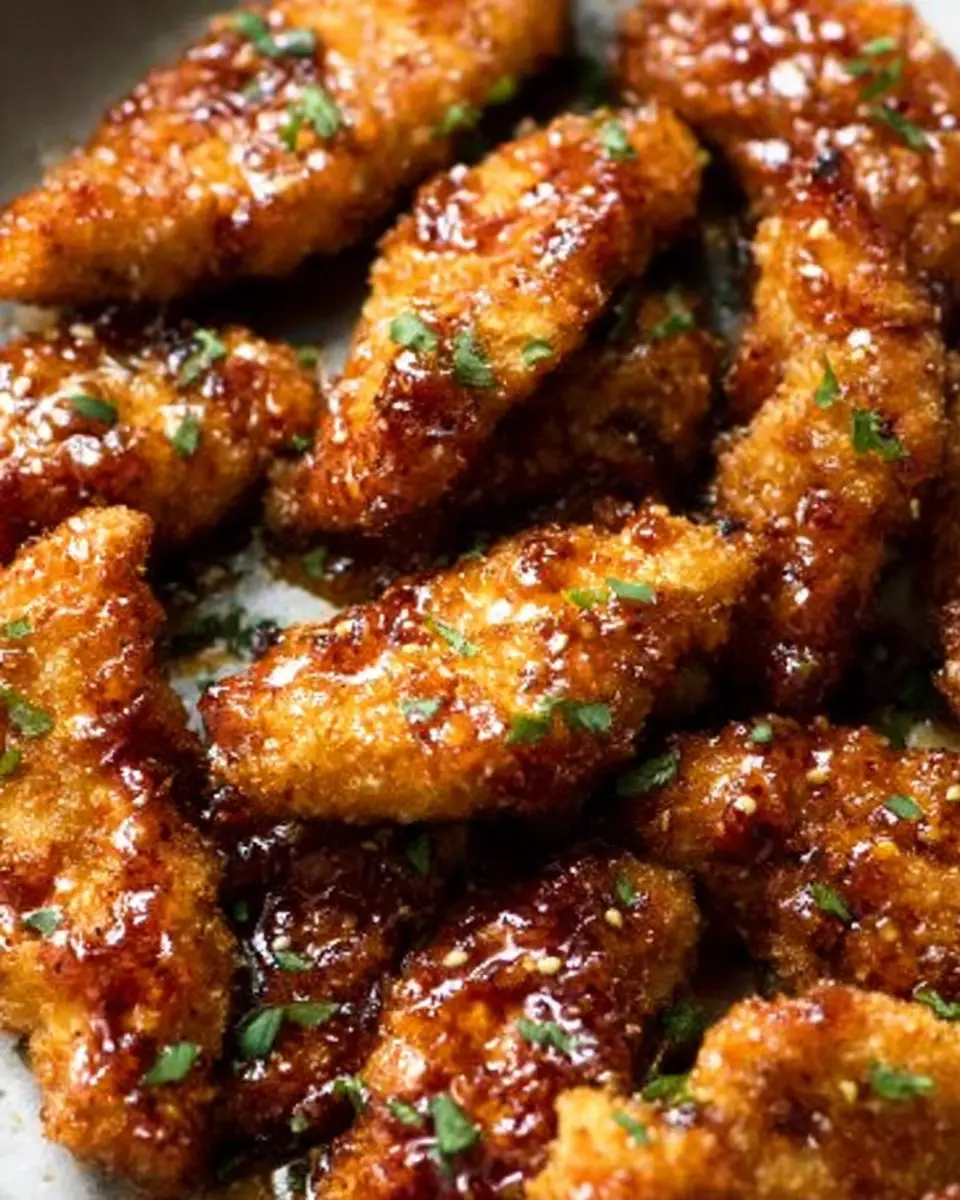
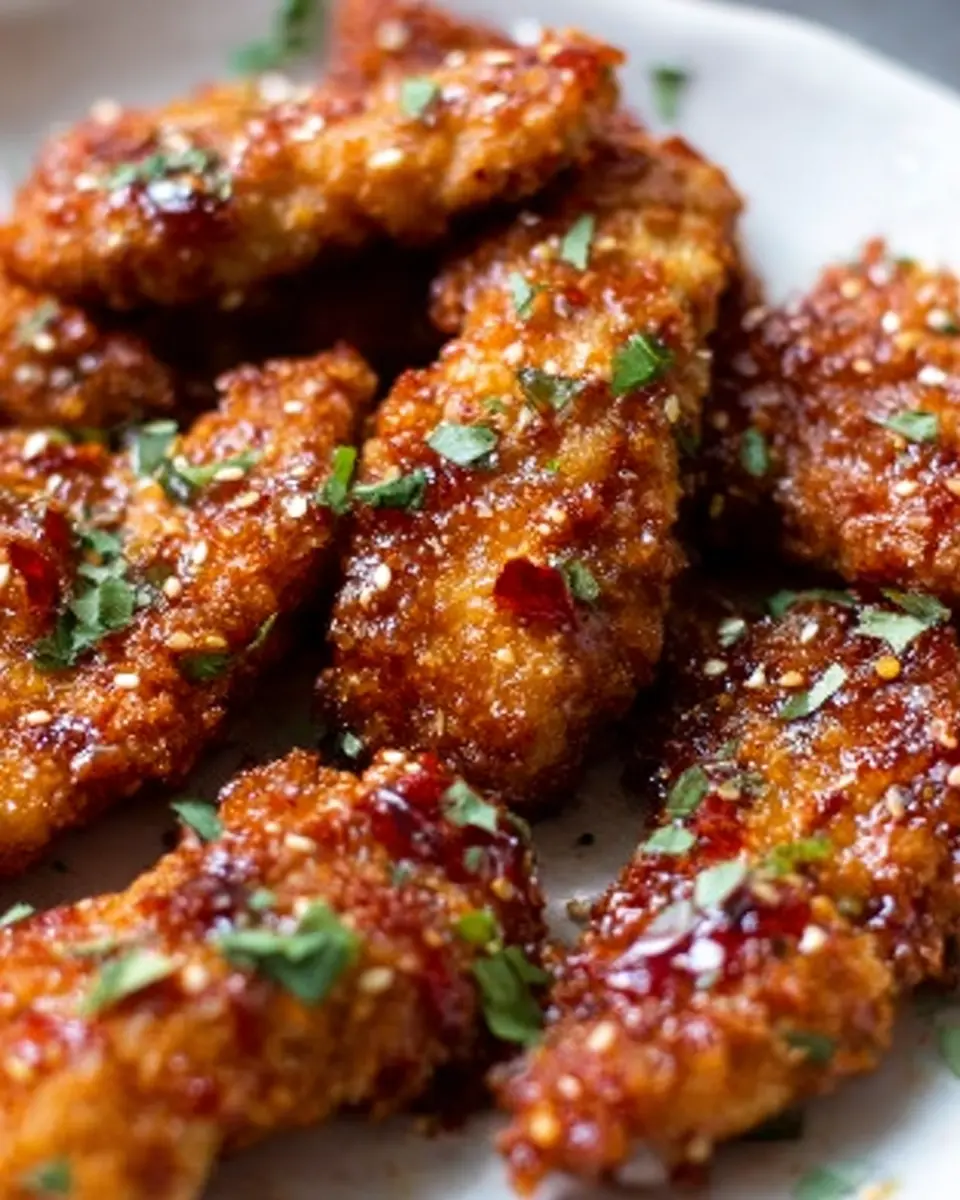
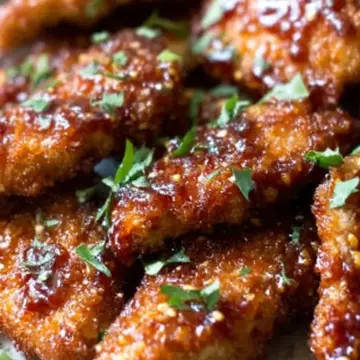
Combine chicken and sauce for the final touch
Once your chicken is fully baked, it’s time for the grand finale! Heat a large skillet over medium heat and add in half of your baked chicken tenders along with half of the sauce. Toss gently and cook for about 30 seconds to a minute, allowing the sauce to cling to the chicken and create that sticky finish you’re after. Repeat with the remaining chicken and sauce. Just a tip: keep the heat manageable to avoid drying out the sauce!
There you have it—your sticky honey garlic chicken tenders are ready! Serve them up with a side of crunchy veggies or a fresh salad for the perfect meal. Enjoy!

Variations on Sticky Honey Garlic Chicken Tenders
Baking vs. Frying the Chicken
When it comes to cooking your sticky honey garlic chicken tenders, the choice between baking and frying can shape the dish's outcome significantly. Baking at 425°F yields a healthier alternative, allowing the chicken to become tender while maintaining a delicious crisp with minimal oil. On the other hand, frying provides an irresistible crunch—simply heat oil to 375°F and fry for 3-5 minutes per side for that golden perfection. If you're curious about frying techniques, check out this detailed guide on fried chicken tenders.
Adding Spice with a Twist
For those who love a kick, consider adding some heat! Enhance your sticky honey garlic chicken tenders by mixing in cayenne pepper or crushed red pepper flakes into the sauce for a spicier profile. Alternatively, you can stir in some Sriracha for a fiery zing or even experiment with a touch of smoked paprika for a unique flavor boost. Personalizing the heat level not only complements the sweetness of the honey but also elevates the overall dish, leaving your taste buds buzzing with excitement!
Cooking tips and notes for Sticky Honey Garlic Chicken Tenders
How to keep your tenders crispy
To ensure your sticky honey garlic chicken tenders maintain that delightful crunch, consider a few key steps:
- Proper dredging: Make sure to evenly coat your chicken strips in flour, egg, and panko bread crumbs. This three-step process is essential for a crispy outer layer.
- Correct baking temperature: Bake at a high temperature (425°F) for quick cooking, which helps to lock in moisture while creating that crispy texture.
- Avoid overcrowding: Give the chicken tenders enough space on the baking sheet to allow hot air to circulate freely, which helps them crisp up nicely.
Substitutes for common allergens
If you're navigating allergies, here are some convenient swaps:
- Gluten-sensitive: Use gluten-free panko or breadcrumbs and cornstarch instead of flour.
- Soy-free: Substitute soy sauce with coconut aminos for a similar flavor without the soy.
- Egg-free: Instead of egg for dredging, try a mixture of water and flaxseed meal or silken tofu as a binding agent.
These swaps make it easy for everyone to enjoy your delicious sticky honey garlic chicken tenders!
Serving suggestions for Sticky Honey Garlic Chicken Tenders
Pairing with sides that complement the dish
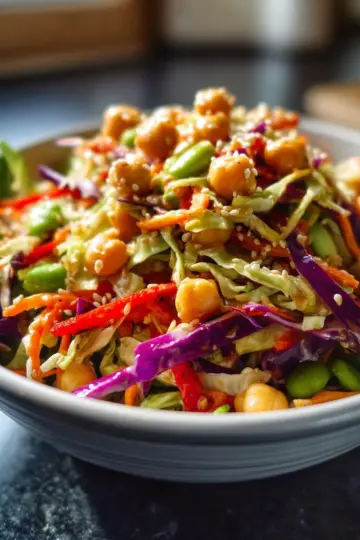
To make your sticky honey garlic chicken tenders a complete meal, consider pairing them with vibrant sides. Freshly steamed broccoli or sautéed green beans add a delightful crunch. For a more hearty option, fluffy jasmine rice or a creamy potato salad can balance the dish’s sweetness. If you're feeling adventurous, whip up a quick coleslaw to introduce a refreshing tang. You might also enjoy a side of roasted sweet potatoes for some added flavor.
Creative serving ideas
Presentation makes all the difference! Serve your sticky honey garlic chicken tenders on a wooden board for a rustic vibe, or arrange them in a vibrant bowl atop a bed of greens. Drizzle extra sauce over the top for a glossy finish, and garnish with sesame seeds or chopped green onions for a pop of color. For a fun twist, create skewers by threading the tenders with colorful bell peppers and onions. Don’t forget to provide toothpicks for those bite-sized morsels—perfect for a gathering!
Time Breakdown for Sticky Honey Garlic Chicken Tenders
Preparation Time
Getting ready to make these sticky honey garlic chicken tenders will take about 15 minutes. This includes slicing the chicken, preparing your breading stations, and gathering all the ingredients. Feel free to put on some music—cooking should be fun!
Cooking Time
Once you're prepped, baking your tenders will take around 25 minutes. You'll spend about 15 minutes in the oven before giving them a gentle flip and letting them crisp up for an additional 5-10 minutes. Trust us, the aroma that fills your kitchen will be totally worth it!
Total Time
All in all, you'll be looking at approximately 40 minutes from start to finish. Perfect for a weeknight dinner or a casual gathering with friends. Pair them with a fresh salad or some rice, and you've got a fantastic meal in no time! For authentic meal inspiration, check out this guide on easy chicken recipes.
Nutritional facts for Sticky Honey Garlic Chicken Tenders
When whipping up a batch of sticky honey garlic chicken tenders, you might be curious about their nutritional value. Here's a quick overview:
Calories
Each serving contains approximately 537 calories, making it a satisfying choice for a meal without compromising on taste.
Protein
With around 54 grams of protein per serving, this dish is an excellent source of lean protein, perfect for muscle repair and overall health.
Sugar Content
The tenders have a sugar content of 43 grams, primarily from honey and ketchup, which adds that delicious sweetness we all love.
For more tips on balancing flavors and nutrition in your meals, consider exploring the Nutritional Guidelines from the USDA. Enjoy cooking!
FAQ about Sticky Honey Garlic Chicken Tenders
Can I use chicken thighs instead of breasts?
Absolutely! While the recipe calls for boneless, skinless chicken breasts, chicken thighs are a fantastic alternative. They tend to be juicier and more flavorful, making your sticky honey garlic chicken tenders even more delicious. Just keep an eye on the cooking time, as thighs might slightly differ from breasts.
How do I store leftovers?
Leftover sticky honey garlic chicken tenders can be stored easily. Place them in an airtight container in your refrigerator, where they’ll stay fresh for up to 3 days. For longer storage, consider freezing them. Just ensure they’re well-packed to avoid freezer burn. When ready to enjoy again, simply reheat in the oven for a few minutes to regain some crispiness.
What can I substitute for honey?
If you’re looking for alternatives to honey, maple syrup works wonderfully for a similar sweetness. Agave nectar or brown sugar mixed with a bit of water can also do the trick. Just remember to adjust the quantity to taste, as these substitutes can vary in sweetness!
For more tips and ingredient swaps, check out this helpful guide on ingredient substitutions.
Conclusion on Sticky Honey Garlic Chicken Tenders
In conclusion, these sticky honey garlic chicken tenders are a delightful mix of sweet and savory flavors that will elevate your weeknight dinner game. Perfectly crispy, easy to prepare, and irresistibly delicious, they’re a crowd-pleaser. Try making this dish and watch it become a family favorite!
For more ideas on chicken recipes, check out resources from The Kitchn or explore cooking tips on Serious Eats. Enjoy!
Sticky Honey Garlic Chicken Tenders
Equipment
- Baking Sheet Pan
Ingredients
for the chicken strips
- 2 pounds boneless skinless chicken breast or chicken tenderloins
- 1 cup panko bread crumbs or regular bread crumbs
- 2 units eggs
- ¾ cup all-purpose flour or more if needed
- 1 teaspoon kosher salt
- fresh cracked black pepper to taste
- optional additional seasonings additional salt & pepper, crushed or minced garlic, garlic powder, smoked paprika, etc.
for the sweet and sticky honey soy sauce
- ½ cup ketchup
- ½ cup honey
- ¼ cup soy sauce or fish sauce
- 1 Tablespoon chili garlic sauce or any hot sauce (optional)
- 2 Tablespoons fresh lime juice or rice vinegar
- 1 teaspoon cornstarch
Instructions
Preparation
- Pre-heat oven to 425°F (220°C). Prepare 1-2 baking sheets lined with parchment paper.
- If using chicken breasts, cut into thin strips. Make sure the strips are consistently sized for even baking.
- In a bowl, add panko or breadcrumbs. In another bowl, beat the eggs. In a third bowl combine flour, teaspoon of salt, and black pepper.
- Dredge each strip of chicken in flour, then egg, then Panko or breadcrumbs. Lay coated chicken strips on sheet pan. Repeat for all chicken strips.
- Bake chicken strips at 425°F (220°C) for about 15 minutes. Flip the chicken strips to the other side up.
- Continue to bake for another 5-10 minutes or until crisp and cooked through.
Sauce Preparation
- While the chicken is baking, make the sauce. In a bowl, whisk together all the sauce ingredients: ketchup, honey, soy sauce (or fish sauce), chili garlic sauce, fresh lime juice or rice vinegar, and cornstarch.
- Heat a large skillet over medium heat. Add half of the chicken strips and half of the sauce. Toss to coat and cook for about 30 seconds to 1 minute on each side until the strips soak up the sauce.
- Repeat with remaining sauce and chicken strips. Don't let the pan get too hot.


Leave a Reply