
Introduction to Depression Era Peanut Butter Bread
Creating comfort food has always played a vital role in bringing people together, especially during tough times. The Depression Era Peanut Butter Bread was born out of necessity during the economic turmoil of the 1930s when resources were scarce, and families had to get creative with their meals. This humble bread relies on pantry staples, making it both budget-friendly and practical.
The beauty of this bread lies in its simplicity. With basic ingredients like flour, sugar, and of course, creamy peanut butter, it became a staple for many households. Peanut butter not only adds a rich flavor but is also a great source of protein, making this bread both satisfying and nutritious. You could say it’s a tasty testament to the resilience of those who lived through the era.
In fact, the original recipe can be traced back to cookbooks like the beloved Five Roses Cookbook, cherished for its practical and economical recipes. As we revisit this classic, it’s a great reminder of how food makes history a little sweeter. So let’s dive into the details of making your very own Depression Era Peanut Butter Bread and enjoy a slice of nostalgia!
Ingredients for Depression Era Peanut Butter Bread
List of Pantry Staples Needed
Making Depression Era Peanut Butter Bread is easy with just a few basic pantry staples. Here’s what you’ll need:
- 2 cups all-purpose flour: This forms the base of the bread.
- ¼ cup granulated sugar: Adds a touch of sweetness to balance the peanut butter.
- 4 teaspoons baking powder: The leavening agent that gives the bread its lift.
- ½ teaspoon fine grain salt: Enhances the flavors.
- 1 ½ cups creamy peanut butter: The star of the show—choose your favorite brand!
- ¼ cup wildflower honey: A natural sweetener that pairs wonderfully with peanut butter.
- 1 ⅓ cups milk: Fresh or evaporated, depending on what you have on hand.
Overview of Ingredient Substitutes
Don’t worry if you run short on ingredients. For depression era peanut butter bread, consider these handy substitutes:
- Flour: Whole wheat flour can be used for a nuttier flavor and added nutrition.
- Sugar: Honey can replace granulated sugar if you're looking for a more natural choice.
- Baking Powder: If you're out, a mixture of baking soda and vinegar can work.
- Milk: Canned evaporated milk is a great alternative; just avoid sweetened condensed milk, as it’s too sweet.
These options ensure you can bake this comforting bread no matter your kitchen stock! For more creative substitutions, feel free to check out Serious Eats.
Step-by-step preparation of Depression Era Peanut Butter Bread
Making Depression Era Peanut Butter Bread is not just about whipping together ingredients—it's a journey back to a time when meals were crafted with care and resourcefulness. Let’s delve into each step!
Gather your ingredients
Before you get started, take a moment to gather the essential ingredients that will bring this bread to life. You’ll need:
- 2 cups all-purpose flour
- ¼ cup granulated sugar
- 4 teaspoons baking powder
- ½ teaspoon fine grain salt
- 1 ½ cups creamy peanut butter (JIF works beautifully)
- ¼ cup wildflower honey
- 1 ⅓ cups milk (2% milk is ideal)
Using pantry staples not only makes this bread approachable but also means you can whip it up anytime!
Mix the dry ingredients together
In a large mixing bowl, combine the flour, sugar, baking powder, and salt. Whisk these together until they are fully blended. This step ensures that your leavening agent (the baking powder) is evenly distributed throughout the flour mixture. If you’re into precision, a fine mesh sieve can help you sift these ingredients together for a lighter texture.
Combine peanut butter and honey
In a separate bowl, take your creamy peanut butter and mix it with wildflower honey. It’s satisfying to see them transform as they blend—this mixture adds a delightful sweetness and richness to your bread. Use a spatula or wooden spoon to thoroughly combine them. You want a smooth, even consistency that invites whatever bread toppings you have on hand.
Blend everything into the batter
Once you have your peanut butter and honey mixture ready, it’s time to bring in the dry ingredients and the milk. Pour the peanut butter mixture and milk into the bowl with the dry ingredients. Using an electric mixer on low speed, mix until just combined. Be cautious not to over-mix; a few flour streaks are okay! This is a hearty bread that’s meant to be forgiving, so even if it looks textured, it’ll bake beautifully.
Prepare the loaf pan and bake
Grease your 9x5 inch loaf pan—this is crucial for preventing sticking. You can use flour-based baking spray, which I personally find effective in a nonstick pan. Scrape your batter into the prepared pan, smooth the top with a spatula, and pop it in the preheated oven at 325°F. Bake it for about an hour, checking with a toothpick to ensure it’s done. The aroma wafting through your kitchen will be irresistible!
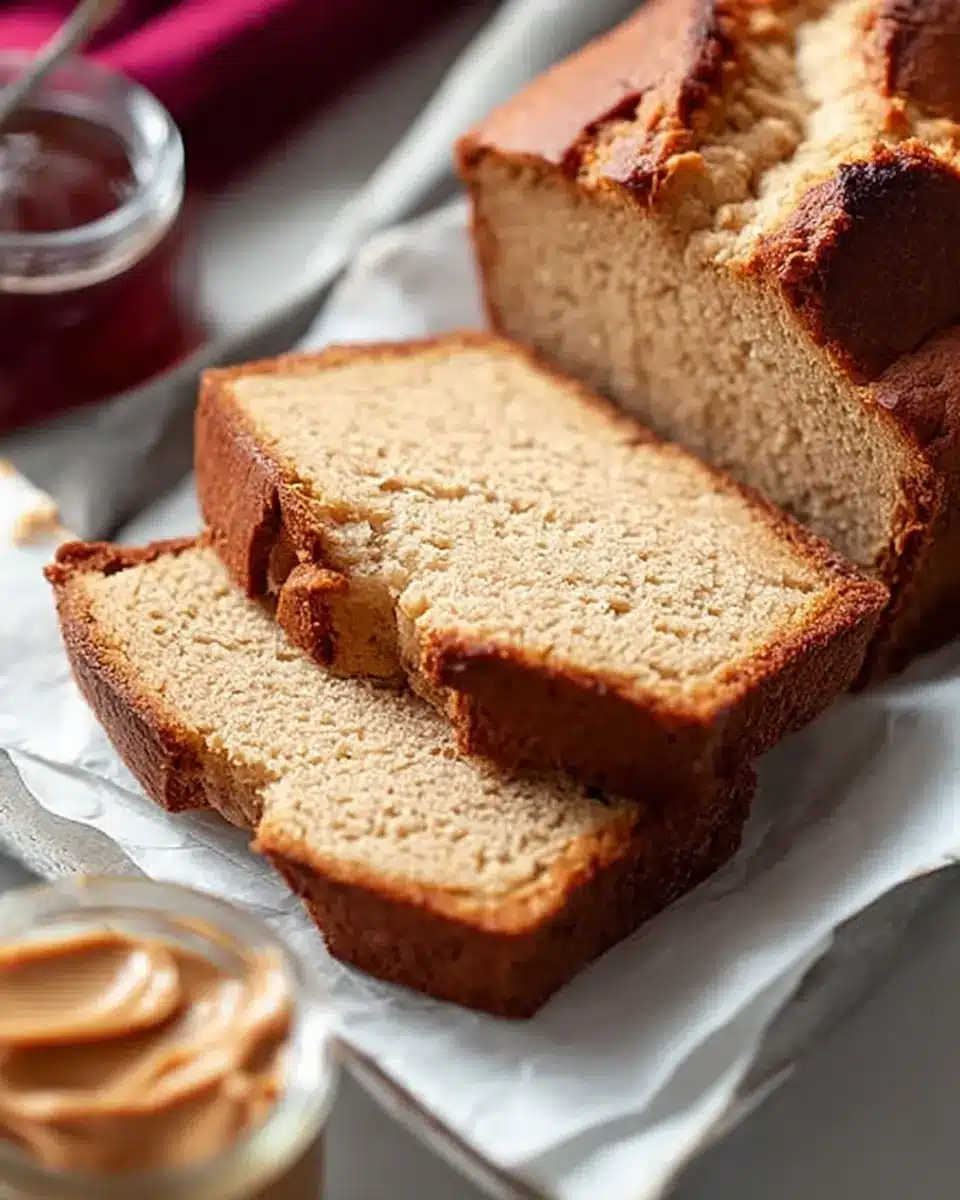
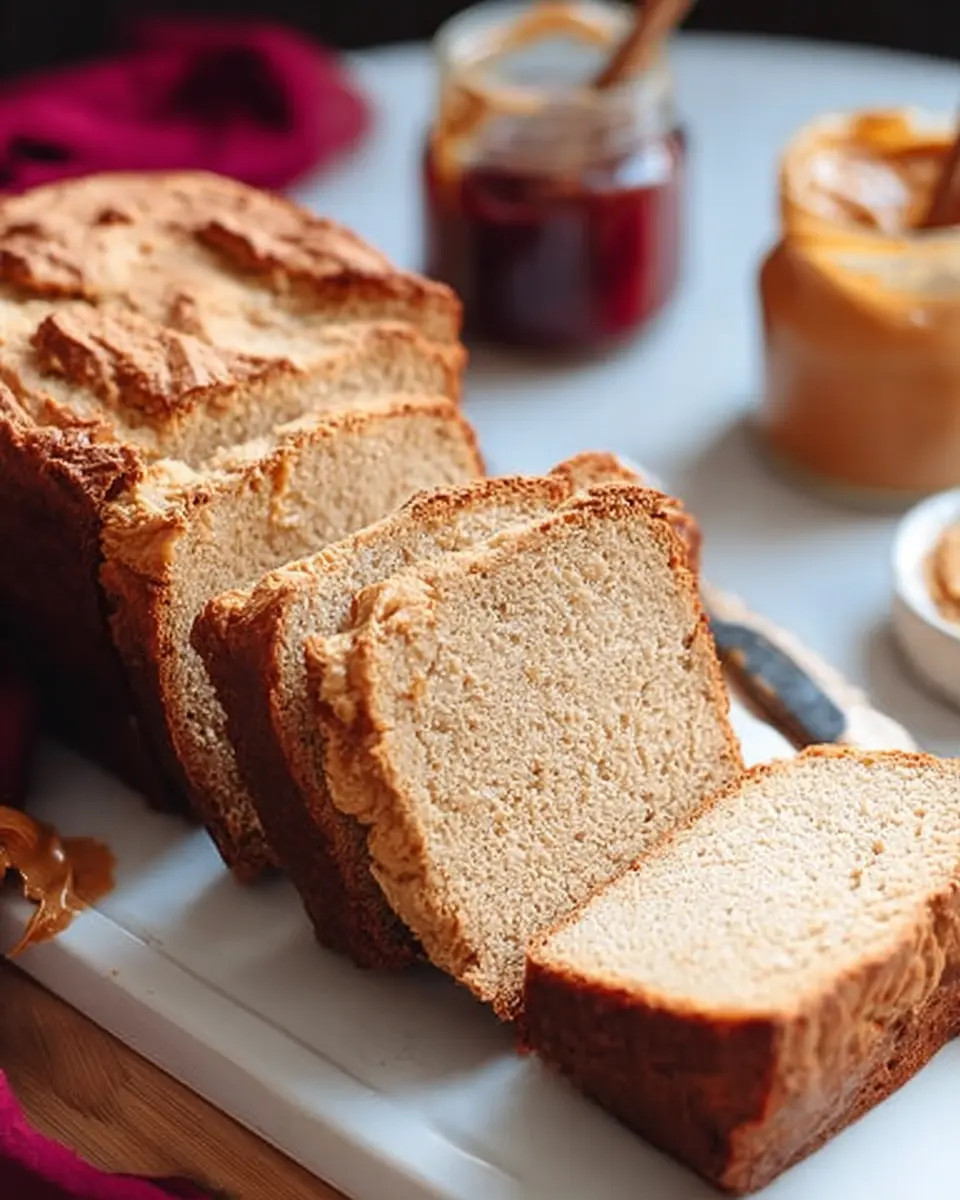
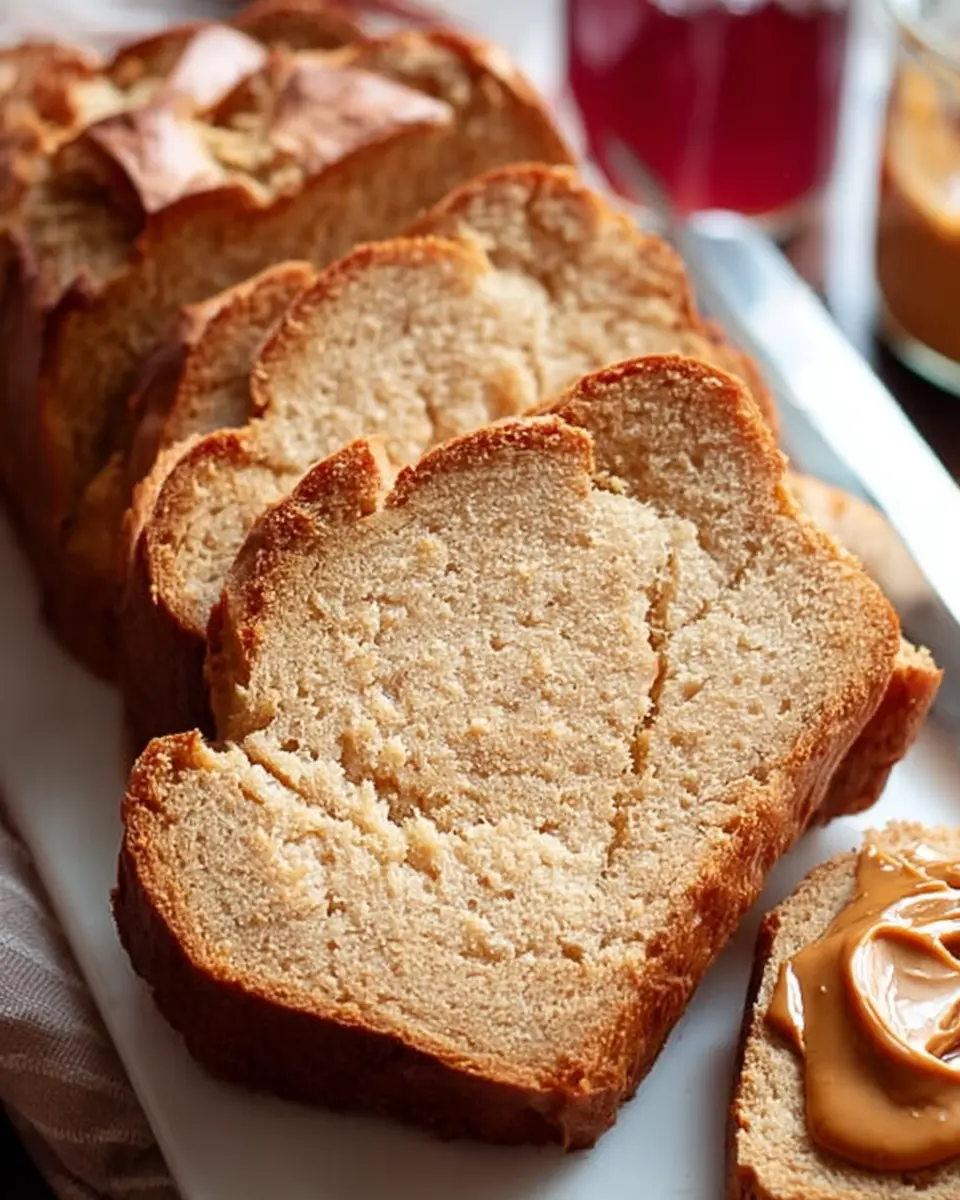
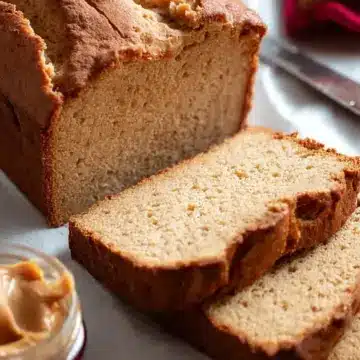
Cool and slice the bread
Once the baking time is completed, let the bread cool in the pan for about five minutes. After that, transfer it to a wire rack to cool completely. Slice it with a serrated knife and serve warm with any spread that tickles your fancy—think butter, Nutella, or even a dash of more honey!
Enjoying your homemade Depression Era Peanut Butter Bread isn’t just nourishing; it’s a way to connect with a wonderful history of resourceful cooking!
Variations on Depression Era Peanut Butter Bread
Add-ins and Mix-ins
Elevate your depression era peanut butter bread by exploring tasty add-ins! Consider tossing in:
- Chopped nuts: Walnuts or pecans for a crunchy texture.
- Chocolate chips: For a sweet twist, mix in semi-sweet or dark chocolate chips.
- Cinnamon: A teaspoon of ground cinnamon can add warmth and depth to the flavor.
- Dried fruits: Raisins or cranberries introduce a hint of tartness.
Feel free to get creative—your taste buds deserve it!
Alternative Sweeteners to Try
If you're curious about alternatives, swap the traditional sweeteners with options like:
- Maple syrup: Adds a unique flavor profile.
- Coconut sugar: A lower glycemic option with a caramel-like taste.
- Stevia: For a no-calorie sweetening option, just adjust to taste.
Experimenting keeps things interesting and can make your depression era peanut butter bread healthier too!
Cooking Tips and Notes for Depression Era Peanut Butter Bread
Baking Tips for Even Results
To achieve a beautifully baked depression era peanut butter bread, start by ensuring your oven is fully preheated to 325°F. This ensures that your bread rises evenly. Consider rotating your loaf pan halfway through baking, especially if your oven has hot spots. If your bread is browning too quickly, tent it with a piece of aluminum foil to keep it from overcooking. Remember, every oven behaves differently, so keep a close eye on your loaf in the final baking minutes.
Storing Your Bread for Freshness
Once you've enjoyed warm slices straight from the oven, you'll want to keep your depression era peanut butter bread fresh for later. Allow the bread to cool completely before storing. Wrap it in plastic wrap or aluminum foil and place it in an airtight container to maintain its moisture. It can last up to a week at room temperature, or if you’re looking to extend its shelf life, slice and freeze portions for up to three months. Just toast or pop them in the microwave when you're ready to enjoy!
Serving suggestions for Depression Era Peanut Butter Bread
Tasty toppings to enhance your bread
To elevate your Depression Era Peanut Butter Bread, consider spreading a generous layer of creamy butter or rich Nutella for a delightful treat. You can also explore various jams or jellies; strawberry and grape are classic choices that create a comforting contrast to the nutty flavor. For an extra touch of sweetness, drizzle honey over the top or add a sprinkle of cinnamon sugar.
Pairing ideas for breakfast or snacks
This versatile bread shines at breakfast or as a snack. Serve slices alongside Greek yogurt and fresh fruit for a nutritious start to your day. Alternatively, enjoy it with turkey bacon or chicken ham for a heartier option. If you’re looking for something simple, enjoy a slice with a hot cup of coffee or herbal tea for a cozy afternoon pick-me-up. Want to add some crunch? Pair it with a handful of nuts or a granola bar for the ultimate energy boost.
By incorporating these tasty toppings and pairings, you can transform your Depression Era Peanut Butter Bread into a delightful meal for any occasion!
Time Breakdown for Depression Era Peanut Butter Bread
Preparation Time
Get started on your Depression Era Peanut Butter Bread by setting aside 10 minutes for preparation. This involves gathering your ingredients, mixing the dry components, and combining them with the sweet peanut butter and honey mixture.
Baking Time
Once your loaf is in the oven, you’ll need to wait for 1 hour and 15 minutes while it bakes to golden perfection. Don’t forget to keep an eye on it—your kitchen will smell divine as it bakes!
Total Time
In total, you're looking at about 1 hour and 25 minutes from start to finish, including both prep and bake time. This recipe is perfect for a low-pressure baking day when you crave something warm and comforting, made from pantry staples.
Feel free to enjoy your freshly baked bread warm or let it cool completely for delightful snacks. Want to dive deeper into peanut butter’s history? Check out this NPR article on the origins of peanut butter. Happy baking!
Nutritional Facts for Depression Era Peanut Butter Bread
Calories
Each slice of this depression era peanut butter bread contains approximately 220 calories, making it a satisfying snack or breakfast option that won't leave you feeling overly stuffed.
Protein
With around 8 grams of protein per slice, this bread is a great way to boost your protein intake while enjoying a classic comfort food that echoes the resourcefulness of the past.
Carbohydrates
This delightful loaf provides about 31 grams of carbohydrates per slice, predominantly from all-purpose flour and natural sugars, ensuring a quick energy source for your day ahead.
Looking to dig deeper into nutrition? For a more comprehensive look at the nutritional benefits of peanut butter, check out The Peanut Institute, which provides valuable insights into how this nut contributes to a balanced diet.
FAQ about Depression Era Peanut Butter Bread
How do I ensure my bread is fluffy?
For fluffy depression era peanut butter bread, make sure to not over-mix the batter. Combine the wet and dry ingredients just until they’re incorporated. Over-mixing can create dense bread. Additionally, ensure your baking powder is fresh, as stale leavening agents can affect the bread's rise.
Can I make this bread gluten-free?
Absolutely! Substituting all-purpose flour with a gluten-free flour blend is a great option. Look for blends that contain xanthan gum, which helps provide the needed structure in gluten-free baking. Many users have successfully made this adaptation, so feel free to experiment and let the dough guide you!
How long does this bread last?
When stored properly in an airtight container, your depression era peanut butter bread will stay fresh for about 3-4 days at room temperature. For longer storage, consider wrapping it tightly and freezing it. Thawing it in the fridge overnight will yield the best results.
For more tips on recipe variations and storage, check out the King Arthur Baking Company for additional insights!
Conclusion on Depression Era Peanut Butter Bread
In wrapping up this delightful journey through depression era peanut butter bread, it's clear this recipe delivers comfort and simplicity. Perfect for busy weeknights or leisurely weekends, it’s versatile enough to enjoy plain or with your favorite toppings. So, grab those pantry staples and whip up a loaf that harks back to a simpler time, while bringing warmth to your table. Happy baking!
Depression Era Peanut Butter Bread
Equipment
- 9×5-inch loaf pan
Ingredients
- 2 cups all-purpose flour
- ¼ cup granulated sugar
- 4 teaspoons baking powder
- ½ teaspoon fine grain salt
- 1 ½ cups creamy peanut butter tested with shelf-stable JIF
- ¼ cup wildflower honey
- 1 ⅓ cups milk tested with 2%
Instructions
- Preheat oven to 325° F.
- Combine the flour, sugar, baking powder and salt in a large mixing bowl. Whisk to combine.
- In a separate bowl, stir together the peanut butter and honey. Add the peanut butter mixture to the dry ingredients along with the milk. Mix using an electric mixer on low speed until just combined. Scrape down the bowl and fold the batter to make sure no streaks of flour remain.
- Grease a 9×5-inch loaf pan. Scrape the batter into the prepared pan and smooth the top. Bake for 1 hour, or until a toothpick tester inserted near the center of the loaf comes out clean.
- Let bread cool 5 minutes in the pan, then turn out onto a wire rack to cool further. Slice using a serrated knife. Serve slices warm smeared with butter, Nutella, peanut butter, cream cheese – your choice!


Leave a Reply