
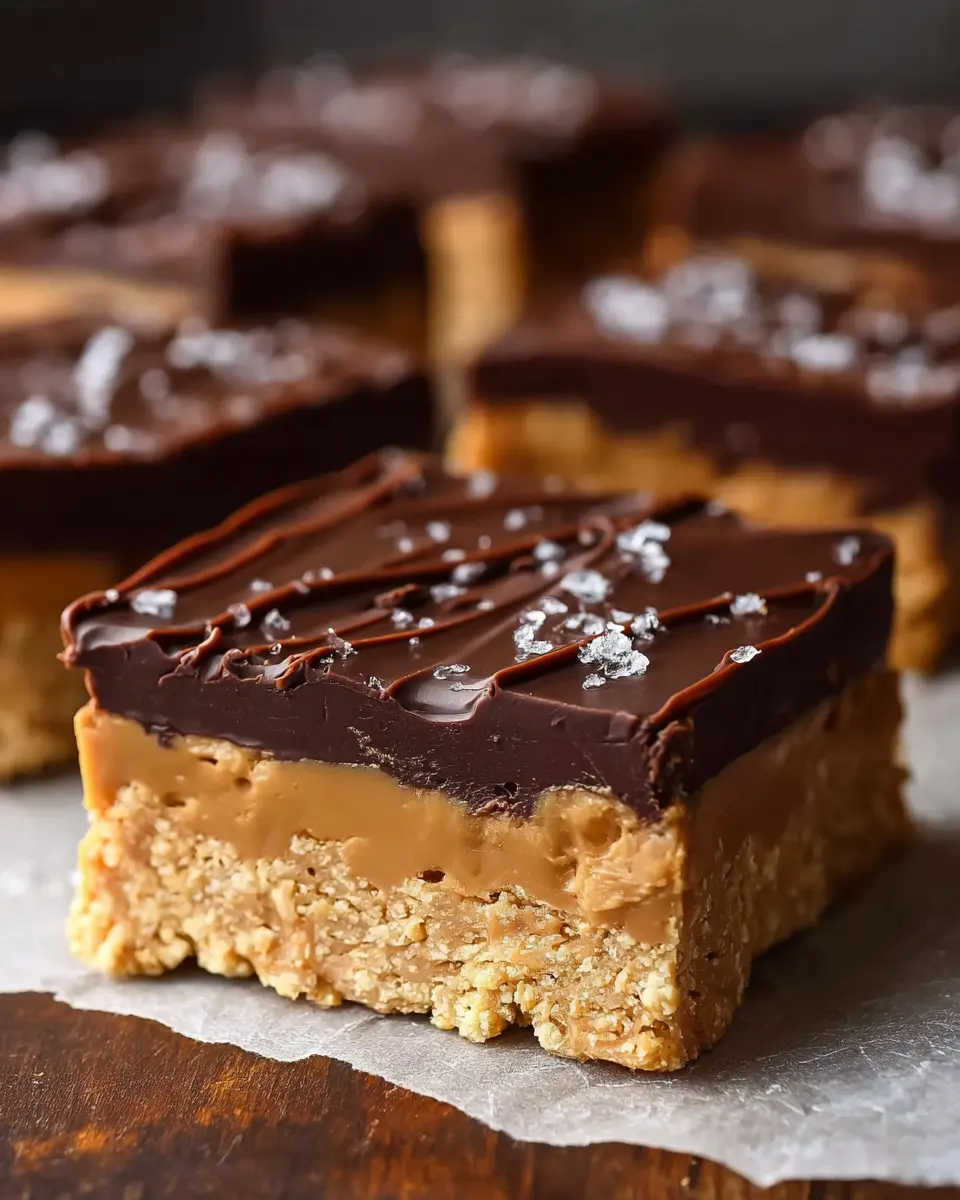
Introduction to Easy No Bake Peanut Butter Bars
If you’re a young professional juggling a busy schedule, you know that meal prep and snacks can quickly become overwhelming. That’s where easy no bake peanut butter bars come into play! These simple bars deliver a delightful combination of creamy peanut butter, hearty oats, and sweet chocolate chips, making them an enticing treat without the need for an oven.
Why No Bake Recipes are a Game Changer for Young Professionals
No bake recipes like these peanut butter bars are particularly beneficial for those of us with packed schedules. First, they save you precious time—who wants to waste time preheating the oven when you could whip up a delicious snack in just 15 minutes? Plus, they require minimal equipment, making cleanup a breeze.
In fact, a study published by the Journal of Nutrition Education and Behavior found that easy-to-make recipes encourage healthy eating habits among busy individuals. When your snacks are quick and satisfying, you’re less likely to reach for less nutritious options!
These easy no bake peanut butter bars can provide a much-needed energy boost for your workday or evening workouts. So, why not treat yourself? Enjoy a homemade snack that’s ready to eat in just a couple of hours. Plus, they’re perfect for meal prep—make a batch to keep you fueled throughout the week!

Ingredients for Easy No Bake Peanut Butter Bars
Making easy no bake peanut butter bars is not only simple but also incredibly rewarding, especially when you see (and taste) the final result. Here’s a rundown of what you’ll need to whip up these delightful treats.
Key Ingredients You'll Need
- 1 cup peanut butter: You can choose either smooth or crunchy, depending on your texture preference.
- ½ cup honey: This natural sweetener adds not just sweetness but also a lovely chewy texture.
- 1 cup rolled oats: These provide that satisfying bite and fiber.
- ½ cup chocolate chips: Go for semi-sweet or dark, which adds a rich flavor contrast.
- ½ teaspoon vanilla extract: Just a hint of this enhances the overall taste beautifully.
Optional Add-Ins for Extra Flavor
Feel free to get creative! Here are a few tasty options:
- Chopped nuts (almonds, walnuts): For added crunch and healthy fats.
- Dried fruit (raisins, cranberries): A sweet burst that complements the peanut butter.
- Seeds (chia, sunflower): Boost the nutritional profile and add texture.
- Cocoa powder: For a chocolatey twist, add a tablespoon or two.
These ingredients make it easy to customize based on what you have in your pantry or your flavor preferences! For more flavor ideas, check out this comprehensive guide on flavor pairings. Happy snacking!
Preparing Easy No Bake Peanut Butter Bars
Making delicious easy no bake peanut butter bars at home is simpler than you might think! With just a few ingredients and a little bit of time, you'll have a sweet treat ready to enjoy. Let’s dive into the easy process.
Step 1: Gather Your Ingredients
Before you start whipping up these delightful bars, make sure you have all your ingredients on hand. You’ll need:
- 1 cup peanut butter (smooth or crunchy, depending on your preference)
- ½ cup honey
- 1 cup rolled oats
- ½ cup chocolate chips
- ½ teaspoon vanilla extract
Getting everything together before you begin is key to a smooth preparation. Don’t miss this step! You can check out resources like Healthline for the nutritional benefits of these ingredients.
Step 2: Mix Peanut Butter and Honey
In a large mixing bowl, combine the peanut butter and honey. Stir well until they form a nice, creamy mixture. It’s essential to blend these two together thoroughly, as it creates the base for your bars and unlocks that smooth texture. You may want to use a spatula or a sturdy spoon—just make sure there are no lumps!
Step 3: Fold in Oats and Vanilla
Now it’s time to bring in the rolled oats! Gently fold them into the peanut butter-honey mix along with the vanilla extract. The oats add that lovely chewy texture and make these bars filling. When folding, be careful not to over-mix; you want the oats to remain intact so you get the best bite out of every piece.
Step 4: Add Chocolate Chips
Next up, stir in those irresistible chocolate chips. This is where things get really fun! The chocolate adds a sweet surprise that perfectly complements the nutty flavor of the peanut butter. Make sure they are evenly distributed, but again, handle with care to keep the bars nice and chunky.
Step 5: Transfer Mixture to Pan
Now that your mixture is ready, transfer it to a greased 9x9 inch pan. If you want super easy removal later, consider lining the pan with parchment paper. Using a spatula, press the mixture down firmly into an even layer. This pressing step is crucial to ensure your bars hold together nicely.
Step 6: Refrigerate to Firm Up
Finally, it's time for the most challenging part—patience! Place your pan in the refrigerator for at least two hours. This step allows the bars to firm up, making them easier to cut into squares later. If you’re thinking about meal prep, these easy no bake peanut butter bars are perfect for grabbing on the go!
Once set, cut them into squares and get ready to enjoy! Remember, these can last up to a week in the fridge or can be frozen for up to three months. Just a quick reheating in the microwave (10-15 seconds) can make them just as delicious. Enjoy your homemade treat!

Variations on Easy No Bake Peanut Butter Bars
Nut-Free Version with Sunflower Seed Butter
If you're looking for a nut-free option without sacrificing flavor, try using sunflower seed butter in your easy no bake peanut butter bars. It has a similar creamy texture and works beautifully with the other ingredients. Just swap out the peanut butter for an equal amount of sunflower seed butter, and you're good to go! This variation is not only safe for those with nut allergies, but it also imparts a delightful taste that's sure to please everyone.
Vegan Option Using Maple Syrup
Want to go plant-based? Simply substitute honey with maple syrup to create a deliciously vegan version of these bars. Maple syrup adds a hint of natural sweetness while keeping the bars moist and chewy. Combine it with your favorite nut or seed butter, and follow the original recipe. The result will be just as satisfying and perfect for a guilt-free snack! For more vegan-friendly recipes, check out Minimalist Baker.
Cooking Tips and Notes for Easy No Bake Peanut Butter Bars
How to Store for Freshness
To keep your easy no bake peanut butter bars fresh and delicious, store them in an airtight container in the refrigerator. They’ll stay good for up to one week. If you want to save some for later, consider freezing them for about three months. Just pop them in the microwave for 10-15 seconds before enjoying, and they’ll taste as good as new!
Tips to Avoid Crumbly Bars
Crumbly bars can be a real letdown! To ensure your easy no bake peanut butter bars hold together nicely, make sure to press the mixture firmly into the pan. The more you compress it, the better it will set. Additionally, using the right peanut butter consistency is key; creamy options help bind the ingredients better than chunky varieties. Remember, these small adjustments can lead to delicious, satisfying bites every time!
For additional tips on storage and preparation, check out sources like American Peanut Council for insights!
Serving Suggestions for Easy No Bake Peanut Butter Bars
Pairing with Fruits or Yogurt
To elevate your easy no bake peanut butter bars, consider pairing them with fresh fruits or a dollop of yogurt. Slices of banana or strawberries not only add a splash of color but also provide a refreshing contrast to the rich, nutty bars. Greek yogurt is a fantastic choice—it adds creaminess and a protein boost, making your snack even more satisfying.
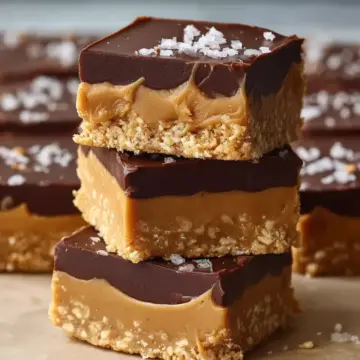
Perfect for Snack Packs or Desserts
These bars are incredibly versatile! They make for an excellent addition to snack packs for a quick on-the-go treat. Cut them into smaller squares, and pack them alongside nuts or dried fruits for a balanced snack. Alternatively, serve them as a dessert topped with a drizzle of honey or a sprinkle of sea salt. With their rich flavor profile, they’re sure to satisfy any sweet tooth without the fuss of baking.
For more delicious snack ideas, check out Mindful Snacking to keep your cravings in check!
Time Breakdown for Easy No Bake Peanut Butter Bars
Preparation Time
Getting started on these easy no bake peanut butter bars takes only about 15 minutes. It’s all about mixing those delicious ingredients together and getting your pan ready. Perfect for those busy weekdays!
Refrigeration Time
Now comes the hard part—waiting! You’ll want to refrigerate your bars for at least 2 hours to ensure they set properly. This is the ideal time to catch up on your favorite show or handle some household chores.
Total Time
In total, from prep to ready-to-eat, you’re looking at around 2 hours and 15 minutes. But don’t worry, most of that time is just letting the bars chill out in the fridge while you get on with your day!
For additional insights into the benefits of quick, no-bake recipes, check out this article on healthy cooking hacks. With minimal effort, you're just minutes away from enjoying a delightful treat!
Nutritional Facts for Easy No Bake Peanut Butter Bars
If you're curious about what makes easy no bake peanut butter bars a delightful snack, here's the nutritional breakdown to keep in mind!
Calories
Each bar contains approximately 180 calories, making it a satisfying yet guilt-free treat that fits well into a balanced diet.
Sugars
With about 9 grams of sugars per bar, these beauties strike a nice balance between sweetness and wholesome ingredients. The natural sweetness from honey keeps them healthy without the sugar overload.
Protein
Loaded with 5 grams of protein from creamy peanut butter, these bars are not only delicious but also hearty enough to keep you fueled throughout your busy day. Perfect for a pre-workout snack or a midday pick-me-up!
By incorporating these easy no bake peanut butter bars into your snacking routine, you're not just indulging your sweet tooth – you're also nourishing your body! For more healthy snacking options, check out sources like Healthline for fresh ideas.
FAQs about Easy No Bake Peanut Butter Bars
Can these bars be frozen?
Absolutely! These easy no bake peanut butter bars can be frozen for up to three months. Just cut them into squares, wrap each piece in plastic wrap, and then store them in an airtight container. When you're ready to enjoy a bar, simply take one out and let it thaw for a few minutes. You'll have a delicious treat ready to go!
What can I substitute for peanut butter?
If you're looking for alternatives to peanut butter due to allergies or taste preferences, consider using almond butter or sunflower seed butter. Both options provide a similar creamy texture and flavor profile. Just remember, using a nut-free alternative like sunflower seed butter is perfect for those who need to avoid nuts entirely.
How long do these bars last in the fridge?
When stored in an airtight container, your easy no bake peanut butter bars will last for about one week in the fridge. They make for an excellent snack or dessert throughout the week, so make sure to grab one when you're in need of a quick energy boost! For more storage tips, check out this handy Food Storage Guide.
Conclusion on Easy No Bake Peanut Butter Bars
In conclusion, these easy no bake peanut butter bars are the ideal sweet treat for anyone on the go. With just a handful of ingredients and minimal prep time, you can whip up a delicious snack that satisfies your cravings. Perfect for sharing, they also store well for later enjoyment!
Easy No Bake Peanut Butter Bars
Equipment
- 9x9 inch pan
- mixing bowl
- Spatula
Ingredients
Main Ingredients
- 1 cup peanut butter smooth or crunchy, your choice!
- ½ cup honey
- 1 cup rolled oats
- ½ cup chocolate chips
- ½ teaspoon vanilla extract
Instructions
Preparation
- Grease a 9x9 inch pan with a little oil or line it with parchment paper for easy removal later.
- In a large mixing bowl, combine the peanut butter and honey. Stir until well blended.
- Gently fold in the rolled oats and the vanilla extract until the oats are evenly coated.
- Add the chocolate chips last, and stir just until evenly distributed throughout the mixture.
- Pour the mixture into the prepared pan. Using a spatula, press the mixture down firmly into an even layer.
- Place the pan in the refrigerator for at least 2 hours to firm up the bars.
- Once set, remove the bars from the pan. Cut them into squares or rectangles, and enjoy!
Leave a Reply