
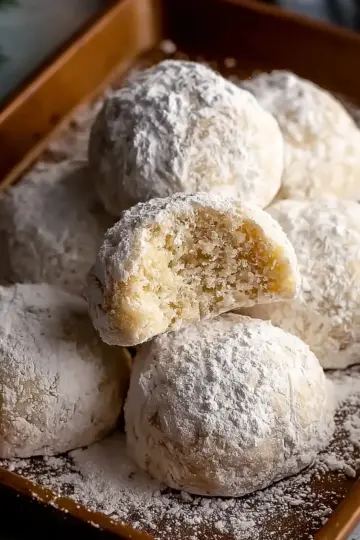
Introduction to No-Bake Apple Cheesecake Jars
Why No-Bake Desserts Are a Game Changer for Young Professionals
For busy young professionals, time is often at a premium. After a long day at work, the thought of whipping up an elaborate dessert can feel overwhelming. That’s where no-bake desserts come to the rescue! They offer the perfect solution for satisfying your sweet tooth without the fuss of preheating the oven, measuring precise baking times, or worrying about perfect soufflé techniques.
Take this no-bake apple cheesecake as an example. Not only does it come together in about 20 minutes, but its elegant presentation in jars makes it ideal for impressing friends or enjoying a personal treat after a hectic day. The best part? You can prepare it in advance and let it chill in the fridge while you reset for the evening.
Diving deeper, no-bake desserts often feature simpler ingredients and short preparation times without sacrificing quality or flavor. Plus, they allow for creativity—swap out the apples for berries or even chocolate to suit your mood. The versatility and ease of these desserts align perfectly with the dynamic lifestyle of modern professionals.
So, are you ready to discover how to create the perfect no-bake apple cheesecake jars? Let’s dive into the recipe!
Ingredients for No-Bake Apple Cheesecake Jars
Creating these delightful no-bake apple cheesecake jars is simple and requires a few essential ingredients. Let’s break them down:
Essential Ingredients for the Crust
To form that delicious crunch at the base of your jars, you’ll need:
- 1 cup graham cracker crumbs: These give the base its iconic flavor.
- 2 tablespoons granulated sugar: Adds just the right amount of sweetness.
- 4 tablespoons unsalted butter, melted: Helps everything bind together and adds richness.
Creamy Cheesecake Filling Components
The heart of this dessert is its smooth cheesecake filling. You’ll need:
- 8 ounces cream cheese, softened: This provides that classic creamy texture.
- 1 cup heavy cream, chilled: Essential for whipping and lightening the filling.
- ½ cup powdered sugar: Sweetens without the graininess of granulated sugar.
- 1 teaspoon vanilla extract: For a little extra depth of flavor.
Flavorful Apple Topping Ingredients
No apple cheesecake is complete without a tasty topping. Here’s what you’ll need:
- 2 medium apples, peeled, cored, and diced: Choose your favorite variety for the best taste.
- 2 tablespoons unsalted butter: Adds richness while cooking the apples.
- 2 tablespoons brown sugar: Brings out a lovely caramel note.
- ½ teaspoon ground cinnamon: Perfect for that warm, spiced aroma.
- 1 teaspoon lemon juice: Brightens the flavor and prevents browning.
These ingredients come together beautifully, making your no-bake apple cheesecake jars an irresistible treat perfect for any occasion! For more delightful dessert ideas, check out The Spruce Eats for inspiration.
Step-by-Step Preparation of No-Bake Apple Cheesecake Jars
Creating your own no-bake apple cheesecake jars at home is not just an enjoyable experience, but also a way to impress your family and friends with little effort. Let's walk through the steps together!
Prepare the crust
Start off by preparing the graham cracker crust that forms the delicious base of your jars. In a mixing bowl, combine 1 cup of graham cracker crumbs, 2 tablespoons of granulated sugar, and 4 tablespoons of melted unsalted butter. This mixture should be wet enough to hold together when pressed. Using your fingers or the back of a spoon, firmly press the mixture into the bottom of each jar or serving glass until it's compact. This stage is crucial, as a solid crust will provide the perfect foundation for the layers that follow. For a fun twist, consider adding some chopped nuts for extra crunch!
Make the cheesecake filling
Next up is the creamy cheesecake filling that defines this delightful dessert. In a large bowl, begin by beating 8 ounces of softened cream cheese until it achieves a smooth, creamy texture. In a separate chilled bowl, whip 1 cup of heavy cream until it forms stiff peaks. This whipped cream is what lends a light and airy feel to your cheesecake. Gently fold the whipped cream into the cream cheese mixture with ½ cup of powdered sugar and 1 teaspoon of vanilla extract. Take your time with this step—mixing too vigorously will deflate that lovely whipped cream you just created!
Prepare the apple topping
Now for the star ingredient—the apple topping that adds warmth and pizzazz to your no-bake apple cheesecake. Heat 2 tablespoons of unsalted butter in a skillet over medium heat. Add 2 medium diced, peeled apples, 2 tablespoons of brown sugar, and ½ teaspoon of ground cinnamon. Stir frequently and allow the mixture to cook for about 5-7 minutes or until the apples become tender yet firm enough to hold their shape. Finish off with 1 teaspoon of lemon juice for a tangy kick. Let this topping cool to room temperature so it doesn’t melt your cheesecake layers.
Assemble the jars
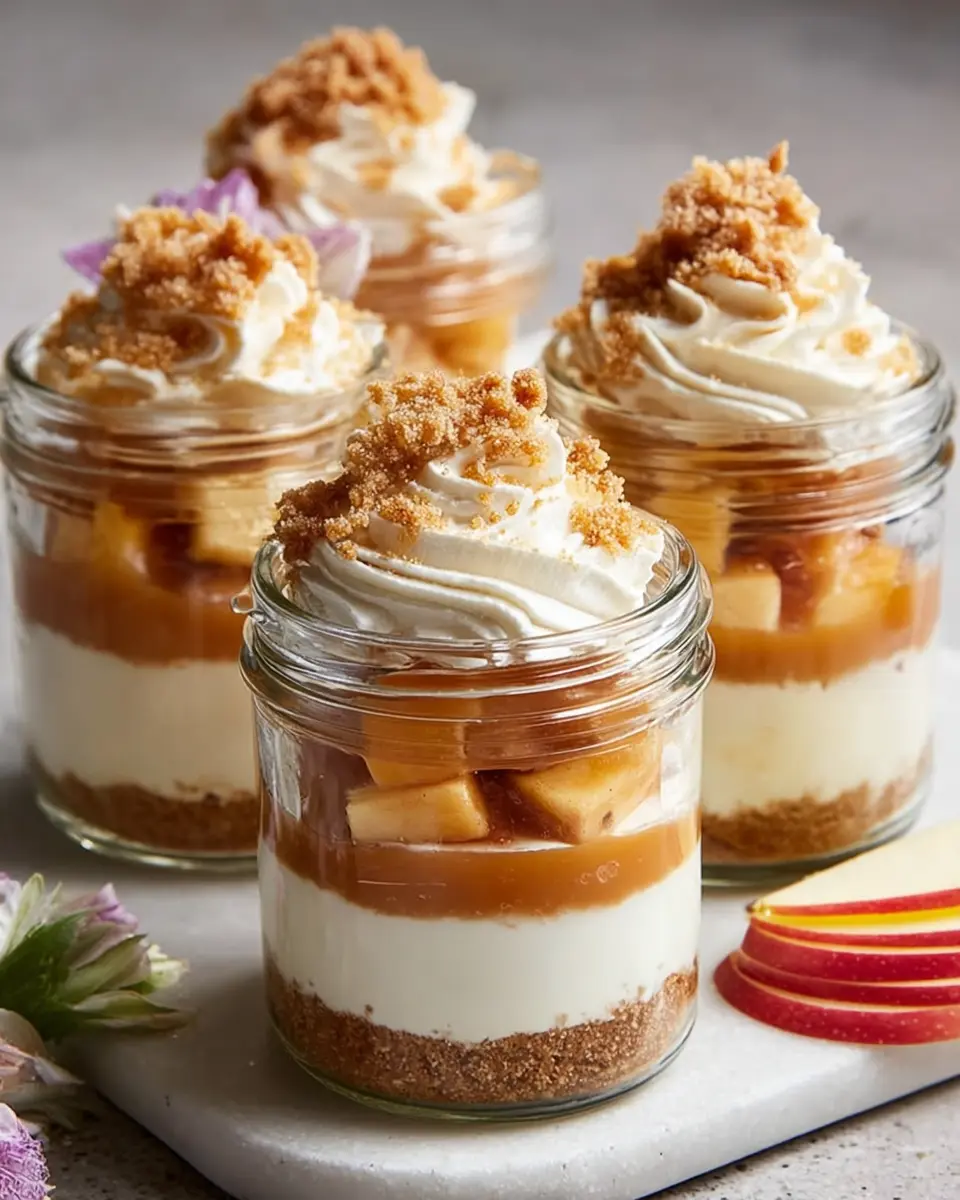
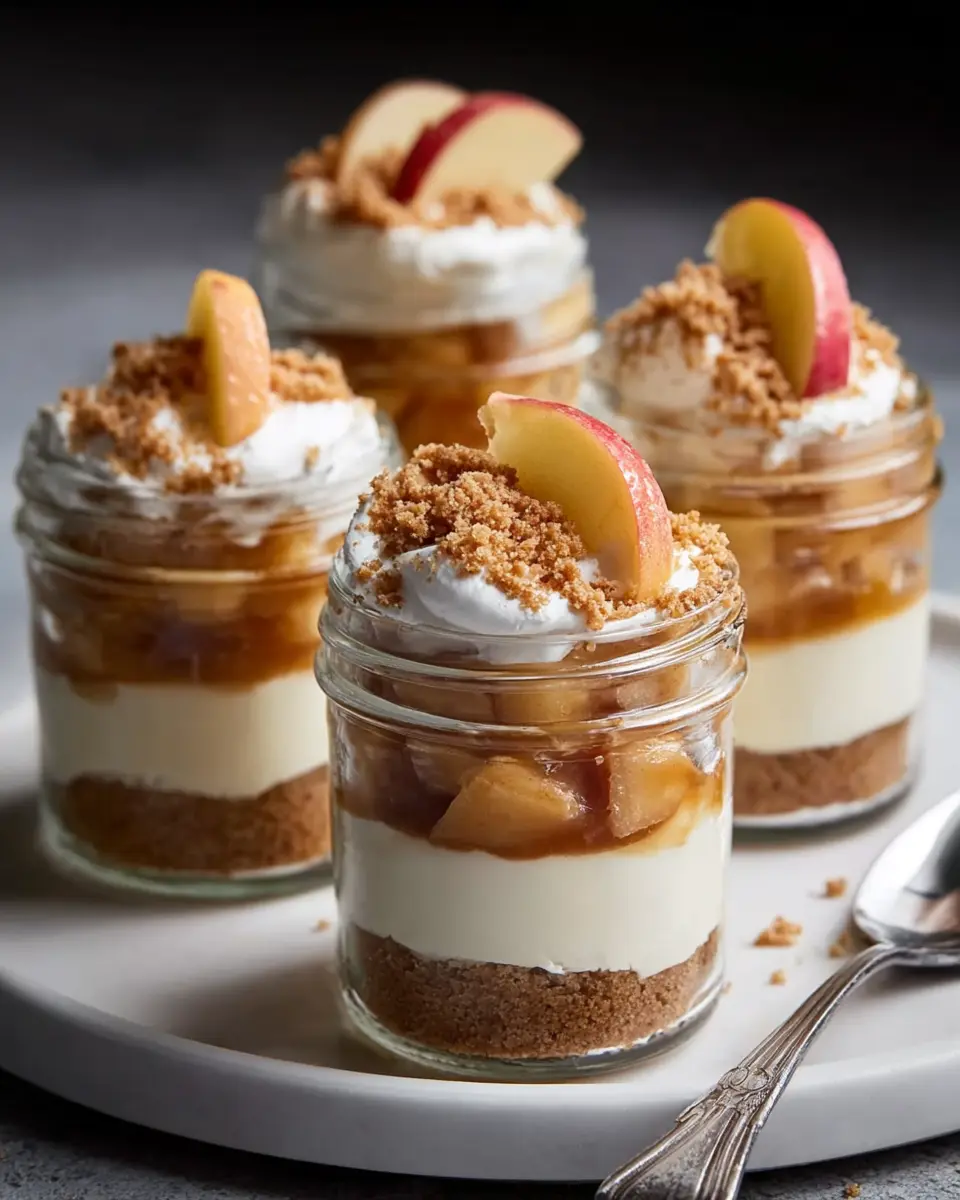
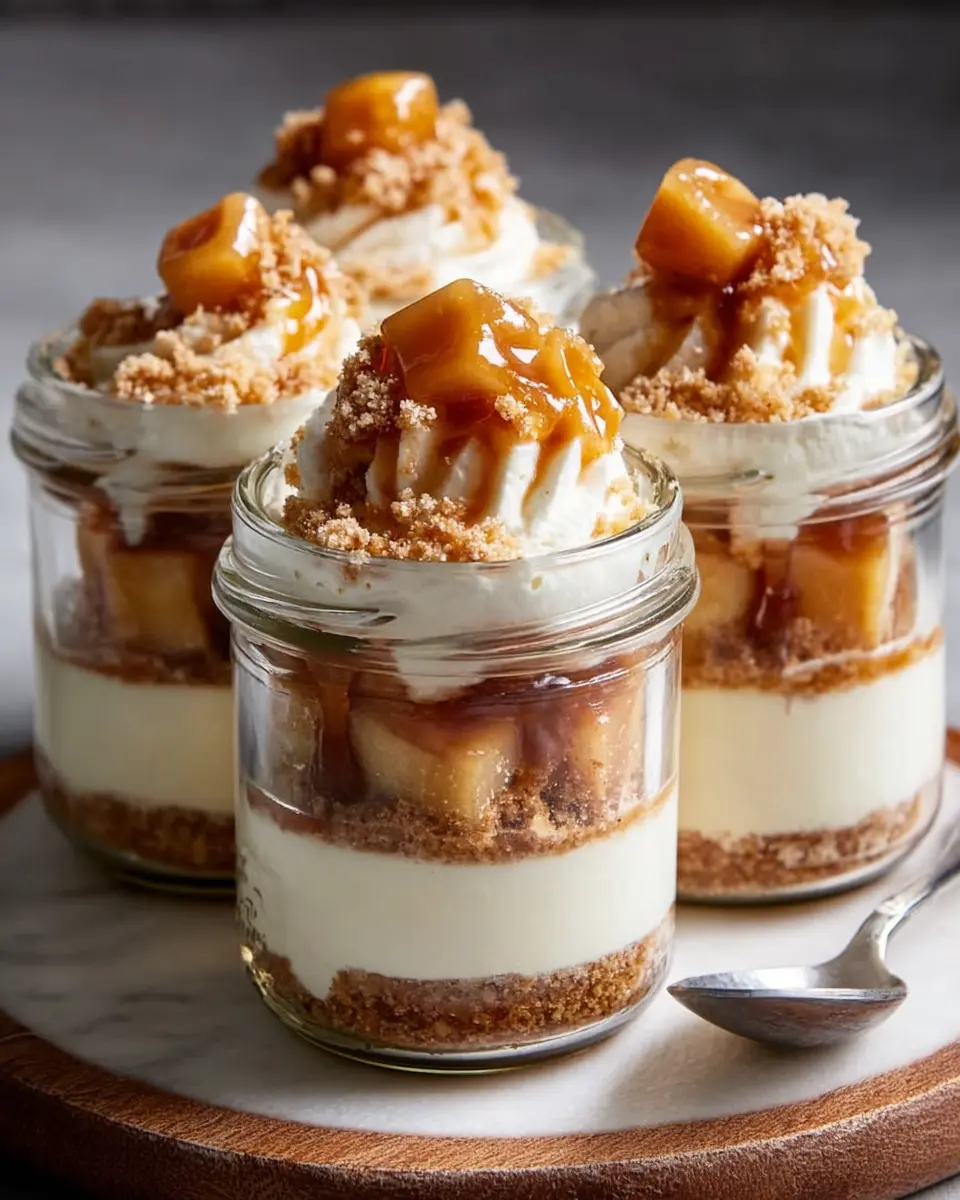
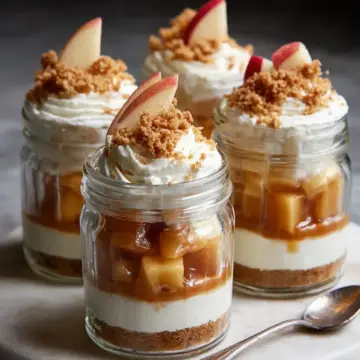
Once all your components are ready, it’s time to assemble! Start by spooning a generous layer of the cheesecake filling over the cool graham cracker crust in each jar. Then, spoon a delightful layer of your apple topping on top. If your jars are tall enough, feel free to repeat the layers for a more eye-catching presentation, ensuring the apple topping is at the top for that Instagram-worthy finish!
Garnish and chill
The final touch comes with garnishing your no-bake apple cheesecake jars. Top each with a dollop of whipped cream and a sprinkle of crushed graham crackers or a drizzle of caramel sauce for an added indulgence. Once assembled, chill the jars in the refrigerator for at least 1 hour before serving. This helps the flavors meld beautifully and allows the cheesecake filling to set.
Enjoy your homemade no-bake apple cheesecake jars and prepare for smiles all around! For additional tips and variations on this recipe, check out resources like AllRecipes or Food Network. Happy baking—or should we say no-baking!
Variations on No-Bake Apple Cheesecake Jars
Substitute Fruits for Different Flavors
Feel free to switch things up! Instead of apples, why not try ripe peaches, tart cherries, or even mixed berries for a burst of color and flavor? Each fruit brings its personality to your no-bake apple cheesecake jars. For example, strawberries add a fresh twist, while blueberries offer a delightful tang. Check out seasonal fruits for ideas that fit your taste, making your dessert unique each time!
Create a Dairy-Free Version
If you're looking for a dairy-free option, easy swaps can keep your cheesecake jars deliciously creamy. Use coconut cream or a cashew cream alternative for the filling. For the crust, replace butter with coconut oil and ensure your graham crackers are dairy-free. You can still enjoy the warm fruit topping without compromising on flavor! Remember, adjustments can bring new dimensions to your dessert while catering to various diets.
Cooking Tips and Notes for No-Bake Apple Cheesecake Jars
Ensuring Whipped Cream Consistency
For the best results, use chilled heavy cream straight from the fridge when whipping. This not only helps achieve those lovely stiff peaks faster but also keeps your cheesecake filling airy and light. Hand-whipping can be a fun workout, but using a stand mixer or hand mixer will give you more consistent results.
Making Ahead for Enhanced Flavor
If you're preparing your no-bake apple cheesecake jars in advance, you'll be rewarded with even better flavor! Assemble the jars up to 24 hours ahead of time and store them in the refrigerator. This allows the flavors to meld beautifully, creating a creamy, decadent treat that's perfect for entertaining. Just remember to add the whipped cream garnish right before serving for the freshest taste. Happy cooking!
Serving Suggestions for No-Bake Apple Cheesecake Jars
Creative Presentation Ideas
Elevate your no-bake apple cheesecake jars by presenting them in unique containers. Consider using mason jars or vintage teacups for a charming touch. Layer the desserts in clear containers to highlight the beautiful colors of the creamy cheesecake and spiced apple topping. To add flair, tie a ribbon around each jar or attach a small tag with a handwritten note for guests.
Perfect Pairings
This delightful dessert pairs well with various beverages to complement the flavors. For a refreshing choice, serve it alongside herbal tea or a fruity iced tea. If you're in the mood for something different, how about pairing it with a scoop of vanilla ice cream? The creaminess of the ice cream beautifully contrasts with the crispness of the apples, creating a well-rounded dessert experience. For more ideas on dessert pairings, check out Dessert Magazine.
Time Breakdown for No-Bake Apple Cheesecake Jars
Preparation Time
Getting started is easy! You'll need about 20 minutes to gather your ingredients and prepare the crust and cheesecake filling. Just pop on your favorite playlist and whip it all together.
Cooling Time
After assembling your jars, allow them to chill in the fridge for at least 1 hour. This step is crucial for the flavors to meld beautifully and the cheesecake to set.
Total Time
From start to finish, you’re looking at a total of 1 hour and 30 minutes. Most of that is inactive time while your delicious no-bake apple cheesecake jars cool, making it a perfect treat to prepare in advance!
So why wait? Get your ingredients together and enjoy this delightful, no-bake dessert! For more delicious ideas, check out our post on easy dessert recipes.
Nutritional Facts for No-Bake Apple Cheesecake Jars
Calories per serving
Each jar of this delightful no-bake apple cheesecake contains approximately 280 calories. This makes it a satisfying indulgence without tipping the calorie scale too much!
Protein content
You'll get about 3 grams of protein per serving, primarily from the cream cheese and heavy cream. Although not a protein powerhouse, it certainly adds a nice touch to your dessert!
Sugar count
With roughly 20 grams of sugar in each jar, this dessert is sweet but still offers the delicious flavor that makes it irresistible. You can always adjust the sweetness by tweaking the amount of sugar in the filling or topping!
For more detailed nutritional insights, it’s always a good idea to refer to resources like the USDA FoodData Central for information on specific ingredients. Enjoy your no-bake apple cheesecake jars with the assurance that you know what’s in them!
FAQs about No-Bake Apple Cheesecake Jars
Can I use low-fat cream cheese?
Absolutely! Using low-fat cream cheese in your no-bake apple cheesecake jars can be a great way to lighten up the recipe. Just keep in mind that it might slightly alter the texture, making the filling a bit less creamy. For the best results, try to find a quality brand that specifically mentions it can be used for desserts.
How long can I store the cheesecake jars in the fridge?
These delightful jars can be refrigerated for up to 3 days. However, they’re best enjoyed within the first 24 hours for the freshest taste and texture. Be sure to cover them tightly with lids or plastic wrap to prevent any fridge odors from affecting your no-bake apple cheesecake jars.
What if I want to add nuts or other toppings?
Feel free to customize! Chopped walnuts or pecans can add a lovely crunch and richness to your no-bake apple cheesecake jars. Sprinkle them on top along with whipped cream or caramel sauce. The fun of making dessert is exploring combinations—don't hesitate to experiment with your favorite toppings!
For more inspiration, check out this article on dessert toppings for ideas!
Conclusion on No-Bake Apple Cheesecake Jars
These no-bake apple cheesecake jars are the perfect way to indulge your sweet tooth without turning on the oven. Simple to prepare, they make for an impressive dessert that everyone will love. Plus, you can easily customize them with various toppings, making them a versatile treat for any occasion. Enjoy!
No-Bake Apple Cheesecake Jars Recipe
Equipment
- mixing bowl
- skillet
- whisk
- measuring cups
- measuring spoons
- serving jars
Ingredients
Crust
- 1 cup graham cracker crumbs
- 2 tablespoons granulated sugar
- 4 tablespoons unsalted butter, melted
Cheesecake Filling
- 8 ounces cream cheese, softened
- 1 cup heavy cream, chilled
- ½ cup powdered sugar
- 1 teaspoon vanilla extract
Apple Topping
- 2 medium apples, peeled, cored, and diced
- 2 tablespoons unsalted butter
- 2 tablespoons brown sugar
- ½ teaspoon ground cinnamon
- 1 teaspoon lemon juice
Garnishes
- whipped cream
- crushed graham crackers
- caramel sauce
Instructions
Preparation
- In a mixing bowl, combine the graham cracker crumbs, granulated sugar, and melted butter. Stir until all crumbs are evenly coated with butter, then firmly press this mixture into the bottom of individual jars or serving glasses to form the crust layer.
- Beat the softened cream cheese in a large bowl until it reaches a smooth, creamy consistency. In a separate chilled bowl, whip the heavy cream until stiff peaks form. Gently fold the whipped cream, powdered sugar, and vanilla extract into the cream cheese, blending carefully to maintain the airy texture.
- Heat the butter in a skillet over medium heat. Add the diced apples, brown sugar, and ground cinnamon, stirring frequently. Cook for 5-7 minutes, or until the apples soften but retain some bite. Remove from heat and stir in the lemon juice. Allow the mixture to cool to room temperature.
- Spoon a layer of the cheesecake mixture over the graham cracker crust in each jar, then add a layer of the cooled apple compote. Repeat these layers if your jars are large enough, ending with an apple topping layer.
- Top each jar with a dollop of whipped cream and sprinkle with crushed graham crackers or drizzle with caramel sauce as desired. Chill the jars in the refrigerator for at least 1 hour before serving to allow the flavors to meld and the cheesecake filling to set.

Leave a Reply