
Introduction to Roasting Garlic in the Oven
Roasting garlic in the oven is a game changer for your culinary creations. Once you discover how to roast garlic in the oven, you’ll wonder why you didn’t try it sooner. The result is a sweet, nutty, and buttery flavor that transforms ordinary dishes into something extraordinary.
So why should you roast garlic? For starters, roasted garlic has a far milder, smoother taste compared to raw garlic. Its rich, caramelized sweetness makes it a delightful addition to everything from mashed potatoes to spreadable dips. According to recent studies, incorporating garlic into your meals not only enhances flavor but also brings numerous health benefits, including anti-inflammatory properties and improved heart health.
Not to mention, roasted garlic is incredibly versatile—it can be stirred into sauces, blended into dressings, or slathered onto warm bread. Plus, roasting is a simple process. With just a head of garlic and a drizzle of olive oil, you can elevate your favorite recipes.
Ready to dive in? Let’s explore the steps to perfect roasted garlic, whether you're roasting whole heads or individual cloves. Trust me; this is a method you'll want to add to your recipe arsenal!
Ingredients for Roasting Garlic
Essential ingredients for whole roasted garlic
To create perfectly roasted garlic, you'll need just a couple of essential ingredients. The star of the show is, of course, a whole garlic head. Look for firm bulbs with no sprouting or blemishes for the best flavor. The second ingredient is extra virgin olive oil, just about 1 teaspoon. This will help to enhance the garlic’s natural sweetness and achieve that beautifully caramelized texture.
Optional add-ins for flavor enhancement
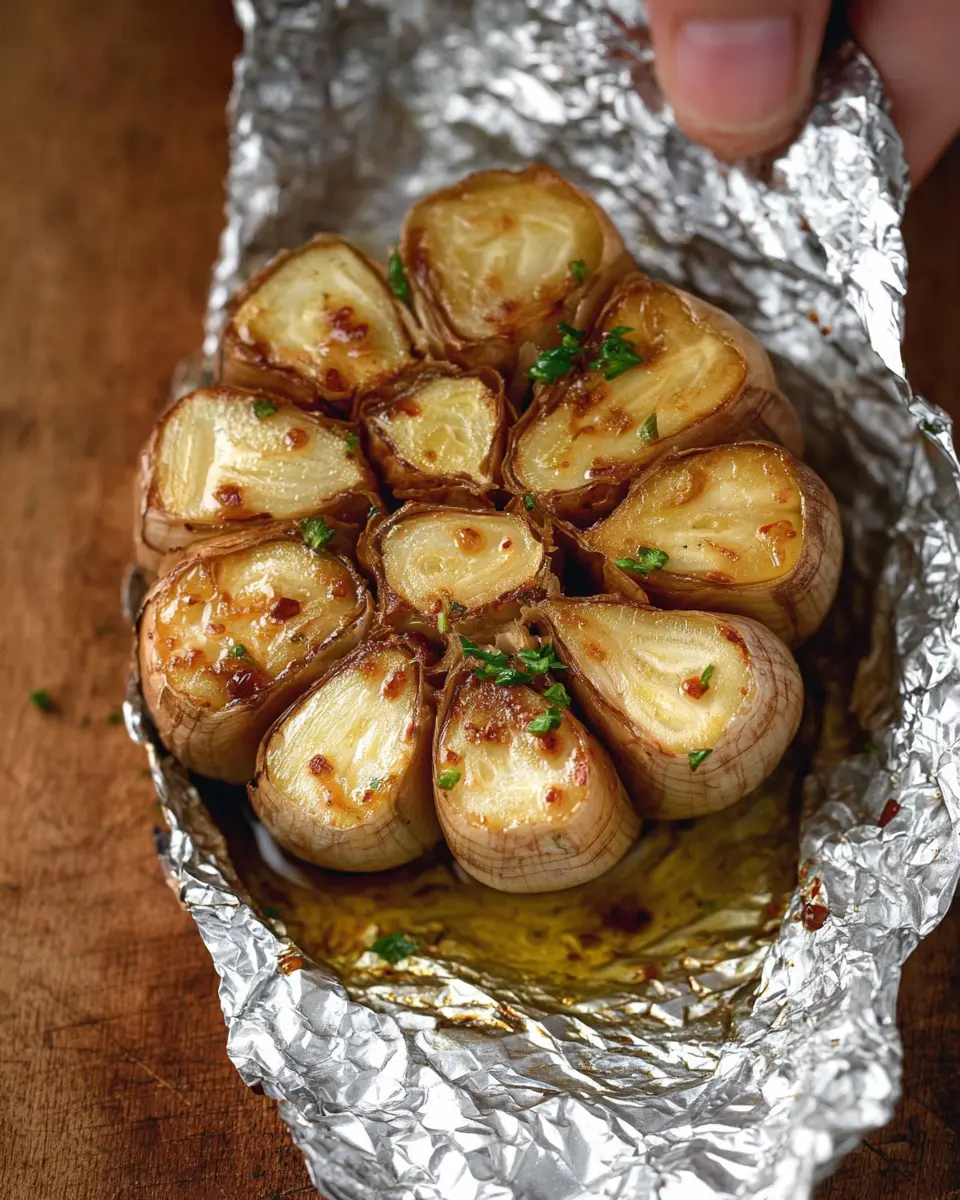
While the basic recipe is deliciously simple, you can elevate your roasted garlic experience with some optional add-ins. Consider mixing in a pat of butter for a richer flavor, or sprinkle in a pinch of salt and freshly cracked pepper to boost the umami richness. Fresh herbs like rosemary or thyme work wonders too, adding fragrant notes to your roasted creation. If you're feeling adventurous, a dash of red pepper flakes can introduce a subtle heat that beautifully complements the mellow sweetness of the garlic!
For more detailed insights into roasting techniques, you might find the BBC Good Food helpful!
Step-by-Step Preparation for Roasting Garlic
Roasting garlic in the oven transforms those pungent cloves into a wonderfully sweet, buttery spread that's perfect for a variety of dishes. Whether you plan to enjoy it on bread, in dips, or as a flavorful addition to dishes, here’s your step-by-step guide to making roasted garlic with ease.
Preheat the oven
The first step to a perfect roast is to get your oven preheated. Set it to 400ºF (200ºC). Preheating helps the garlic cook evenly, so you don’t end up with burnt bits or undercooked centers. Proper oven preparation ensures consistent results, allowing all that delicious flavor to develop beautifully.
Prepare the garlic head
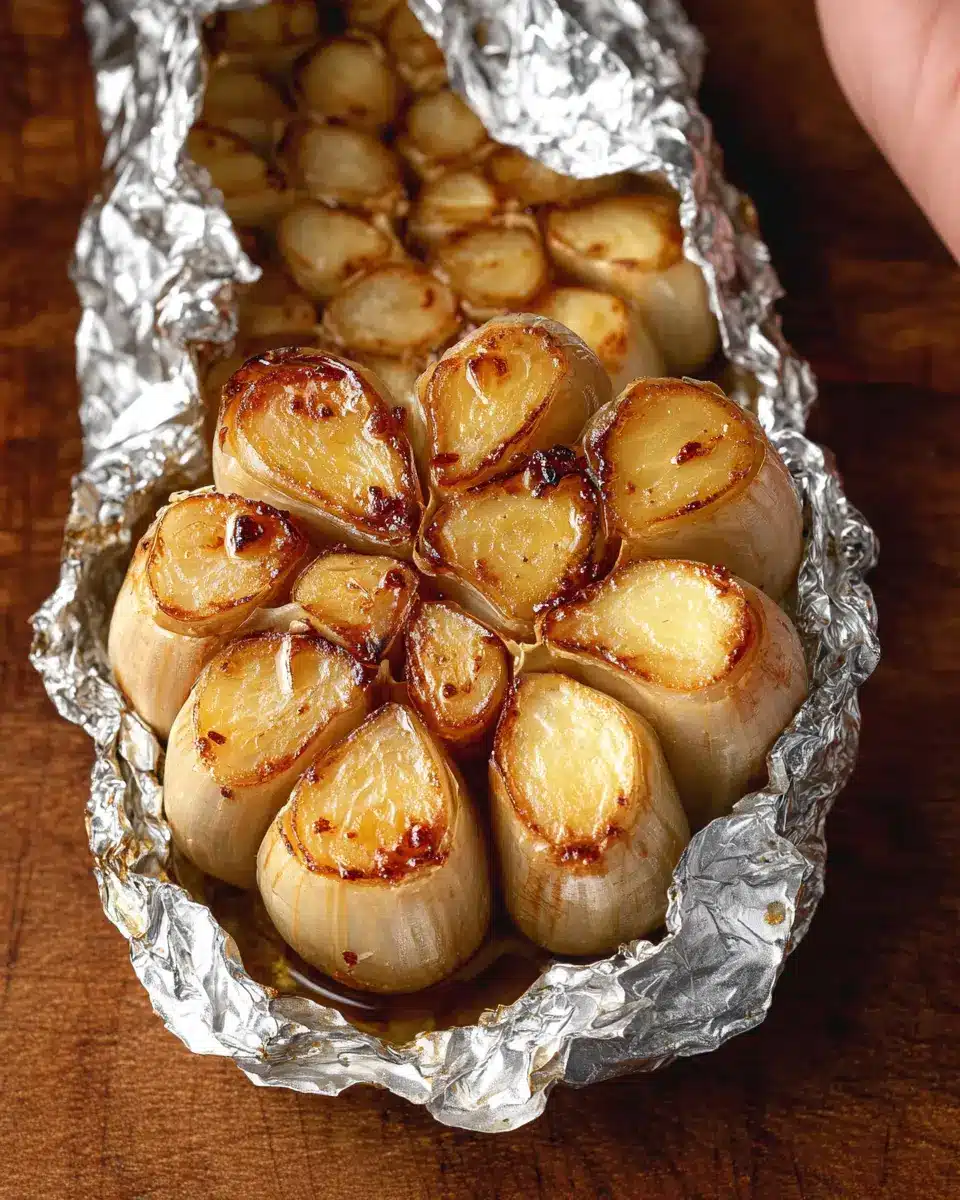
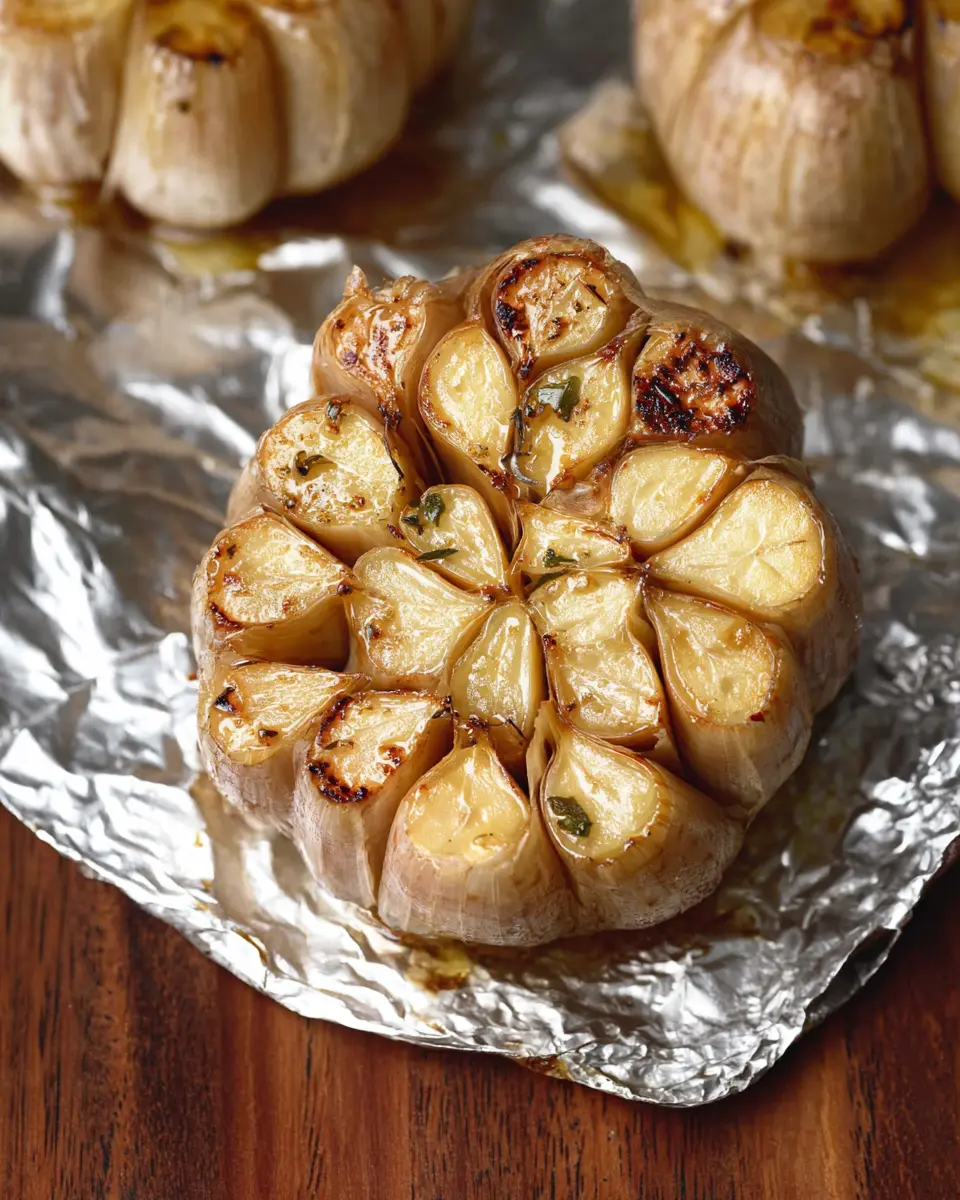
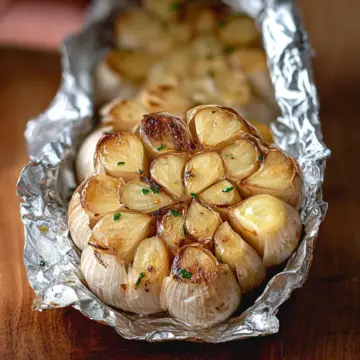
Start with a whole garlic head. You’ll want to slice it in half horizontally, exposing the individual cloves. Place both halves cut-side up on a large sheet of foil, large enough to fully envelop the garlic. Alternatively, you can peel away some of the outer layers without separating the cloves, while just trimming the tops of the cloves to expose them. This method is great for an easier removal post-roasting.
Drizzle with olive oil
Once you’ve prepared the garlic, it's time to add some flavor. Drizzle 1 teaspoon of olive oil over the cut sides of the garlic. This helps to keep the garlic moist during the roasting process while adding a wonderful depth of flavor. Not a fan of olive oil? You can substitute with melted butter for a richer taste, or even infused oils for a unique twist.
Seal in foil and roast
Now that your garlic is prepped and seasoned, wrap it tightly in the foil to create a little “parcel.” The wrapped garlic will gently steam, allowing it to roast beautifully. Place your foil packet in the preheated oven and set a timer for 30 minutes. You might want to check it occasionally to see if it needs a little more time—roasting time can vary based on the garlic's size and freshness.
Check for doneness
After about 30 minutes, carefully unwrap the foil and check the garlic. It should be golden and super soft to the touch. If you prefer it darker and more caramelized, you can return it to the oven for an extra 5-10 minutes, unwrapped, to let it brown slightly.
Removing roasted garlic
Once your garlic has reached that perfect golden hue, let it cool slightly before handling. To remove the roasted cloves, simply squeeze from the bottom of the head—the cloves should pop right out, all soft and sticky, ready to use in your favorite dishes.
Roasting individual cloves (optional)
Want to roast just a few cloves instead of a whole head? No problem! Place unpeeled individual cloves in a small foil packet, drizzle with olive oil, and roast them at the same temperature for about 15-20 minutes. Keep an eye on them, checking every 5 minutes after the initial 15, until they are tender and fragrant.
With these easy steps, you'll have irresistible roasted garlic ready to elevate your meals. You can explore more about cooking techniques on blogs like Serious Eats or New York Times Cooking for other delicious ideas!
Variations on Roasted Garlic
Roasting garlic opens up a world of flavors that can elevate any dish. Here are some delightful variations to try!
Adding herbs and spices
Incorporating herbs and spices can take your roasted garlic game to the next level. Consider adding fresh rosemary, thyme, or even crushed red pepper for a little kick. These ingredients not only enhance the flavor but also add aromatic notes to your roasted garlic. For more ideas on flavor pairings, check out resources like The Spice House.
Making roasted garlic butter
One of the most delectable outcomes from roasting garlic is creating a savory roasted garlic butter. Simply mash roasted garlic cloves into softened butter, mixing well. This compound butter is fantastic for spreading on bread, melting over veggies, or adding to your favorite proteins. Try it with chicken for a delightful twist!
Cooking Tips and Notes for Roasting Garlic
Common pitfalls to avoid
When learning how to roast garlic in the oven, it's easy to make mistakes. Overcooking can lead to bitter flavors, while undercooking leaves you with firm, unpleasant cloves. To avoid this, check for tenderness after 25 minutes, extending the time in small increments. Additionally, make sure you wrap the garlic loosely in foil to prevent it from steaming and sticking, ensuring that you achieve a beautifully caramelized outside.
Roasting in bulk for convenience
If you love roasted garlic as much as I do, consider roasting several heads at once! Not only does this save time, but it also means you'll have delicious garlic ready for all your recipes. After roasting, store any extras in an airtight container in the fridge for up to five days, or freeze for later use. You can even create flavor-infused garlic by mixing in herbs when roasting. Learn more about flavor infusion here.
Roasted garlic is versatile—spread it on bread, mix it into dips, or add it to soups for a rich, savory touch. Happy cooking!
Serving Suggestions for Roasted Garlic
How to Use Roasted Garlic in Dishes
Once you’ve mastered how to roast garlic in the oven, the possibilities are endless! Here are a few ideas to incorporate that sweet, nutty flavor into your meals:
- Pasta Sauce: Blend roasted garlic into your favorite marinara or cream sauce for a deeper flavor.
- Soups and Stews: Mash a few cloves into your soups for an aromatic kick.
- Mashed Potatoes: Mix roasted garlic into mashed potatoes for a savory twist that elevates a classic side.
Creative Ways to Spread It
Looking to spread the love? Roasted garlic works wonderfully as a condiment. Here are some ways to enjoy it:
- On Toast: Simply spread roasted garlic on warm bread or toast for an easy appetizer.
- With Dips: Add it to hummus or cream cheese for a delicious flavor boost.
- With Turkey Bacon: Pair it with crispy turkey bacon for a savory breakfast twist.
Feel free to get creative, and don’t hesitate to experiment with your favorite flavors! For more inspiration, check out this guide on The Spruce Eats.
Time Breakdown for Roasting Garlic
Preparation Time
Bringing your roasted garlic dreams to life starts with just 5 minutes of prep. Slice your garlic head and drizzle it with olive oil—easy peasy!
Cooking Time
Next, let the oven work its magic for about 30 minutes. Depending on your preference for caramelization, keep an eye on it and adjust as necessary.
Total Time
In just 35 minutes, you’ll be all set with some warm, buttery, roasted garlic that you can use in countless delicious ways.
If you're curious about more garlic-roasting tips or different methods, check out this guide on roasting garlic for additional insights and variations!
Nutritional Facts for Roasted Garlic
Calories
Roasted garlic is surprisingly low in calories, with just 20 calories per clove. This makes it a guilt-free addition to your meals, whether you're adding it to a creamy dip or spreading it on toast.
Protein
In terms of protein content, each clove of roasted garlic delivers about 1 gram. While that may not sound like much, every bit helps, especially when integrated into a balanced diet rich in various nutrients.
Dietary Specifics
If you’re looking for food that fits various dietary restrictions, roasted garlic checks a lot of boxes! It is gluten-free, vegan, and vegetarian, making it a fantastic condiment for just about anyone. Plus, it's super versatile—perfect in everything from savory stews to fresh spreads. For more tips on integrating garlic into your meals, check out this article from the Garlic Institute, which dives deep into the benefits and uses of garlic in cooking.
FAQs about Roasting Garlic
What to do if garlic turns bitter?
If your roasted garlic has a bitter taste, it may be due to the age of the garlic or incorrect cooking temperatures. Try reducing the oven temperature to 350ºF (175ºC) and roasting it longer, around 40-50 minutes. This lower heat can prevent that unpleasant bitterness from developing. Using fresh garlic can also help—you don’t want to roast garlic that’s been sitting in your pantry for too long.
Can you roast garlic in an air fryer?
Absolutely! To roast garlic in an air fryer, wrap the garlic head in foil, drizzle with olive oil, and cook at 370ºF (190ºC) for about 22-25 minutes. This method will yield similar caramelized flavors and textures as traditional oven roasting.
How to store roasted garlic properly?
After roasting, let your garlic cool, then store the cloves in an airtight container in the refrigerator for up to 3-5 days. For longer storage, consider freezing them. Simply mash or keep the cloves whole, and place them in a freezer-safe bag. They can last up to 3 months in the freezer! To learn more about garlic storage, check out this guide.
Conclusion on Roasting Garlic in the Oven
Roasting garlic in the oven transforms its pungent sharpness into a sweet, rich flavor perfect for various dishes. Whether you choose to roast whole heads or individual cloves, you’ll end up with a versatile ingredient that enhances everything from spreads to soups. Enjoy the deliciousness!
For more tips on enhancing your culinary skills, check out this guide on cooking with herbs.
How to Roast Garlic in the Oven
Equipment
- oven
- Tin foil
Ingredients
Main Ingredients
- 1 whole garlic head
- 1 teaspoon olive oil
Instructions
Method 1: Whole Roasted Garlic
- Preheat the oven to 400ºF/200ºC.
- Slice the garlic head in half across the middle and place both halves onto a large piece of foil.
- Drizzle the raw garlic with olive oil and lightly brush/rub it into the garlic cloves.
- Seal the tin foil around the pieces to create a little 'parcel.'
- Roast in the oven for about 30 minutes until golden color and super-soft to touch.
- Optionally unwrap the foil for the final five minutes to allow it to darken and caramelize further.
- Allow the garlic to cool enough to touch and squeeze the cloves out.
Method 2: How to roast garlic cloves
- Place the unpeeled cloves in a tin foil packet, drizzled with a bit of olive oil, and roast until tender.
- Check the garlic cloves at the 15-minute mark, returning to the oven if needed.

Leave a Reply