
Introduction to Preserving Apples
Have you ever found yourself staring at a mountain of apples, wondering what to do with them? Preserving apples at home is a delightful way to make the most of your harvest, reduce food waste, and for many of us, embark on a hands-on culinary adventure. Not only does it allow you to savor the flavors of fresh apples long after the season ends, but it also opens the door to creating delicious staples like homemade apple cider vinegar.
So, why preserve apples at home? The answer is simple yet compelling. First and foremost, homemade is often healthier and tastier than store-bought options. When you take the time to make preserves or vinegar yourself, you control the ingredients—no preservatives or added sugars. Plus, it can be a fun and engaging project, perfect for a cozy weekend or a gathering with friends.
According to the USDA, nearly 40% of food waste in the U.S. comes from fruits and vegetables. By preserving apples, you’re doing your part to combat this staggering statistic while enjoying the satisfaction of crafting something uniquely yours.
Curious about how to transform those apples into a flavorful elixir? Let’s dive into the process and see how easy it is to create homemade apple cider vinegar!
Ingredients for Homemade Apple Cider Vinegar
Main ingredients you'll need
To get started on your homemade apple cider vinegar, you'll need a few essential ingredients:
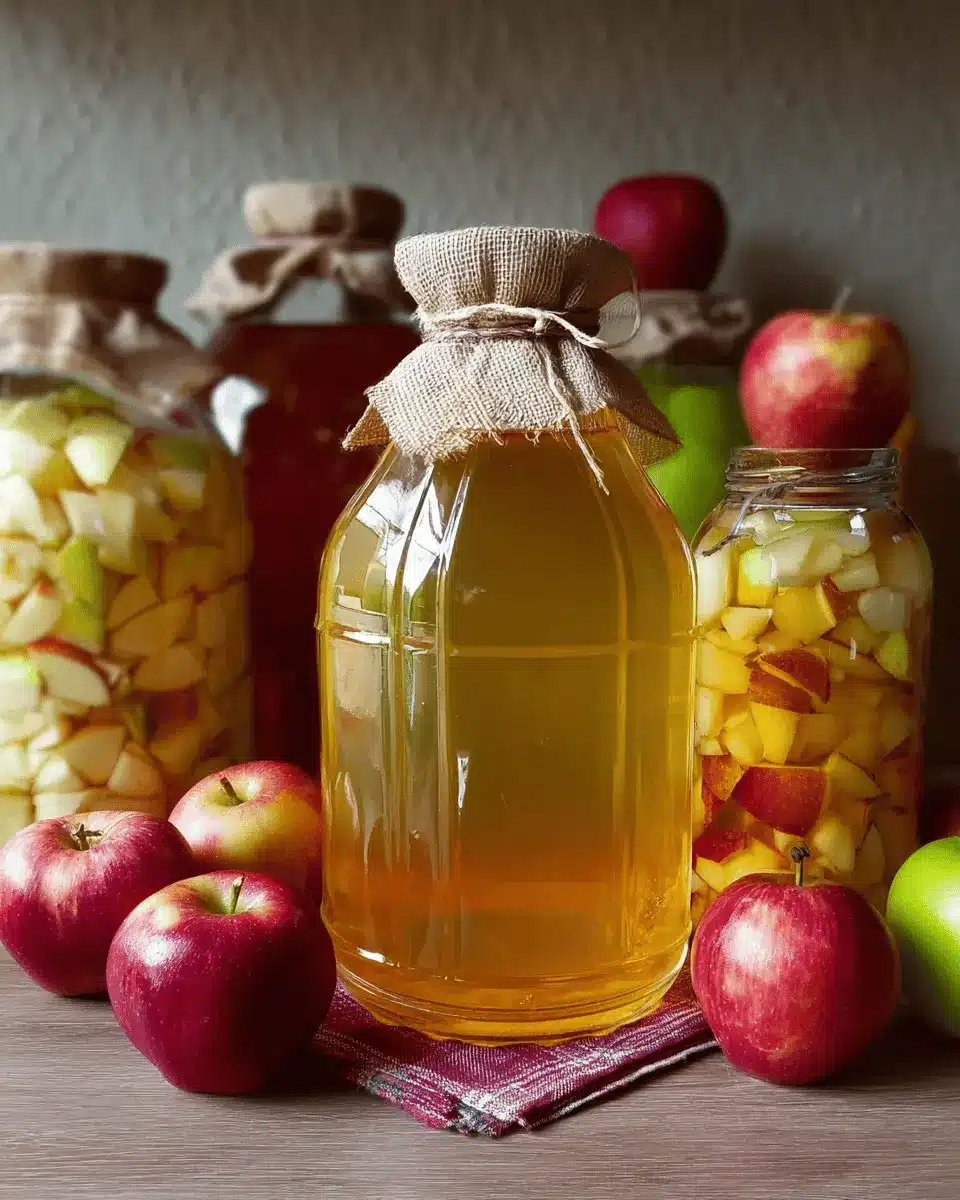
- Diced apple chunks or apple scraps: You can use cores, skins, or any excess apples; fill your jar halfway with them for a robust flavor.
- Sugar: Add 1 tablespoon of sugar for every cup of filtered water. If you're making a larger batch, use 1 cup of sugar for every gallon of water. The sugar feeds the fermentation process, allowing those yummy probiotics to flourish.
Optional ingredients to enhance flavor
While the basic recipe is simple, you might consider adding a splash of finished organic apple cider vinegar to help kickstart the fermentation. This can add depth to the flavor and speed up the process. Additionally, feel free to throw in some spices like cinnamon sticks or cloves, or even dried fruits like raisins for a unique twist.
For a deeper dive into the fermentation process and health benefits, check out this helpful resource on fermented foods. Happy preserving!
Step-by-Step Preparation for Homemade Apple Cider Vinegar
Making your own homemade apple cider vinegar is a rewarding endeavor. With just a few basic ingredients and a little patience, you can create a product that’s both delicious and healthy. Let's dive into the step-by-step preparation process!
Gather Your Apple Materials
The first step in your apple cider vinegar journey is to gather your apple materials. You can utilize fresh apple chunks or even scraps like peels and cores, making this a fantastic way of preserving apples that might otherwise go to waste. Aim to fill your fermenting vessel about halfway with your chosen apples. Fun fact: using a variety of apple types can enhance the flavor of your vinegar, so if you have different kinds on hand, feel free to mix and match!
Prepare the Sugar-Water Mixture
Next, it's time to create your sugar-water mixture. For every cup of filtered water you add, stir in 1 tablespoon of sugar. If you’re making a larger batch, simply adjust the ratios: use 1 cup of sugar per gallon of water. This mixture will help kickstart the fermentation process by providing the natural yeasts with something to munch on—keeping your vinegar bubbling with zest in no time!
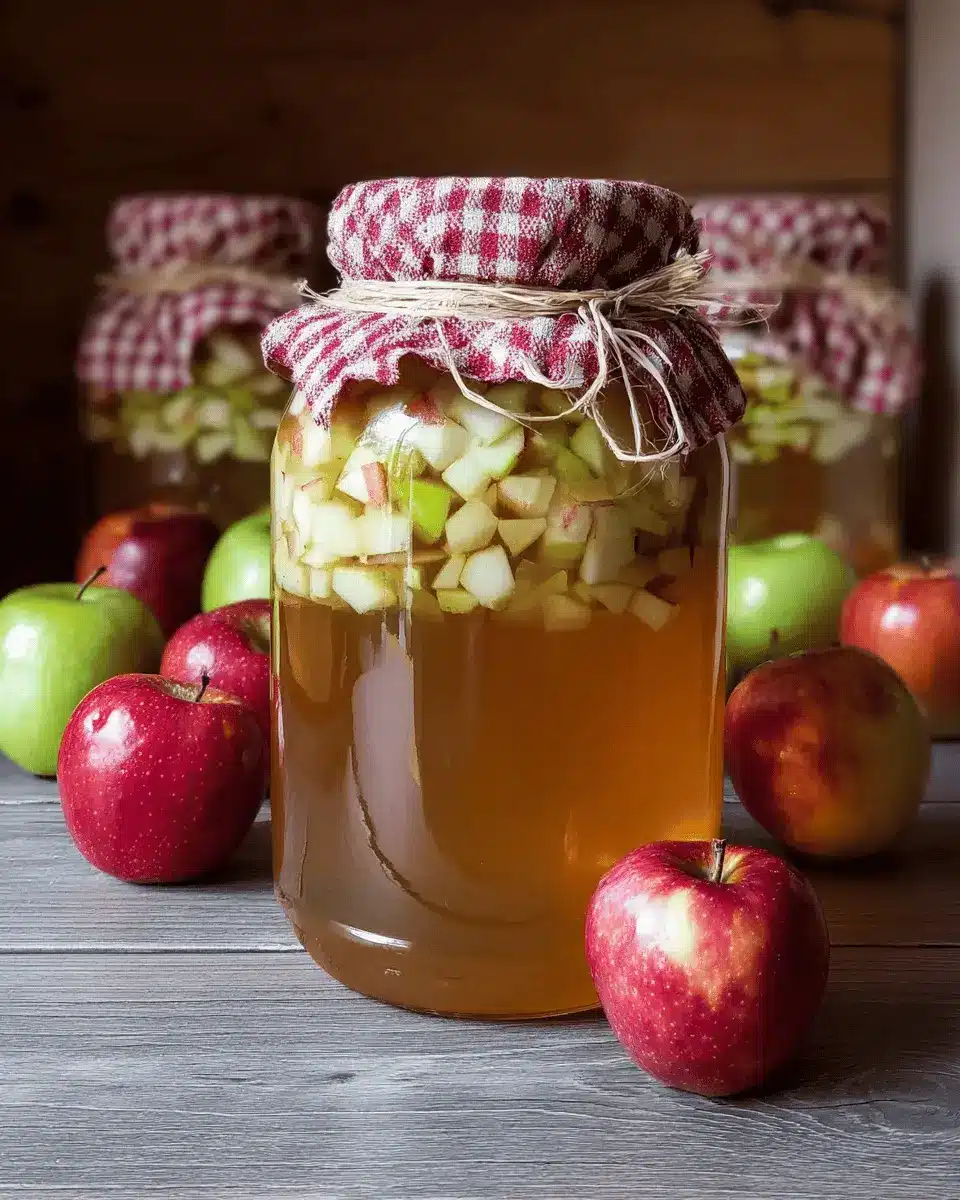
Combine Apples and Liquid in Fermenting Vessel
Now, pour your lukewarm sugar-water mixture over the apple pieces in your fermenting vessel. Make sure you’ve noted how much water you added, as this will be useful later. You’ll want to cover the apples completely, leaving a little room at the top for fermentation gases. To foster the right environment, consider adding a splash of organic apple cider vinegar if you have it; this can help speed up the inoculation process.
Initial Fermentation Process
Cover your vessel with a breathable material like cheesecloth or a dishtowel to keep dust out while allowing air in. Then, store it in a dark, warm place (around 70 to 75°F) for about two weeks. It's essential to stir the mixture daily to prevent mold. Think of it as a little daily ritual—like watering a plant!
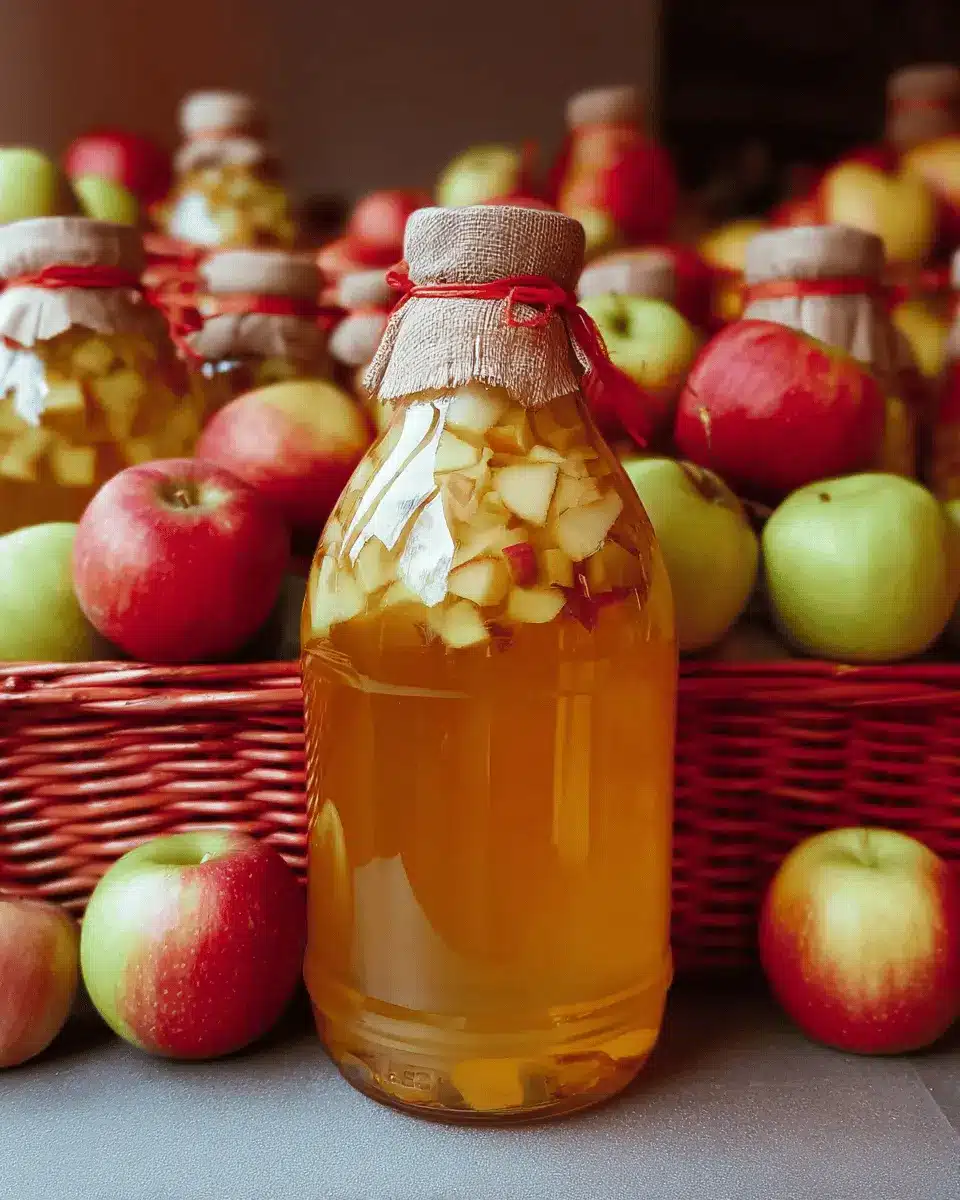
Strain and Transfer for Long-Term Fermentation
After two weeks, it’s time to strain the mixture. Reserve the liquid into a new container and toss the apple scraps into your compost bin. This is a great moment to appreciate how we can use every part of the apple while preserving apples in the most efficient way possible! Cover the new container with a breathable cloth again and store it in a cool, dark place for long-term fermentation.
Taste Testing and Bottling
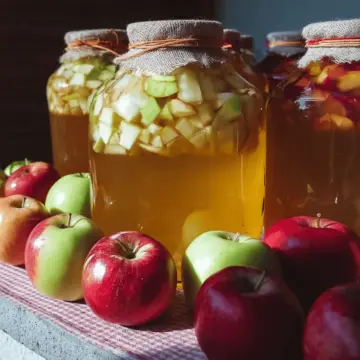
After about a month, sample your vinegar to see how it’s developing. You can let it ferment longer if you prefer a more robust flavor—up to three months if needed. Once you've achieved your desired tanginess, transfer the finished apple cider vinegar into bottles with lids. Remember, your homemade vinegar should keep well for over a year when stored properly.
You can enjoy your apple cider vinegar in salad dressings, marinades, and even health tonics. Happy fermenting! For more tips and recipes on preserving your harvest, consider checking this resource for additional ideas on how to make the most out of your kitchen creations.
Variations on Homemade Apple Cider Vinegar
Adding spices for unique flavors
To elevate your homemade apple cider vinegar, consider adding spices for a delightful twist. Ingredients like cinnamon sticks, cloves, or ginger can infuse your vinegar with warmth and depth. Just toss a few into your fermenting jar and let them work their magic as your vinegar brews. This not only enhances the flavor but also offers added health benefits. Imagine drizzling your spiced cider vinegar over a salad or using it in sauces for a warm kick!
Using different types of apples for varied taste
The type of apples you choose can drastically affect the flavor of your cider vinegar. Experiment with sweet apples like Fuji or Honeycrisp for a milder taste, or go for tart varieties like Granny Smith for a sharper profile. Mixing different apples can create a complex and interesting flavor that will surely impress your friends! With preserving apples, don’t hesitate to try out various combinations to find your perfect blend. After all, the beauty of homemade vinegar lies in its personalization!
Cooking Tips and Notes for Homemade Apple Cider Vinegar
When you're preserving apples to make your own apple cider vinegar, remember a few handy tips:
- Keep It Clean: Ensure all your utensils and jars are sanitized to prevent unwanted bacteria from affecting the fermentation process.
- Avoid Metal: Use glass or food-safe plastic containers. Metals can react with vinegar and alter the flavor.
- Taste Testing: After one month, taste your vinegar. If it’s not tart enough, simply let it ferment longer. Each batch can be unique!
- Store Wisely: Once bottled, a covered container keeps the flavor fresh for home use.
For helpful insights on fermentation, check out resources like the Cultured Food Life for expert advice!
Serving Suggestions for Apple Cider Vinegar
Incorporating it in Dressings and Marinades
Apple cider vinegar's tangy flavor makes it a superb addition to homemade dressings and marinades. Combine it with olive oil, Dijon mustard, and a touch of honey for a zesty salad dressing that elevates any greens. For marinades, mix it with fresh herbs and spices to marinate chicken or Turkey Bacon, enhancing both flavor and tenderness. Embrace the versatility of this vinegar—it's essential for preserving apples and adding that extra kick to your culinary creations!
Suggested Drinks Using Apple Cider Vinegar
Not just for cooking, apple cider vinegar shines in beverages too! Mix a tablespoon with warm water and a drizzle of honey for a revitalizing morning tonic. For a refreshing twist, try adding it to sparkling water with a slice of lemon or ginger. This not only adds flavor but incorporates the health benefits of apple cider vinegar—wondering how to make it taste even better? Try this apple cider vinegar drink recipe for a delicious, healthy start to your day!
Time Breakdown for Making Apple Cider Vinegar
Preparation Time
Getting started is a breeze! Spend about 20 minutes gathering your apples and prepping your fermentation vessel.
Fermentation Time
This is where the magic happens! You’ll need to let your mixture ferment for 60 days to achieve that delightful tang.
Total Time
All in all, you’re looking at a two-month commitment to craft your very own apple cider vinegar, but remember, most of that time is hands-off fermentation. For a deep dive into the world of preserving apples, check out resources like The Spruce Eats for tips and tricks!
Nutritional Facts for Homemade Apple Cider Vinegar
Health benefits of apple cider vinegar
Homemade apple cider vinegar boasts a range of health benefits, including improved digestion, stable blood sugar levels, and enhanced weight management. Rich in acetic acid, it may also help with heart health and provide antimicrobial properties. Incorporating it into your diet can be an easy way to support overall wellness!
Caloric content
In terms of caloric content, homemade apple cider vinegar is incredibly low, with approximately 3 calories per tablespoon. This makes it a perfect addition to beverages, dressings, and marinades without compromising your daily caloric intake. Enjoy its tangy flavor while keeping your nutrition goals on track!
For additional insights on health benefits, check out Healthline's article on apple cider vinegar benefits.
FAQs about Preserving Apples
Can I use any type of apples for apple cider vinegar?
Absolutely! While you can use any type of apples for preserving apples and making apple cider vinegar, certain varieties—like Granny Smith, Fuji, or Honeycrisp—can yield a more flavorful end product. Each type brings its individual sweetness or tartness, so feel free to mix and match for a more complex taste.
How long does homemade apple cider vinegar last?
Homemade apple cider vinegar can last for over a year when stored properly. Just keep it in a cool, dark place and ensure there’s no visible mold or off-putting flavors. If it's been a while, a quick taste test can help you decide if it’s ready for your next salad dressing or home remedy.
What are the health benefits of apple cider vinegar?
The health benefits of apple cider vinegar are impressive! It's known for potentially aiding digestion, supporting weight loss, and even lowering blood sugar levels. Beyond these benefits, many people enjoy using it for skin care or as a natural cleaning product. For a deeper dive into its uses, you can check out resources like Healthline.
By incorporating apple cider vinegar into your diet, you're not just preserving apples—you're embracing a healthier lifestyle!
Conclusion on Preserving Apples
In summary, preserving apples through homemade apple cider vinegar is both a fun and practical kitchen project. Not only do you reduce food waste, but you also create a versatile ingredient packed with flavor and health benefits. Why not give it a try? Your taste buds will thank you!
Homemade Apple Cider Vinegar
Equipment
- fermenting vessel
- measuring cup
- strainer
Ingredients
- 1 quart diced apple chunks or apple scraps enough to fill half of the vessel
- 1 tablespoon sugar per 1 cup filtered water
- 1 cup sugar per 1 gallon of filtered water
- 1 gallon filtered water
Instructions
- Wash and chop the apples into chunks, or gather collected apple scraps and add them to your jar until it is halfway full.
- Pour lukewarm filtered water over the apples into the container until it is almost full, noting the total amount of water added.
- Stir in sugar in ratios of 1 tablespoon of sugar per cup of water added, or for larger batches, 1 cup of sugar per gallon of water added.
- Optional: Add a splash of finished organic apple cider vinegar to inoculate the culture and encourage fermenting.
- Stir combined ingredients until thoroughly mixed, and cover with breathable material.
- Store in a dark location around 70 to 75 degrees F for two weeks to ferment, stirring every day to prevent mold from forming.
- After two weeks, strain and reserve the liquid into a similar sized container and compost the spent fruit.
- Move the covered container of liquid to a cool location to continue long term fermentation.
- After one month, sample the vinegar to see if it is finished fermenting and tart to your liking.
- Once it is fermented to your desired flavor, transfer the apple cider vinegar into bottles with lids and store at room temperature or in the refrigerator.
- Properly fermented apple cider vinegar should stay good for over a year as long as it does not have visible mold or unusual flavor.


Leave a Reply