
Introduction to Danish Butter Cookies
What are Danish Butter Cookies and Why are They So Popular?
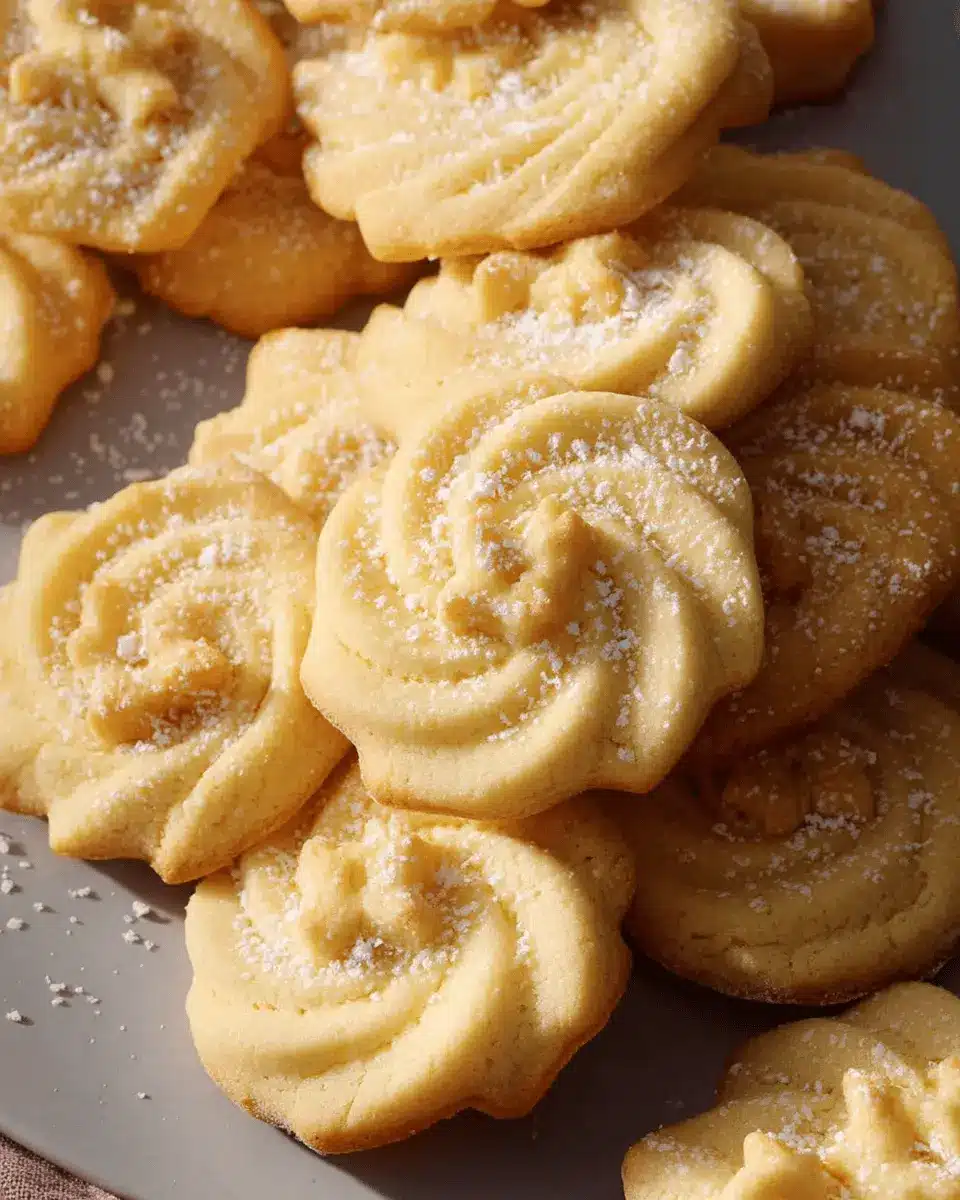
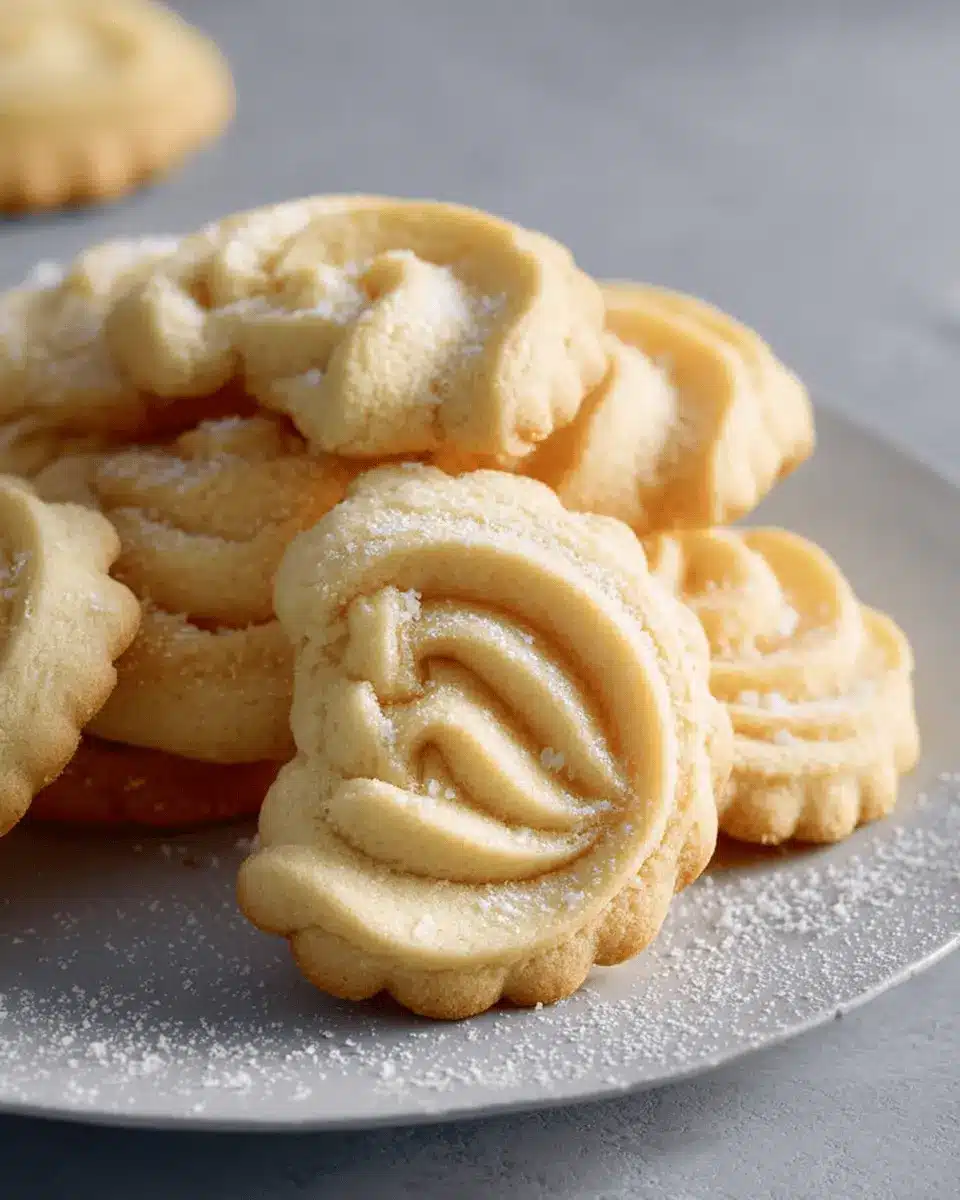
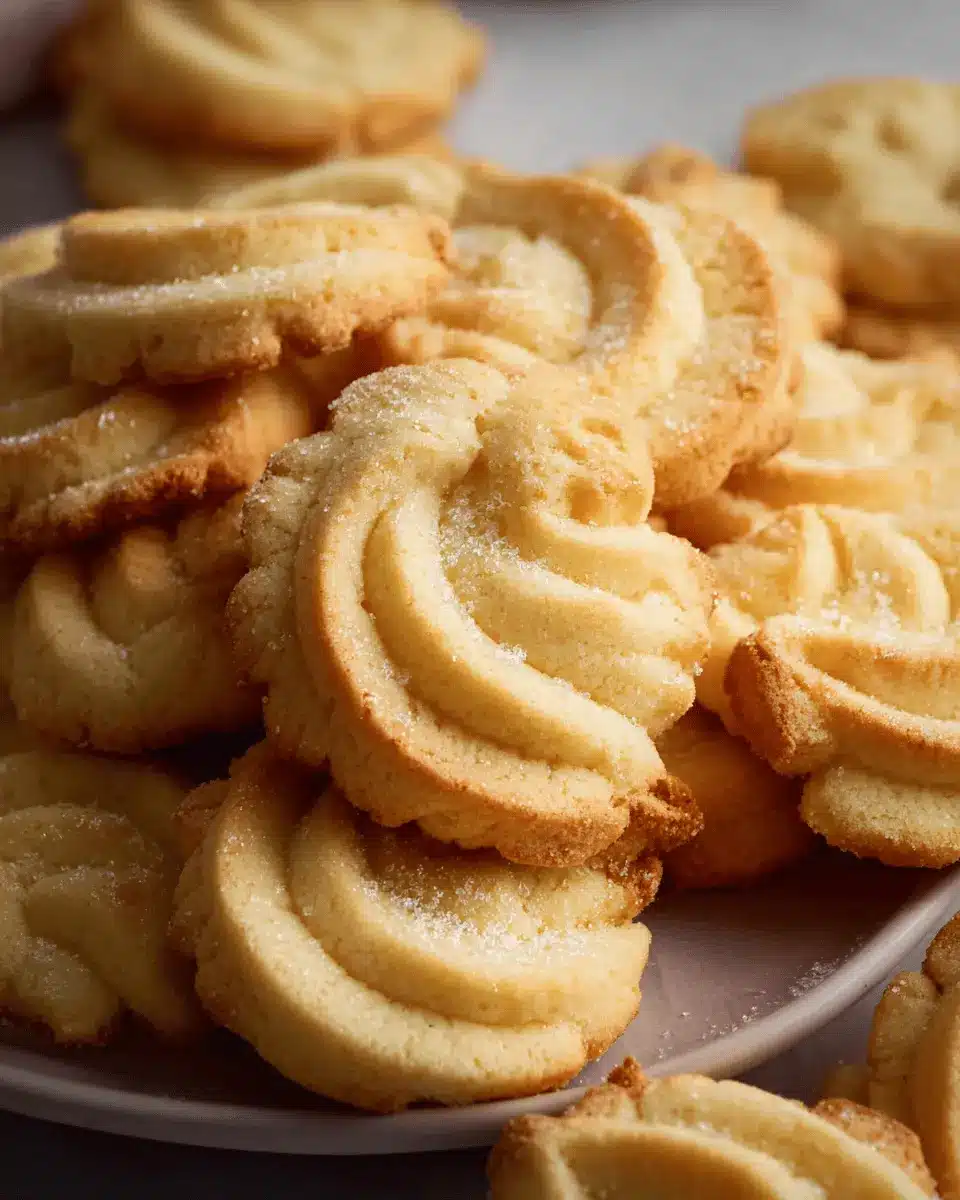
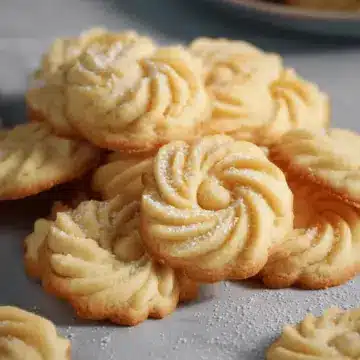
Danish Butter Cookies, also known as Danish Kager, are delightful treats hailing from Denmark. Characterized by their rich, buttery flavor and tender crumb, these cookies are made primarily from butter, sugar, and flour. They have a unique melt-in-your-mouth quality that makes them irresistible. What sets them apart is not just their taste but also their charming shapes and crisp edges, often elaborately piped or cut into circles, hearts, or festive designs.
These cookies have gained popularity for several reasons:
- Versatile Enjoyment: Perfect for any occasion, whether it’s a casual afternoon snack, a holiday treat, or a charming addition to tea parties.
- Simple Ingredients: The straightforward ingredient list means they can easily be made at home without needing any fancy equipment or hard-to-find products.
- Perfect for Gifting: Beautifully packaged, Danish Butter Cookies make for delightful gifts, bringing a touch of Danish tradition to your loved ones.
Their universal appeal and nostalgic roots make them a beloved cookie around the world. If you're curious about how to bake these delectable Danish Butter Cookies, follow along for a recipe that’s sure to impress!
Ingredients for Danish Butter Cookies
When it comes to Danish Butter Cookies, the ingredients play a crucial role in achieving that perfect melt-in-your-mouth texture. Here's what you'll need for this delightful treat:
- 1 cup (227 g) European salted butter, brought to room temperature for optimal blending.
- ½ cup (100 g) granulated sugar, adding just the right touch of sweetness.
- ⅛ teaspoon salt, to enhance the flavors.
- 2 large egg yolks, enriching the dough and contributing to a tender texture.
- 2 teaspoons (10 g) vanilla extract, for that delicious aromatic essence.
- 1 tablespoon (15 g) whole milk, or more if needed to soften the dough.
- 2 cups (220 g) all-purpose flour, the base of your cookie dough.
- ½ cup (50 g) cake flour, to create a light and airy consistency.
- Coarse sugar, for sprinkling on top, giving those cookies a delightful crunch.
With these simple yet high-quality ingredients, you're well on your way to baking irresistible Danish Butter Cookies that will impress friends and family alike. For more tips on sourcing these ingredients, check out this guide from Fine Cooking. Happy baking!
Step-by-step preparation of Danish Butter Cookies
Creating these Danish Butter Cookies is a delightful experience that results in melt-in-your-mouth treats, perfect for any occasion. Follow this step-by-step guide to ensure your cookies come out perfect every time.
Prepare the workspace and baking mats
Before diving into the mixing bowl, it's vital to set the stage. Clear your countertop and make some space in the refrigerator for a baking sheet; the cookies will need to chill for 20-30 minutes to keep their shape. Line two baking sheets with parchment paper or use a silicone baking mat—this will prevent sticking and help with even baking.
Cream together butter, sugar, and salt
In a stand mixer fitted with a paddle attachment, begin by creaming your room-temperature European salted butter on medium speed. It's essential to start with soft butter—you want it to be smooth and easily spreadable. Slowly add in your granulated sugar and salt while the mixer is running on low. After a minute or so, increase to medium speed and mix until the mixture becomes light and fluffy. This step is key; the air incorporated will help make your cookies tender.
Incorporate the egg yolks, vanilla, and milk
Now it’s time to add flavor! With the mixer still running, drop in two egg yolks (make sure they're at room temperature for even mixing), a splash of vanilla extract, and a tablespoon of milk. Keep mixing until these ingredients are fully combined, scraping down the sides of your bowl to get every delicious bit in there.
Mix dry ingredients and combine
In a separate bowl, whisk together your all-purpose flour and cake flour. This combination gives the cookies a light texture that's to die for. Gradually add the dry mixture to your creamed ingredients, mixing on low speed. Be careful not to over-mix; once there are no visible traces of flour, you’re good to go. If the batter seems too thick and hard to pipe, don’t hesitate to add another tablespoon of milk to soften it.
Pipe the cookies onto baking sheets
Grab a large piping bag fitted with a ½-inch star tip for fancy edges! Fill the bag with your mixture and pipe out 2-inch cookies onto your prepared baking sheets. It’s best to leave about 2 inches of space between each cookie to allow for spreading. Optional but encouraged: sprinkle with coarse sugar or festive decorations.
Prepare and preheat the oven
As you’re piping your cookies, preheat your oven to 350°F, placing the rack in the middle so your cookies bake evenly. This step is important for that perfect golden texture—trust me!
Bake and cool the Danish butter cookies
Your oven is ready, so it’s showtime! Bake the cookies for 10-15 minutes or until the edges are just lightly golden. Pay close attention to avoid over-baking, as these cookies can go from perfect to too crispy in a blink. Once baked, let them cool on the baking sheet for about 5 minutes before transferring to a wire rack to cool completely.
With some patience and a little love, you'll have scrumptious Danish Butter Cookies that invite longing glances and satisfy cravings!
Variations on Danish Butter Cookies
Who can resist the melt-in-your-mouth goodness of Danish Butter Cookies? For a fun twist on the classic recipe, try these delightful variations that add a unique spin to your cookie experience.
Chocolate-dipped Danish Butter Cookies
Imagine biting into a buttery cookie only to be greeted by a luscious layer of rich chocolate. Simply dip half of each Danish Butter Cookie into melted chocolate after they cool, and let them set on parchment paper. It's a delightful way to elevate your cookie game, making them a perfect treat for parties or as personalized gifts.
Spiced Danish Butter Cookies
Add a dash of warmth to your Danish Butter Cookies by incorporating spices like cinnamon or nutmeg. Blend in a teaspoon of ground spices into the dough for a cozy flavor that’s especially enjoyable during the colder months. These spiced versions pair wonderfully with a cup of tea or coffee, perfect for a relaxing afternoon snack.
Feel free to experiment and discover your ideal cookie creation!
Cooking Tips and Notes for Danish Butter Cookies
Importance of Room Temperature Ingredients
When making Danish Butter Cookies, starting with room temperature ingredients is essential. It allows for better blending, resulting in a smooth batter. Leave your butter out for about 45 minutes to achieve that perfect consistency. If you’re in a rush, simply place eggs in warm water for five minutes to bring them to the right temperature. This minor step can significantly affect the final texture of your cookies, ensuring they melt in your mouth.
How to Avoid Overmixing the Dough
Mixing is a vital step in cookie preparation, but it's easy to overdo it. Overmixing develops gluten, which can make your Danish Butter Cookies tough rather than tender. Aim to mix just until there are no dry ingredients left visible. If your dough feels too thick, it’s okay to add a touch of milk to soften without compromising texture. Remember, it’s better to mix less than too much! Want more tips on cookie making? Check out King Arthur Baking for expert advice.
Serving suggestions for Danish Butter Cookies
Perfect pairings with coffee or tea
When it comes to enjoying your Danish Butter Cookies, nothing beats a warm cup of coffee or tea. The richness of these cookies complements a bold espresso or a delicate herbal tea seamlessly. For a special touch, try pairing them with spiced chai or creamy latte — the flavors dance beautifully together. If you're feeling adventurous, consider serving them alongside a refreshing iced tea during warmer months. This delightful combination not only enhances your snacking experience but also makes for a perfect afternoon treat, whether you’re relaxing at home or entertaining guests.
Creative ways to present cookies
Elevate your Danish Butter Cookies presentation to impress friends and family. Use elegant serving platters or tiered stands to showcase your baked goodness. Adding a sprinkle of confectioners' sugar or a drizzle of melted chocolate can create an eye-catching display. You could also package the cookies in decorative tins or clear bags tied with a ribbon for thoughtful gifts. For a cozy touch, serve them in matching tea cups on a quaint table setting. Just remember, the way you present your cookies can make even a simple treat feel like a festive occasion!
Time Breakdown for Danish Butter Cookies
Preparation Time
Get ready to bake some delightful Danish Butter Cookies: this step requires about 30 minutes. You'll need time to cream the butter and sugar, mix in the eggs and vanilla, and prepare the baking sheets.
Baking Time
After you’ve piped those beautiful cookies, they’ll need 10–15 minutes in the oven. Keep an eye on them to catch that perfect golden-brown edge.
Total Time
In total, plan for around 1 hour from start to finish, including chilling time for your dough. Doesn’t that sound manageable? Perfect for a cozy weekend baking session!
Nutritional Facts for Danish Butter Cookies
When indulging in Danish Butter Cookies, it's helpful to know what you're treating yourself to:
Calories
Each cookie packs approximately 374 calories. This is a delightful treat that fits nicely into a balanced diet, especially when enjoyed in moderation.
Protein
With about 11 grams of protein per serving, these cookies provide a satisfying boost, making them not just a delicious snack but also a small source of nourishment.
Sugar Content
These cookies contain 7 grams of sugar each, offering just the right amount of sweetness without overwhelming your palate. It's the perfect balance to complement their buttery goodness.
Feel free to enjoy these delicious Danish Butter Cookies knowing they not only melt in your mouth but also add a little nutritional value to your day. For more tips on balancing treats with healthy eating, check out resources like the USDA Dietary Guidelines.
FAQs about Danish Butter Cookies
How do I store my Danish Butter Cookies for freshness?
To keep your Danish Butter Cookies fresh and delicious, store them in an airtight container at room temperature. This way, they’ll retain their melt-in-your-mouth texture for up to five days. If you wish to keep them even longer, consider freezing them. Just make sure to layer them with parchment paper, and they can last for up to three months!
Can I freeze Danish Butter Cookie dough?
Absolutely! Freezing Danish Butter Cookie dough is a fantastic way to have freshly baked cookies whenever you want. Shape the dough into logs or scoop it into balls, then wrap it tightly in plastic wrap before freezing. You can bake them straight from frozen—just increase the baking time by a few minutes.
What is the best way to decorate Danish Butter Cookies?
Decorating your Danish Butter Cookies can be a fun process! Consider adding a sprinkle of coarse sugar before baking for a beautiful finish. Once baked, you can use royal icing or melted chocolate to create designs, or simply leave them plain to showcase their buttery texture. Let your creativity shine! For more decorating ideas, check out this helpful guide.
Conclusion on Danish Butter Cookies
In summary, Danish Butter Cookies deliver a perfect harmony of richness and lightness, every bite melting in your mouth. Whether enjoyed during the holidays or as an everyday treat, their delightful texture and buttery flavor make them irresistible. Try this recipe, and you’ll see why they’re a beloved classic!
Danish Butter Cookies (Melt in Your Mouth)
Equipment
- Stand Mixer
- piping bag
- parchment paper
- baking sheet
Ingredients
- 1 cup European salted butter room temperature
- ½ cup granulated sugar
- ⅛ teaspoon salt
- 2 teaspoons vanilla extract
- 1 tablespoon whole milk or more to soften
- 2 cups all-purpose flour
- ½ cup cake flour
- coarse sugar for decorating
Instructions
- Make space in the refrigerator and prep the baking mats.
- Cream butter, sugar, salt.
- Incorporate egg yolks, vanilla, and milk.
- Mix dry ingredients and add into mixture.
- Pipe the cookies.
- Prepare the oven.
- Bake.

Leave a Reply