
Introduction to Gluten Free Lemon Bars
The Appeal of Homemade Desserts
There's something truly special about homemade desserts, especially when they come bursting with flavor like these gluten free lemon bars. As the seasons change and the days grow warmer, the bright, zesty taste of lemon becomes a refreshing choice that lifts the spirit. Whether you’re entertaining friends on the weekend or simply treating yourself on a weeknight, there's undeniable satisfaction in crafting these delightful treats from scratch.
Imagine the sweet, tangy aroma wafting through your kitchen as you whip up your own batch of gluten free lemon bars. Not only do they provide a satisfying bite, but they also cater to diverse dietary needs—allowing everyone at your gathering to enjoy a piece of sunshine regardless of gluten sensitivities.
The simplicity of the recipe is one of its many charms. You don’t need a master’s degree in baking to follow along. Just a few fresh ingredients like lemon juice, butter, and a quality gluten free all-purpose baking flour go a long way. For more information on gluten-free baking, you can check out reputable sources like Gluten Free Living and Celiac Disease Foundation.
So, are you ready to dive into the world of gluten free lemon bars? Let's get baking!
Ingredients for Gluten Free Lemon Bars
Crust ingredients
Creating the perfect base for your gluten free lemon bars starts with just a few simple ingredients. Here’s what you’ll need for a delightful shortbread crust:
- ½ cup white sugar
- ½ cup butter, softened
- 1 ½ cups gluten free all-purpose baking flour – ensures your bars are both delicious and safe for those with gluten sensitivities
- 2-3 tablespoons water, as needed
- ¼ teaspoon salt
The butter brings a rich flavor while the sugar provides that sweet touch we all love in a good dessert.
Filling ingredients
Now, let’s move on to the luscious lemon filling that truly makes these bars shine. Gather these fresh ingredients:
- 1 ¼ cups white sugar
- 5 tablespoons gluten free all-purpose baking flour – this adds the necessary thickness and stability
- 4 large eggs, bringing richness and structure
- ½ cup fresh lemon juice – feel free to use bottled, but fresh is always best!
- 2 tablespoons fresh lemon zest for that extra zesty punch
With these vibrant ingredients, your gluten free lemon bars will be bursting with citrusy goodness, perfect for a sunny day or a cozy evening treat. Happy baking!
Step-by-step preparation of Gluten Free Lemon Bars
Creating the perfect gluten free lemon bars at home is not just a rewarding experience; it’s a delightful way to enjoy a sunny treat any time of year. Let’s dive into the step-by-step preparation to ensure your lemon bars are a hit!
Preheat the oven
First things first, preheat your oven to 350°F (180°C). This crucial step ensures that your crust bakes evenly from the moment it enters the oven, giving you that perfect golden base for your lemony filling.
Prepare the crust
While the oven warms up, it’s time to prepare the crust. In a mixing bowl, combine ½ cup of white sugar, ½ cup of melted butter, 1 ½ cups of gluten free all-purpose baking flour, and ¼ teaspoon of salt. If your mixture seems too crumbly, don’t worry! Just whisk in 2-3 tablespoons of water until a soft dough forms. Press this mixture evenly into the bottom of an 8x8-inch baking pan lined with parchment paper for easy removal later.
Bake the crust
Now it’s time to bake that crust! Place your pan in the preheated oven and bake for about 25 minutes or until it’s lightly golden. Make sure to keep an eye on it during the last few minutes; you want it crisp but not too dark. The aroma from the oven is sure to get your taste buds tingling!
Whisk the filling ingredients
While your crust is baking, whisk together the filling ingredients in a separate bowl. Combine 1 ¼ cups of white sugar and 5 tablespoons of gluten free all-purpose baking flour. Then, beat in 4 large eggs, ½ cup of fresh lemon juice, and 2 tablespoons of fresh lemon zest until the mixture is smooth and well combined. The fresh lemon juice and zest will provide that bright, tangy flavor that makes gluten free lemon bars so refreshing.
Bake the filling
Once the crust is ready, remove it from the oven and pour the lemon filling over the baked crust. Bake the entire confection for another 20-25 minutes or until the center is set and doesn’t jiggle when you shake the pan gently. It’ll have a delightful glossy appearance when it’s done!
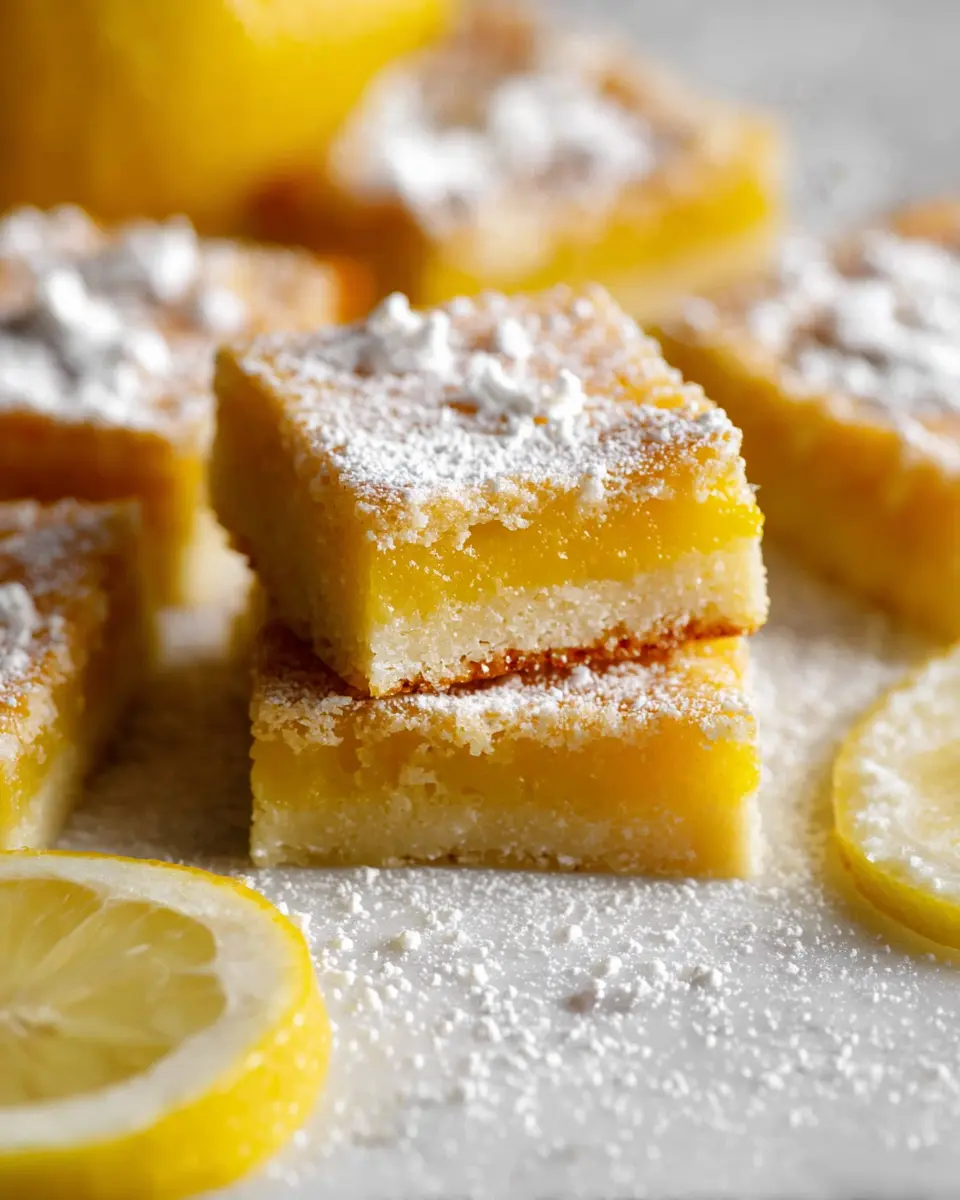
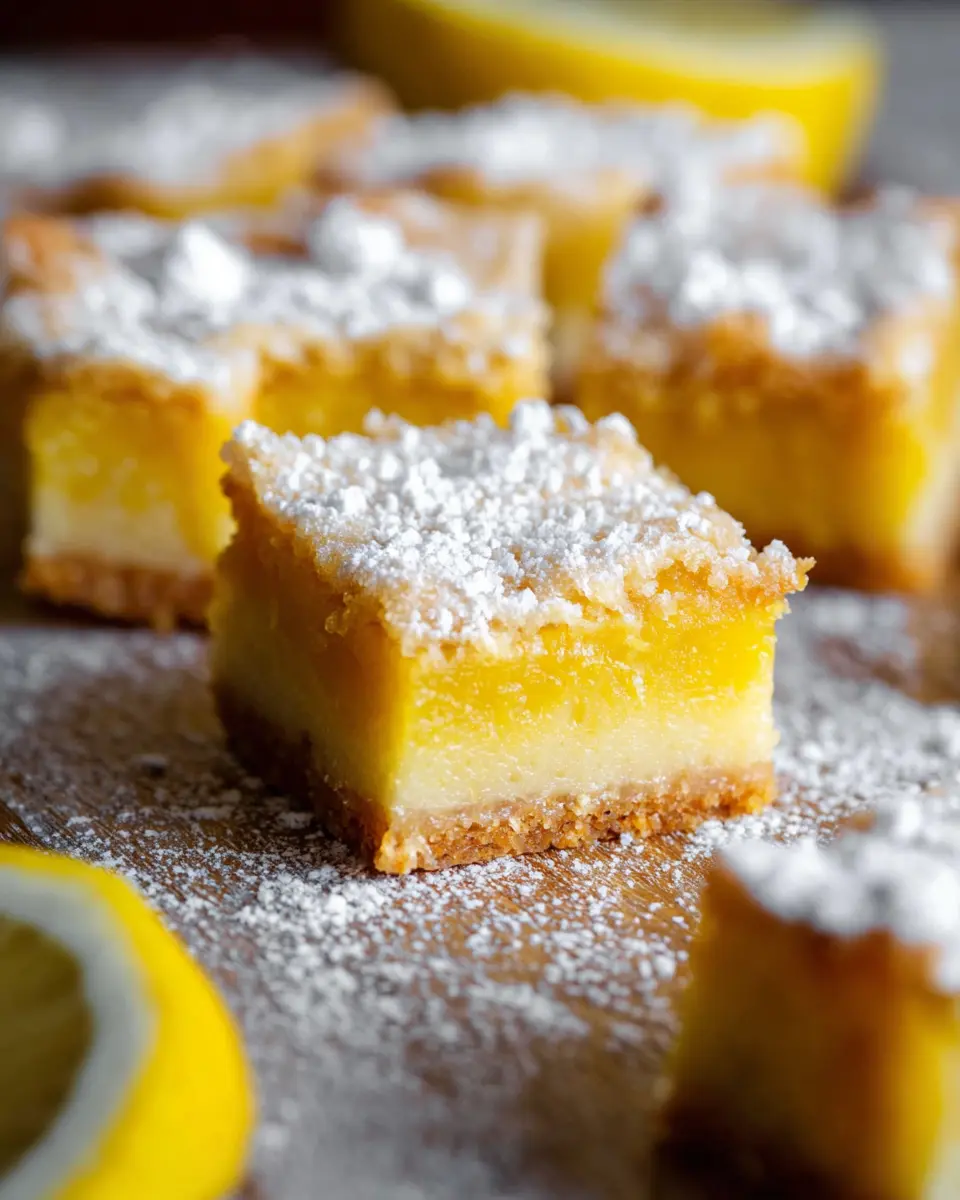
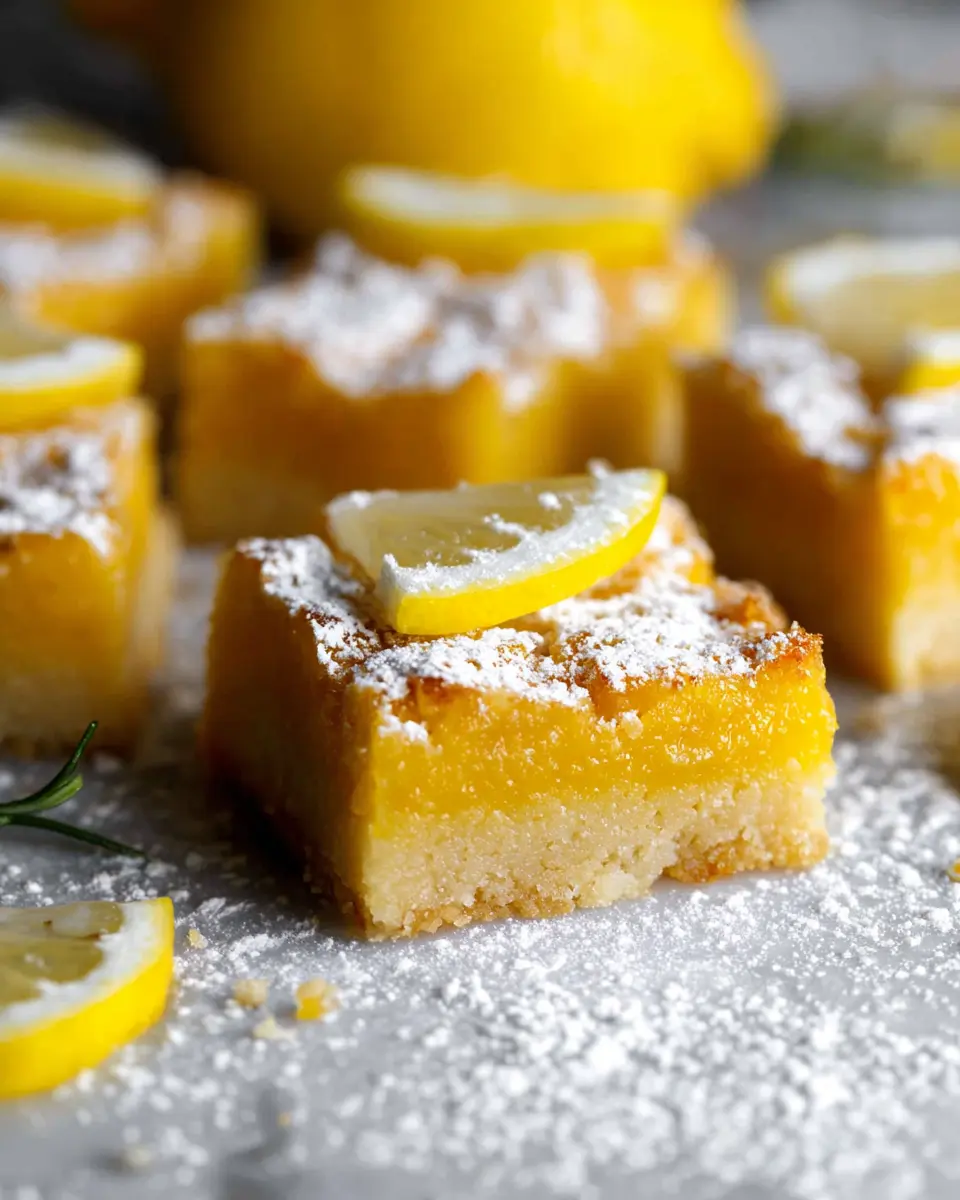
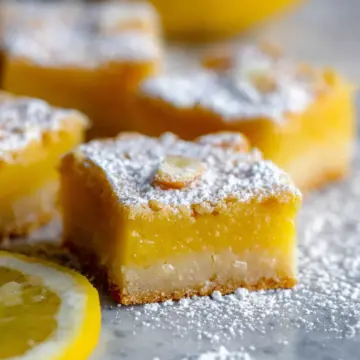
Cool and slice
After baking, let your gluten free lemon bars cool at room temperature for about 20 minutes. Then, refrigerate them for at least 1-2 hours to allow them to fully set before slicing into 16 squares. This chilling step makes them easier to cut and brings out their refreshing flavor.
And there you have it! Delicious, homemade gluten free lemon bars that are sure to impress. Enjoy them with family or friends or savor them all for yourself—you deserve it!
Variations on Gluten Free Lemon Bars
Extra Tangy Lemon Bars
If you love a serious punch of flavor, try making your gluten free lemon bars extra tangy! Simply reduce the sugar in the filling to 1 cup and add an additional tablespoon of lemon zest. This will intensify the citrus flavor, making each bite a refreshing and zesty experience. Perfect for lemon lovers!
Lemon Bars with a Berry Twist
For a fun twist on traditional gluten free lemon bars, consider adding fresh berries like raspberries or blueberries. Gently fold in one cup of fresh berries into the lemon filling before pouring it onto the crust. The combination of tart lemon and sweet berries creates a delightful contrast that is sure to impress your family and friends. You can also top the bars with a berry coulis for extra flair!
These variations not only add an element of surprise but also allow you to customize your bars to suit your taste. Enjoy experimenting!
Cooking tips and notes for Gluten Free Lemon Bars
Tips for a perfect crust
To achieve a deliciously flaky crust for your gluten free lemon bars, be sure to use cold butter and combine the ingredients until just mixed. Overworking the dough can result in a tough crust. If you find it too crumbly, add water, one tablespoon at a time, to bring it together. Parchment paper is your best friend—line your baking pan with it for easy removal after baking!
Storing leftovers
Leftover gluten free lemon bars can be stored in the refrigerator for up to a week. Simply slice them and place them in an airtight container. If you want to enjoy them for longer, consider freezing them! Wrap each bar individually in plastic wrap and then place them in a freezer-safe bag for up to three months. Just let them thaw in the fridge before enjoying again.
For further tips on gluten-free baking, check out resources from Gluten Free Baking for more insights!
Serving suggestions for Gluten Free Lemon Bars
Pairing with fresh fruits
When enjoying your gluten free lemon bars, consider serving them alongside a vibrant selection of fresh fruits. Slices of strawberries, blueberries, or even a handful of raspberries beautifully complement the tartness of lemon, enhancing the overall experience. The splash of color and freshness not only elevates the presentation but also adds a delightful texture contrast!
Ideal beverages to serve
To wash down your delicious lemon bars, opt for refreshing beverages. I recommend iced herbal teas or sparkling water with a hint of citrus for a zesty twist. These drinks not only cleanse the palate but also maintain the light and bright theme of your dessert. If you're feeling adventurous, try adding a sprig of fresh mint for an extra splash of flavor!
For more ideas, check out this guide on pairing desserts with beverages. Enjoy your lemony delight!
Time Breakdown for Gluten Free Lemon Bars
Preparation time
Get started with just 15 minutes! This quick prep time means you can whip up these delicious bars even on a busy day.
Baking time
Allow around 45 minutes for baking your delicious gluten free lemon bars. This includes 25 minutes for the crust and 20-25 minutes for the filling.
Total time
In just 1 hour, you can enjoy these bright, zesty treats! The extra refrigerating time is essential for setting the bars perfectly, so plan to chill them for at least 1-2 hours before serving.
For more insights on creating mouthwatering desserts, check out this article on gluten free baking tips!
Nutritional Facts for Gluten Free Lemon Bars
When it comes to treating yourself to a sweet and tangy delight, gluten free lemon bars shine brightly! Here’s a quick glance at what’s in each serving.
Calories
Each serving contains approximately 172 calories, making it a light yet fulfilling treat that can satisfy your sweet tooth without overwhelming your daily caloric intake.
Sugar Content
With 14 grams of sugar per bar, these lemon bars strike a lovely balance between sweet and tangy. It's a delightful indulgence that you can enjoy guilt-free, especially if you're watching your sugar levels.
Ready to make a zesty treat that everyone will adore? Check out the full recipe above and enjoy!
FAQ about Gluten Free Lemon Bars
Can I use regular flour instead?
Using regular flour in place of gluten-free flour will change the texture and overall integrity of your lemon bars. If you're not baking gluten-free, feel free to substitute, but for those adhering to a gluten-free diet, stick with a gluten-free all-purpose flour blend. They’re designed to mimic the properties of wheat flour, ensuring your bars turn out just right!
How can I make these bars less sweet?
If you prefer your gluten free lemon bars on the tart side, you can easily adjust the sweetness. Consider reducing the sugar in the filling to 1 cup, or add an extra tablespoon of fresh lemon zest for that zingy flavor. Remember, tasting as you go is key!
How do I store unused lemon bars?
To keep your gluten free lemon bars fresh, store leftovers in the refrigerator. Simply cover them tightly or transfer to an airtight container. They should last for about five days—if they last that long! For even longer storage, they can be frozen and thawed when you’re ready to enjoy them again.
Conclusion on Gluten Free Lemon Bars
These gluten free lemon bars truly embody the perfect balance of sweet and tangy flavors, making them an ideal treat for any occasion. Whether you're enjoying them at a backyard BBQ or as a refreshing dessert during the hot months, they're sure to impress. Give this easy recipe a try and delight your friends and family! For more delicious gluten-free recipes, check out Gluten Free Goddess.
Gluten Free Lemon Bars
Equipment
- 8×8 baking pan
- mixing bowl
- whisk
- microwave
Ingredients
Crust
- 0.5 cup white sugar
- 0.5 cup butter
- 1.5 cups gluten free all purpose baking flour
- 2-3 tablespoons water use as needed
- 0.25 teaspoon salt
Filling
- 1.25 cups white sugar
- 5 tablespoons gluten free all purpose baking flour
- 4 large eggs
- 0.5 cup fresh lemon juice
- 2 tablespoons fresh lemon zest
Instructions
Preparation
- Preheat the oven to 350 degrees Fahrenheit.
- Line an 8x8 baking pan with parchment paper.
- Add the butter to the microwave and melt for 25 seconds. It won't be fully melted, but should be mostly melted.
- Combine the flour, sugar, butter and salt. Whisk in 2 tablespoons of water and mix until a dough forms.
- If it seems too crumbly, whisk in the third tablespoon of water.
- Press into the baking pan until even.
- Bake for 25 minutes.
- Meanwhile, whisk together the flour and sugar for the filling.
- Whisk in all remaining ingredients until smooth.
- When the crust is done, pour in the filling and bake for 20-25 minutes or until the center looks set.
- Remove from the oven and let cool at room temperature for about 20 minutes, then let set in the fridge for at least 1-2 hours before slicing.
- Slice into 16 squares and enjoy! Store leftovers in the fridge.


Leave a Reply