
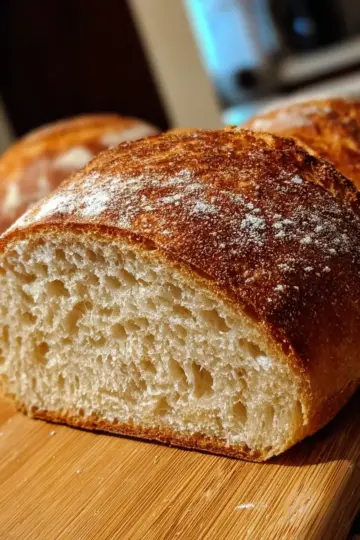
Introduction to Sourdough Sandwich Bread
Why Sourdough?
Have you ever experienced the joy of biting into a fresh sourdough sandwich bread slice? The rich flavor and airy texture make every sandwich something special. But what's the magic behind sourdough? It's all about the fermentation process! This method uses wild yeast and beneficial bacteria, which not only adds depth to the flavor but also improves the bread's digestibility. Studies have shown that sourdough can promote better nutrient absorption—a win for your health and your tastebuds.
The Benefits of Homemade Bread
Making your own sourdough bread at home opens up a world of possibilities. For starters, you get to control the ingredients, ensuring everything is fresh and wholesome. Homemade bread is often healthier than store-bought varieties, as it typically contains fewer preservatives. Plus, there’s nothing quite like the satisfaction of pulling a golden-brown loaf out of the oven, fragrant and warm.
In today's fast-paced world, dedicating a little bit of time to craft a loaf of sourdough can be incredibly rewarding. It’s a delicious way to unwind and connect with simple pleasures. And trust me, once you taste your first slice, you’ll understand why making sourdough sandwich bread is such a delightful endeavor!
For more information on the art of sourdough and its health benefits, check out The Bread Book for an in-depth look!
Ingredients for Sourdough Sandwich Bread
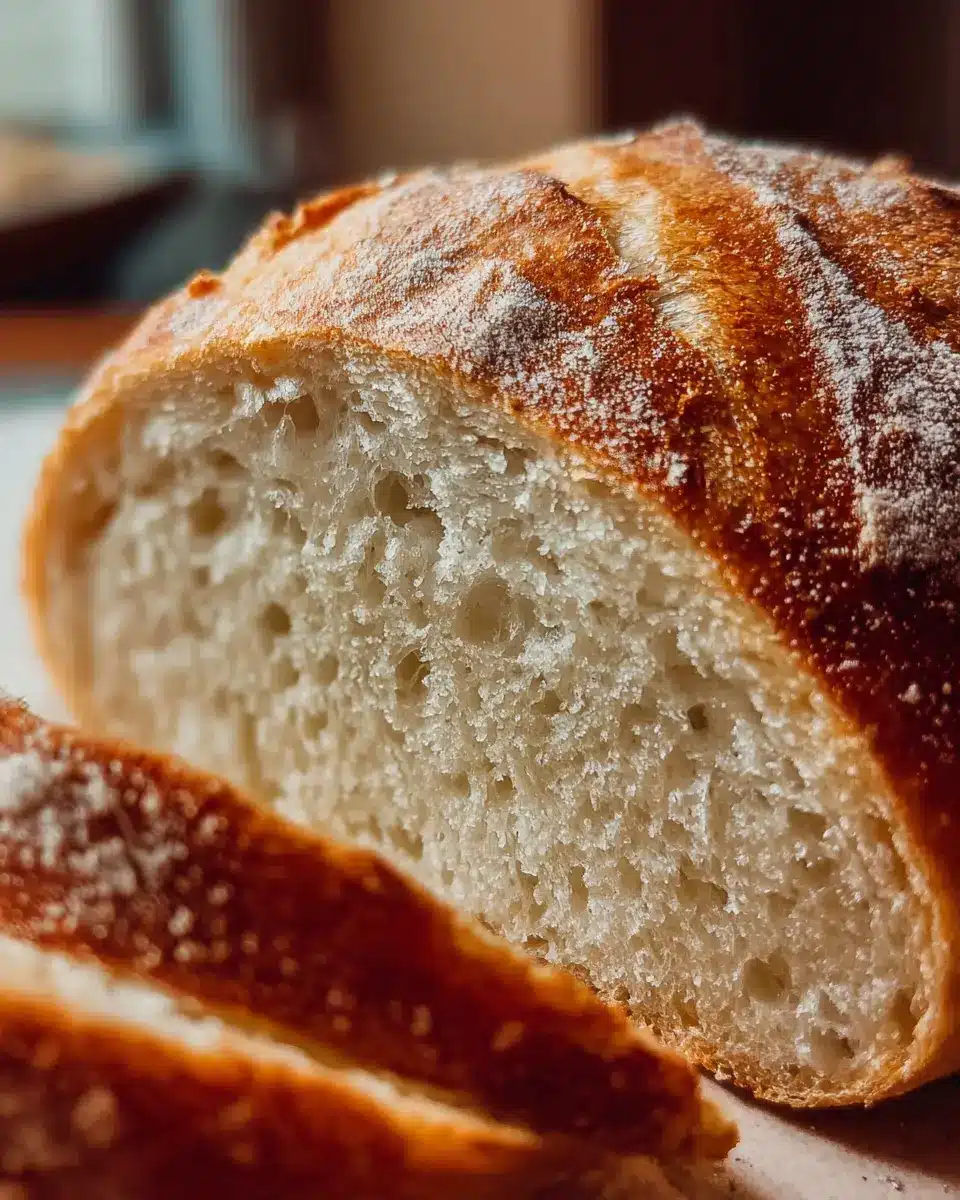
Essential ingredients for the perfect sourdough sandwich bread
Creating the perfect sourdough sandwich bread begins with high-quality ingredients. Here’s what you’ll need:
- 500 g (4 cups) all-purpose flour: This provides the structure and chewiness.
- 12 g (1 tbsp) sugar: A touch of sweetness enhances the flavor and aids fermentation.
- 9 g fine sea salt: Essential for taste and to control yeast activity.
- 60 g (4 tbsp) unsalted butter, softened and cubed: This adds richness and a soft crumb.
- 50 g (¼ cup) active sourdough starter: The soul of your bread, bringing that distinctive tangy flavor.
- 270 g (1 cup + 2 tbsp) warm water: Helps activate the starter and hydrate the flour for a smooth dough.
Make sure your sourdough starter is bubbly and well-fed for the best results!
Optional add-ins for extra flavor
Want to elevate your sourdough sandwich bread? Here are some tasty optional extras:
- Herbs: Add dried or fresh herbs like rosemary or thyme for an aromatic twist.
- Seeds: Throw in sunflower or flax seeds for added texture and nutrition.
- Cheese: Shredded cheese mixed in can create a deliciously savory bread.
- Nuts: Chopped walnuts or pecans offer a delightful crunch and flavor.
These add-ins can transform a classic loaf into something uniquely yours. Have fun experimenting with flavors that complement your favorite fillings! For more tips on using sourdough, check out the resources at King Arthur Baking or The Spruce Eats.
Preparing Sourdough Sandwich Bread
Creating homemade sourdough sandwich bread might seem daunting, but with a little patience and love, you can enjoy the delightful aroma and flavor that fills your kitchen. So, grab your ingredients and let’s walk through the process together.
Mixing the Dough
To start, gather your ingredients and combine them in a stand mixer. You'll want to mix the all-purpose flour, sugar, salt, and softened butter until it resembles coarse crumbs. This step is crucial because it helps incorporate the butter evenly throughout the dough, which contributes to that soft texture we all crave in sandwich bread. Next, add the active sourdough starter and warm water. Mix until everything is fully absorbed and let it sit for about 30 minutes. This resting period is known as autolyse and helps improve the dough's extensibility.
Kneading for That Ideal Texture
Once your mixture is rested, it’s time to knead. If you’re using a stand mixer, set it to medium-low speed and let it work for 6 to 8 minutes. You’re aiming for a smooth, elastic texture that stretches without tearing. Kneading by hand? No problem! Just knead away for about 8 to 10 minutes. Understanding when your dough is ready can make all the difference—look for a silky surface and a slightly tacky feel.
Overnight Fermentation—Why It Matters
Now, here’s where the magic begins. Cover your dough and let it ferment overnight at room temperature. This slow fermentation process is key to developing the complex flavors that make sourdough sandwich bread so exquisite. Not only does it create a delightful tang, but it also enhances the overall texture, giving the bread that chewy yet soft quality you love in a great sandwich loaf.
Shaping the Dough Like a Pro
Once your dough has risen beautifully, it’s time to shape it. Turn it out onto a lightly floured surface and flatten it gently to release any air bubbles. Shape the dough into a log—think of rolling it like a burrito! Let it rest for about 5 to 10 minutes before placing it seam-side down in a buttered loaf pan. A confident shape here will set the stage for a beautiful slice later on.
Second Rise and Preheating the Oven
After shaping, it’s time for the second rise. Cover your loaf pan and let the dough rise again, this time for 1½ to 2½ hours, until it’s domed above the pan. Pro tip: this is also when you should preheat your oven to 375°F. Giving your oven enough time to heat is crucial to achieving that crusty exterior while maintaining the soft inside.
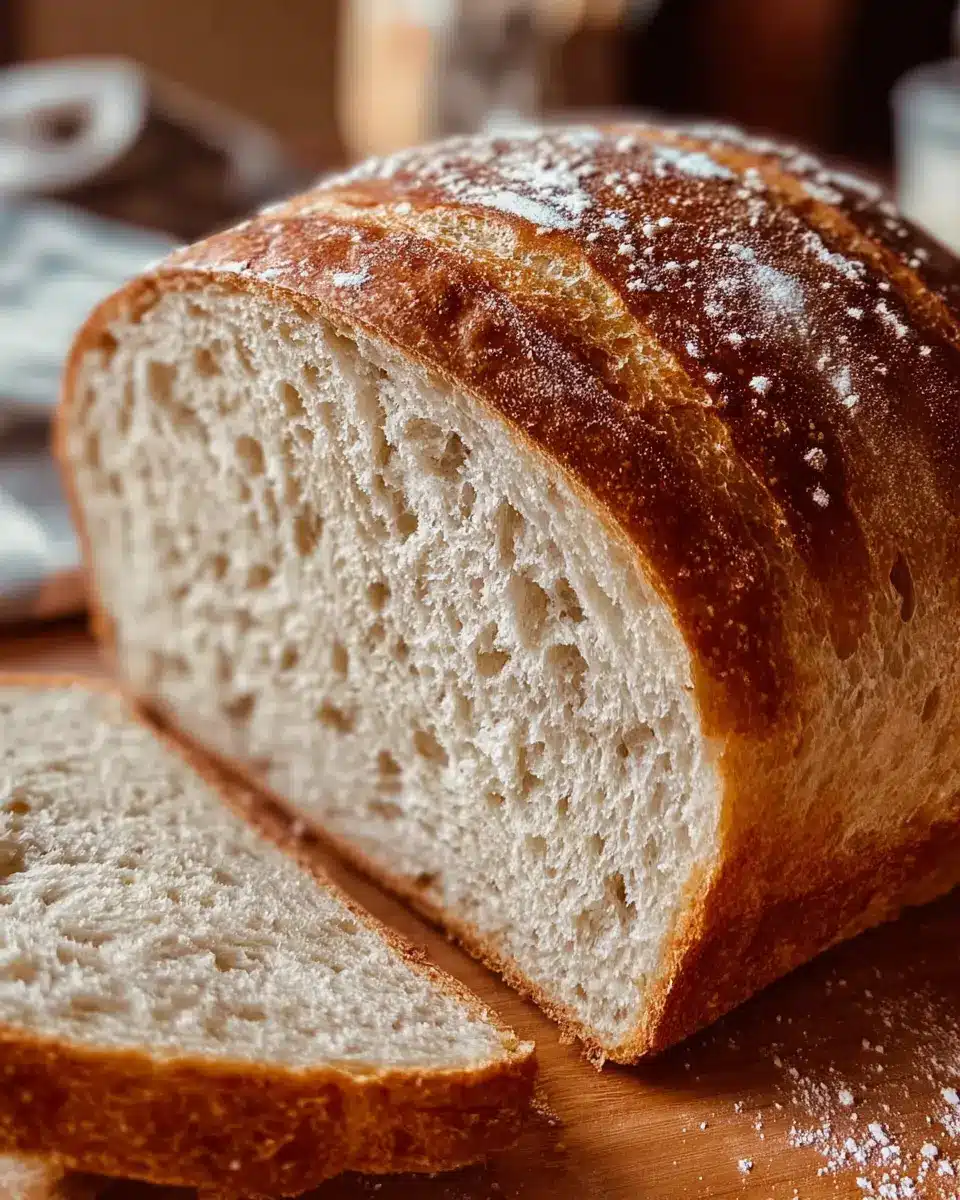
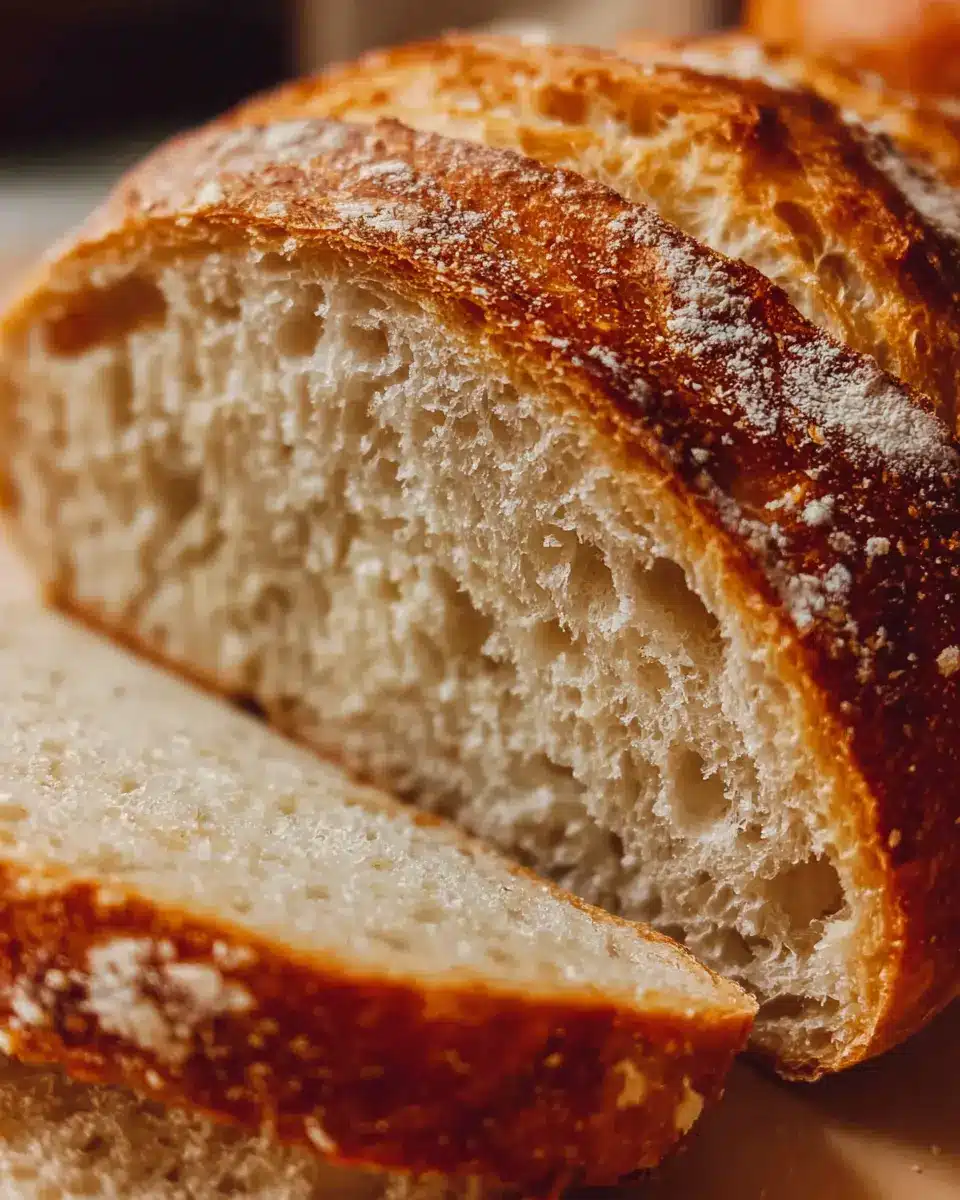
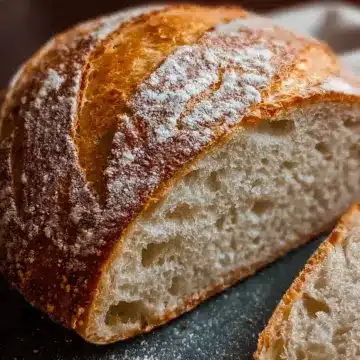
Baking to Golden Perfection
Finally, it’s showtime! Bake your sourdough sandwich bread for about 45 to 50 minutes, or until it's golden brown and sounds hollow when tapped. This stage is so satisfying—you’ll be tempted to peek in, but resist! Let it cool in the pan for about 10 minutes, then transfer it to a wire rack to finish cooling. Your patience will be rewarded when you slice into that soft, flavorful bread—perfect for turkey bacon or chicken ham sandwiches!
By following these steps, you're not just making bread; you're creating a loaf that embodies warmth and homemade goodness. Enjoy the process and the delicious results!
Variations on Sourdough Sandwich Bread
Adding herbs and spices for a twist
Elevate your sourdough sandwich bread with delightful flavors by adding fresh or dried herbs and spices. Consider mixing in a tablespoon of rosemary, thyme, or even garlic powder for a savory note. For something a bit bolder, why not experiment with smoked paprika or chili flakes? These additions not only enhance the taste but can turn your bread into the star of any sandwich. Plus, the aroma while baking will have your kitchen smelling heavenly!
Incorporating seeds for texture
Adding seeds, such as sesame, flax, or sunflower seeds, can bring a wonderful texture and nutty flavor to your loaf. Simply mix in about 50 grams of your seed choice during the kneading process. Not only do they crunch delightfully with each bite, but they also pack a nutritional punch, providing healthy fats and protein. You can even sprinkle some seeds on top of the loaf before baking for an extra touch of flair! Explore these variations to make your sourdough sandwich bread uniquely your own.
Cooking tips and notes for Sourdough Sandwich Bread
Common pitfalls to avoid
When making sourdough sandwich bread, it's essential to watch out for a few common pitfalls. First, ensure your sourdough starter is active and bubbly; a sluggish starter can lead to dense bread. Additionally, avoid rushing the fermentation stages; patience is key for developing that lovely flavor and texture. If your dough hasn't doubled overnight, give it extra time. Lastly, always check for doneness by tapping the crust—if it sounds hollow, you’re good to go!
The science behind the sourdough starter
The magic of sourdough sandwich bread lies in its starter. This mixture of flour and water hosts wild yeast and beneficial bacteria, which ferment and create carbon dioxide, leavening your bread naturally. This not only contributes to the rise but also imparts that distinct tangy flavor. For a deep dive into sourdough fermentation, you might enjoy reading this article from Bakerpedia, which details the fermentation process and its impact on flavor profile. Understanding these elements allows you to tweak the fermentation times to suit your taste preferences!
Serving suggestions for Sourdough Sandwich Bread
Perfect pairings for your sandwiches
There’s nothing quite like a delicious sandwich made with sourdough sandwich bread. Consider pairing it with:
- Turkey Bacon and avocados: This combination offers a rich, creamy texture with a salty crunch.
- Chicken Ham layered with fresh greens: A light and healthy option that pairs beautifully with your tangy sourdough.
- Classic Grilled Cheese: Melted cheese with a crispy bread crust is a match made in heaven.
Serve your sandwiches with a side of homemade potato chips or a light salad for a complete meal.
Creative ways to use leftover bread
If you happen to have any leftover bread, don’t let it go to waste!
- Make croutons: Toss cubes of stale bread with olive oil and spices, bake until golden for the perfect salad topper.
- Whip up bread pudding: A sweet dessert that transforms stale bread into a comforting dish.
- Try your hand at French toast: Soak leftover slices in an egg mixture for a delightful breakfast option.
For more inspiration, check out sources like The Kitchn for creative bread recipes. Enjoy your culinary adventures with sourdough sandwich bread!
Time Breakdown for Sourdough Sandwich Bread
Making sourdough sandwich bread is a rewarding process that requires some key time investments. Here’s how it breaks down:
Mixing and Kneading Time
This initial step takes about 30 to 40 minutes, including 30 minutes for resting and 6 to 8 minutes for kneading.
Rising Time
The bulk rise is done overnight, giving a rich flavor, while the second rise takes 1.5 to 2.5 hours.
Baking Time
Baking the loaf requires about 45 to 50 minutes until it’s perfectly golden brown.
Total Time
In total, you’re looking at approximately 10 to 12 hours from start to finish, thanks to that overnight fermentation—but don’t worry, most of that time is hands-off!
With these time estimates, you can easily plan your baking session. For a deeper dive into sourdough techniques and tips, check out resources like King Arthur Baking or The Perfect Loaf for community insights and inspiration!
Nutritional Facts for Sourdough Sandwich Bread
Calories per Slice
In every slice of this delectable sourdough sandwich bread, you can expect around 150 calories. It's just the right amount to keep you satisfied without weighing you down, whether you're enjoying a simple spread or crafting a gourmet sandwich.
Key Macronutrients
When it comes to nutrition, this bread offers:
- Protein: 4 g – a nice boost for any meal.
- Carbohydrates: 22 g – providing sustained energy.
- Fat: 6 g (4 g saturated) – essential for flavor and texture.
- Fiber: 1 g – helping you feel full.
When making a wholesome choice, remember that bread can be both tasty and nourishing! Pair it with lean meats like turkey bacon or chicken ham for a fulfilling meal. If you’d like to dive deeper into the nutritional benefits of sourdough, check out resources like the Whole Grains Council.
FAQs about Sourdough Sandwich Bread
How do I know my sourdough starter is active?
An active sourdough starter is bubbly, has doubled in size, and gives off a pleasant aroma. To test its readiness, perform the “float test”: drop a spoonful of your starter in a glass of water. If it floats, congratulations! Your starter is ready for baking.
What if my dough isn’t rising?
If your dough isn’t rising, it might need more time or warmth. Check that your sourdough starter was recently fed and actively bubbly. If your kitchen is on the cooler side, try placing the dough in a warm, draft-free area, like an oven with just the light on. Patience is key; sometimes it takes a little extra time for that delicious sourdough sandwich bread to rise.
Can I freeze sourdough sandwich bread?
Absolutely! Freezing your sourdough sandwich bread is a great way to preserve it. Wrap the cooled loaf tightly in plastic wrap, followed by aluminum foil, and store it in the freezer for up to three months. When you’re ready to enjoy some homemade goodness, simply thaw it at room temperature or pop slices in the toaster for a quick treat!
For more on sourdough maintenance, you can check out The Perfect Loaf for helpful tips on keeping your starter happy.
Conclusion on Sourdough Sandwich Bread
Embracing Homemade Bread as a Lifestyle Shift
Baking your own sourdough sandwich bread is more than just a culinary endeavor; it’s a journey toward a healthier and more rewarding lifestyle. Homemade bread allows you to control the ingredients, ensuring freshness and flavor in every bite. Imagine the satisfaction of sharing a delicious turkey bacon or chicken ham sandwich made with love—it's truly special!
Final Thoughts on Your Baking Journey
As you explore the world of sourdough, remember: every loaf is a learning experience. Whether it’s a triumph or a slight misstep, each bake builds your confidence. Enjoy the process, experiment with flavors, and let your creativity flourish. Your sourdough journey awaits—happy baking!
Sourdough Sandwich Bread
Equipment
- Stand Mixer
- Loaf pan
- Wire Rack
Ingredients
Dry Ingredients
- 500 g all-purpose flour
- 12 g sugar
- 9 g fine sea salt
Wet Ingredients
- 60 g unsalted butter, softened and cubed
- 50 g active sourdough starter
- 270 g warm water
Instructions
Dough Preparation
- Mix the Dough: In a stand mixer, combine flour, butter, sugar, and salt. Mix until it looks like coarse crumbs. Add sourdough starter and warm water, mix until fully absorbed. Rest for 30 minutes.
- Knead the Dough: Knead on medium-low speed for 6 to 8 minutes until smooth and elastic. Alternatively, knead by hand for 8 to 10 minutes.
- Bulk Rise (Overnight Fermentation): Cover the dough and let it rise overnight at room temperature until doubled in size.
- Shape the Dough: Turn out the dough, flatten gently, and shape into a log. Rest for 5 to 10 minutes before placing in a buttered loaf pan seam side down.
- Second Rise: Cover the loaf pan and let the dough rise at room temperature for 1½ to 2½ hours until domed above the pan. Preheat the oven to 375°F.
- Bake: Bake for 45 to 50 minutes until golden brown and hollow when tapped. Cool in the pan for 10 minutes then on a wire rack.


Leave a Reply