
Introduction to One-Day Sourdough Bread
Making your own one-day sourdough bread can be a rewarding experience that brings a delightful aroma to your home and provides a sense of achievement. Unlike traditional sourdough methods that can take days or even weeks, this recipe allows you to enjoy freshly baked bread in just one day. But why should you give it a go?
Why Should You Try Making Your Own Sourdough?
-
Health Benefits: Homemade sourdough is easier to digest compared to commercial bread. The fermentation process breaks down gluten and makes nutrients more bioavailable. For those with gluten sensitivities, this can make a world of difference. You can read more about the health benefits of sourdough from The Whole Grains Council.
-
Control Over Ingredients: When you bake at home, you control the ingredients and avoid preservatives found in store-bought breads. This not only makes your bread healthier but also more delicious.
-
Creative Expression: Baking is an art! With sourdough, you can experiment with flavors and textures, from adding herbs to creating unique shapes.
Don’t worry if you’re new to baking—this simple recipe is perfect for novices and pros alike! Grab your ingredients, and let’s get started on this delightful journey to mastering one-day sourdough bread.
Ingredients for One-Day Sourdough Bread
Essential ingredients for a perfect loaf
To create the ideal one-day sourdough bread, you'll need a handful of essential ingredients that come together beautifully:
- 125g active sourdough starter: This is the magic ingredient—ensure it’s bubbly and alive, ready to work its fermentation wonders.
- 500g bread flour: Offers structure and that delightful chewy texture we all crave.
- 300g lukewarm water: Helps activate the starter effectively and ensures proper dough hydration.
- 10g salt: Not just for seasoning; it enhances the overall flavor profile, making each bite truly enjoyable.
These ingredients form the foundation of your sourdough, so quality matters! Try using fresh, unbleached flour for the best results.
Optional add-ins to customize your bread
Feel like experimenting? Here are some fun optional add-ins to make your one-day sourdough bread even more special:
- Herbs and spices: A sprinkle of rosemary or garlic powder can add a savory touch.
- Seeds or nuts: Flaxseeds, sunflower seeds, or chopped walnuts provide crunch and nutritional value.
- Dried fruits: Incorporate raisins or cranberries for a hint of sweetness.
Don't be afraid to get creative—your perfect loaf could be just a unique ingredient away! For more inspiration, check out King Arthur Baking's resource.
Step-by-Step Preparation of One-Day Sourdough Bread
Making your own one-day sourdough bread is not only rewarding but also a fun process that fills your home with the delightful aroma of freshly baked bread. Let’s take a closer look at how to master this wonderful recipe!
Combine the ingredients
Start your bread-making adventure by gathering all your ingredients: 125g of active sourdough starter, 500g of bread flour, 300g of lukewarm water, and 10g of salt. In a large mixing bowl, combine the starter, flour, water, and salt. Use your hands to mix everything together until a sticky ball forms. It’s okay if it doesn’t look perfect at this stage; just ensure all the flour is incorporated.
Autolyse for better flavor and texture
Once you’ve mixed your ingredients, cover the bowl with a towel or plastic wrap. Let it rest for 30 minutes — this step, known as the autolyse, is crucial as it allows the flour to absorb the water fully. This process enhances the flavor and texture of your one-day sourdough bread and gives your loaf that artisanal quality.
Stretch and fold technique explained
After the autolyse, it’s time for some fun with the stretch and fold technique! In your mixing bowl, gently grab one side of the dough, stretch it upwards, and fold it over the center. Turn the bowl a quarter turn and repeat this action until you’ve stretched and folded all four sides. This method helps develop gluten, which gives your bread structure and chewiness. Let the dough rest for a few hours at room temperature to rise and build more flavor.
Shaping the dough
Once your dough has puffed up nicely, it's time to shape it. Gently turn it out onto a floured surface, being careful not to deflate it too much. Use your hands to gently form it into a round or oval loaf, depending on your preference. If you have a proofing basket, place it seam side up; otherwise, you can use a bowl lined with a floured kitchen towel.
Proofing and preparing for baking
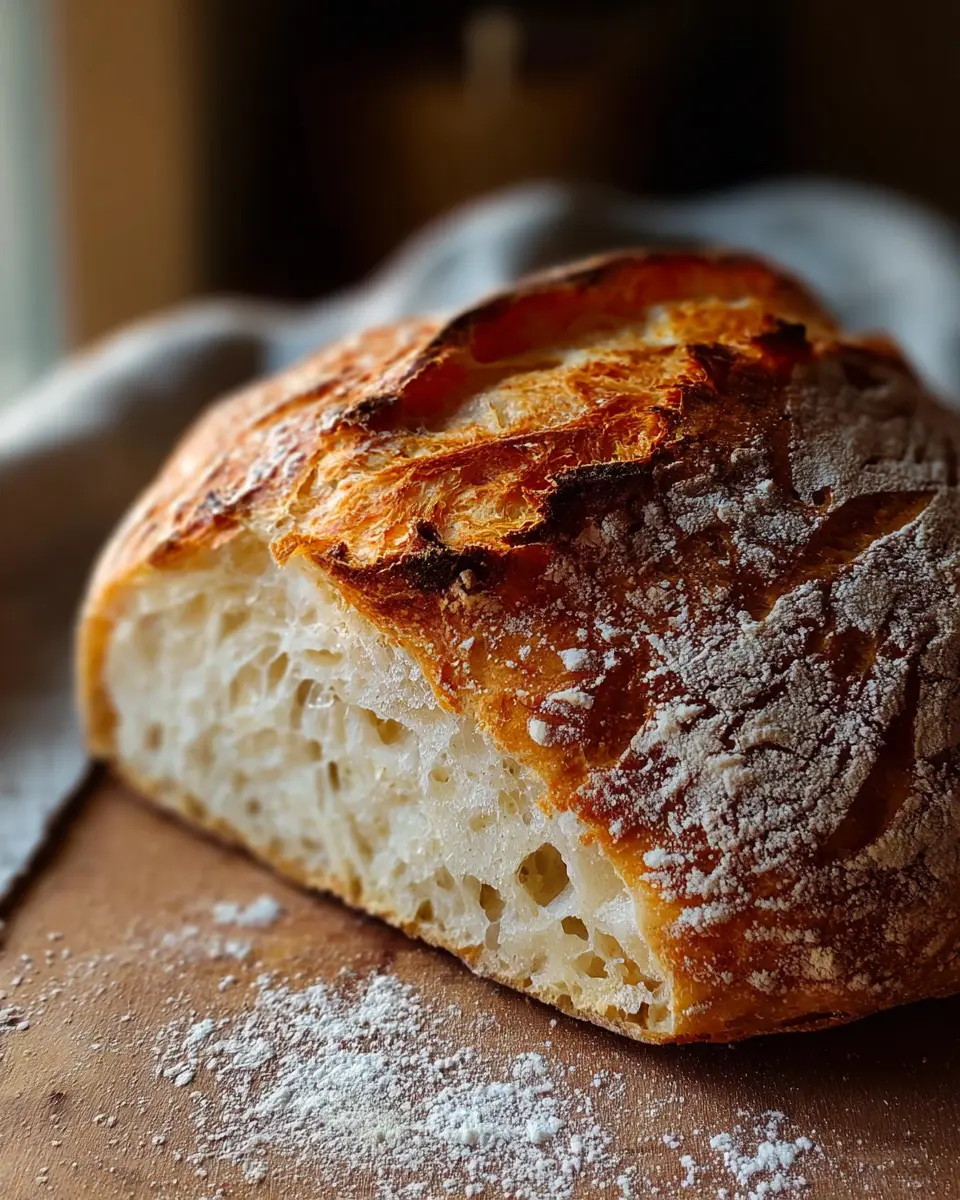
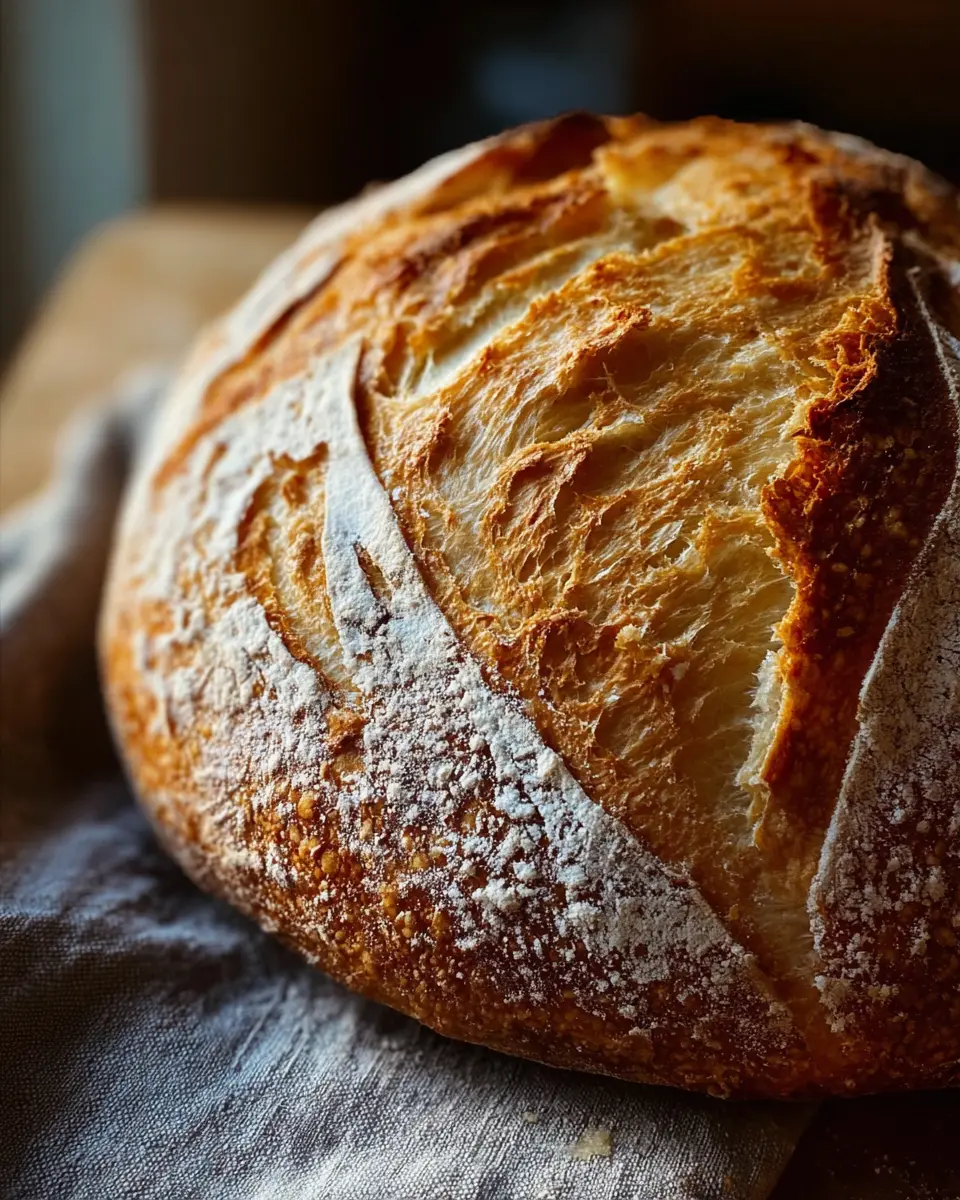
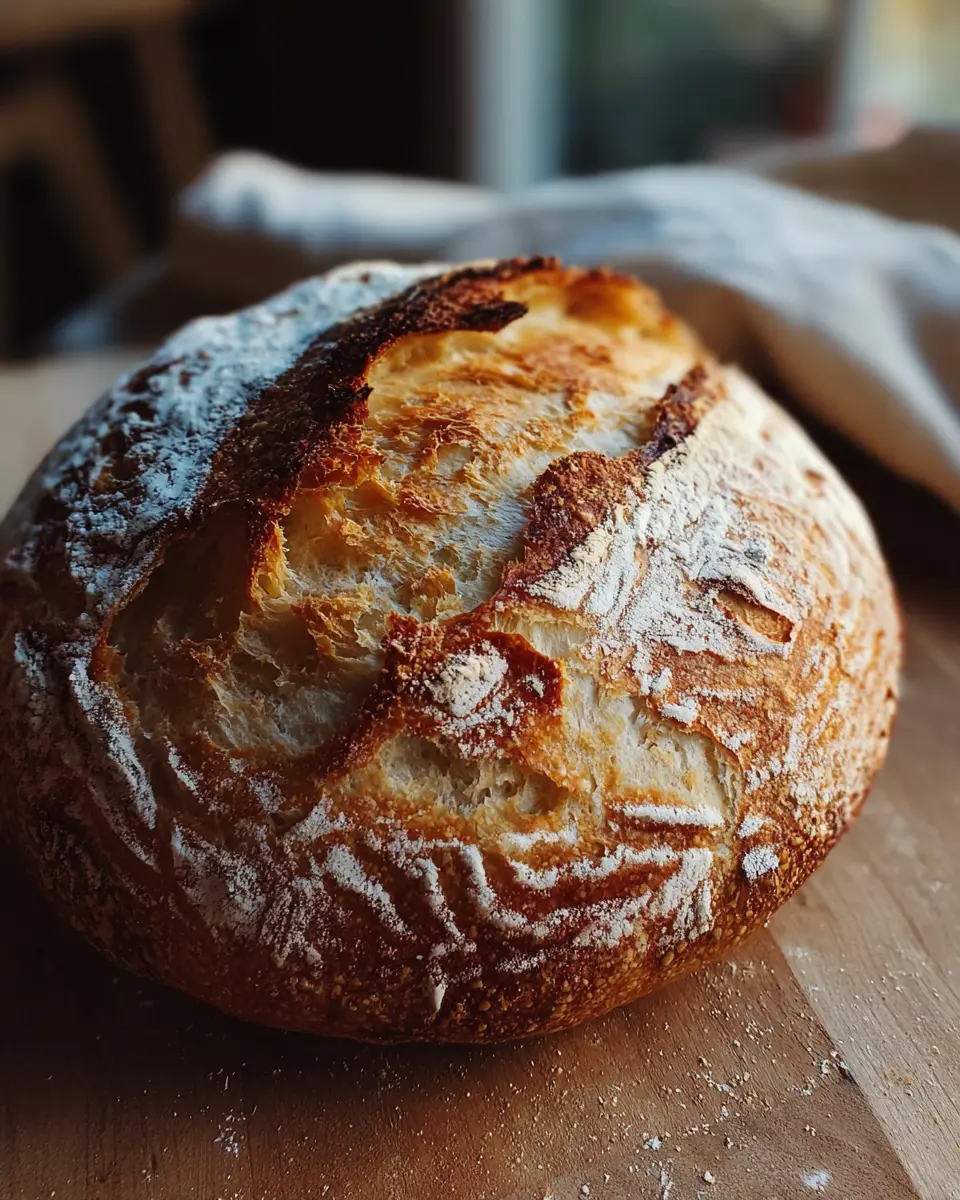
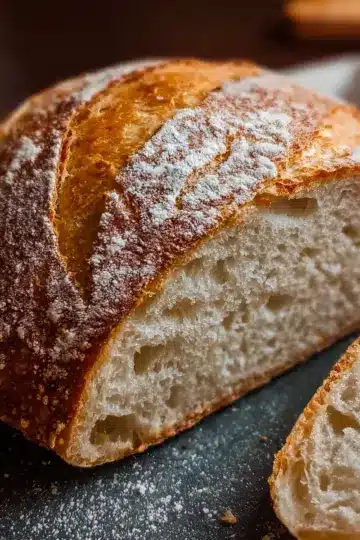
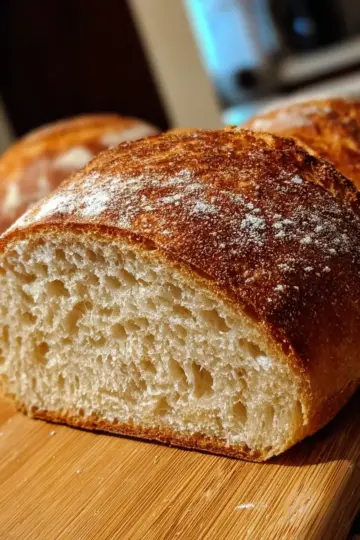
Cover the shaped loaf and let it proof for about an hour at room temperature. This final rise is essential for creating a light, airy texture. After this, for added flavor and crust, place the loaf in the refrigerator to cold ferment. When you’re ready to bake, preheat your oven to 450°F, score the top of the loaf to allow steam to escape, and place it in a cold Dutch oven. Bake for 50 minutes with the lid on, then uncover for another 10 minutes. Voilà! Your delicious one-day sourdough bread is ready to enjoy, warm and homemade.
For further guidance, don't hesitate to check out resources from King Arthur Baking or The Perfect Loaf. Happy baking!
Variations of One-Day Sourdough Bread
Adding herbs and spices
Transform your one-day sourdough bread with a burst of flavor by incorporating fresh herbs or spices into the dough. Try mixing in some chopped rosemary, thyme, or even a pinch of garlic powder. These additions not only enhance the taste but also make your bread stand out at any gathering. For a sweet twist, consider adding spices like cinnamon or nutmeg, particularly if you’re pairing the bread with breakfast dishes.
Whole grain alternatives
Looking for a healthier option? Substituting a portion of white flour with whole grain flour can add more fiber and nutrients to your one-day sourdough bread. Consider using whole wheat, spelt, or rye flour to enrich the flavor and texture. Just remember to adjust the hydration slightly, as whole grains absorb more water. Whether you're serving it with soup or slathering it with butter, these variations can elevate your homemade creations!
For more ideas, explore resources on bread baking techniques and whole grains.
Baking Tips and Notes for One-Day Sourdough Bread
Ensuring your starter is active
Before diving into your one-day sourdough bread adventure, it's essential to check that your sourdough starter is bubbly and lively. A good rule of thumb is to feed it at least 4 to 6 hours in advance. Always perform the “float test” to confirm its readiness: drop a spoonful of starter in water—if it floats, you're good to go!
Handling dough with care
When shaping your dough, be gentle to avoid deflating those precious air bubbles. Use a light touch and let the dough do its thing! Remember that less manipulation can lead to a lighter loaf. If you're looking for additional guidance, check out King Arthur Baking for expert tips on dough handling techniques.
With these tips, you're well on your way to crafting a delightful loaf that’d impress anyone!
Serving Suggestions for One-Day Sourdough Bread
Perfect pairings and spreads
Once you’ve perfected your one-day sourdough bread, the fun really begins! Consider slathering on rich spreads like:
- Cream cheese with fresh herbs
- Avocado topped with chili flakes
- A drizzle of honey for a sweet surprise
Pair it with savory options such as sliced Turkey Bacon or Chicken Ham for a filling sandwich. For a delightful brunch, enjoy your toast alongside a fruit compote and a piping hot cup of coffee.
Creative ways to use your sourdough
The versatility of one-day sourdough bread doesn’t stop at sandwiches. Here are a few creative ideas:
- Turn the loaf into croutons for salads or soups.
- Make a delicious French toast by soaking slices in an egg mixture.
- Use it to whip up a comforting grilled cheese with your favorite melty cheese.
Whatever your choice, this bread will elevate any meal! For more ideas, check out this article for inspiration.
Time Breakdown for One-Day Sourdough Bread
Mixing and Preparation Time
Start your sourdough journey by dedicating about 1 hour for mixing and initial preparation. This includes combining the active starter, flour, water, and salt, followed by an essential 30-minute autolyse period. This step is crucial as it helps develop the dough’s structure.
Resting and Proofing Time
After the initial mix, allow your dough to rest for about 4 hours. This includes the stretch and fold intervals and the bulk fermentation phase. The dough will start to rise and develop those delightful air bubbles that will yield a perfect loaf.
Baking Time
Finally, set aside approximately 1 hour for baking. Once you preheat your oven, the dough bakes in a Dutch oven for 50 minutes with the lid on, ensuring that it retains moisture. Following this, remove the lid and give it an additional 10 minutes for that perfect crust.
For a more in-depth dive into fermentation and dough structure, you can check out King Arthur Baking for additional insights or refer to the works of renowned authors like Peter Reinhart.
Nutritional Facts of One-Day Sourdough Bread
Calories per slice
If you’re wondering about the energy content, a single slice of one-day sourdough bread packs about 150 calories. This makes it a satisfying yet manageable choice for your meals or snacks throughout the day.
Fiber and protein content
When it comes to nutrition, this bread is worth considering. Each slice contains 2 grams of fiber and 5 grams of protein. The fiber aids digestion and the protein contributes to muscle health, making this bread a delightful and nourishing option for your daily diet.
For more ways to incorporate fiber into your meals, you might want to check out this guide on nutrition-friendly foods!
FAQs about One-Day Sourdough Bread
What is the best way to store sourdough bread?
To keep your one-day sourdough bread fresh and delicious, store it in a paper bag at room temperature. If you have leftovers, you can also wrap it in plastic wrap or aluminum foil. For longer storage, consider slicing the bread and freezing it in an airtight container. Just pop slices in the toaster straight from the freezer for a quick and tasty treat.
Can I use this recipe with other flours?
Absolutely! This one-day sourdough bread recipe is versatile. You can experiment with whole wheat flour, spelt flour, or even a gluten-free blend. Just keep in mind that different flours absorb water differently, so you may need to adjust the amount of water in the recipe.
How do you know when the bread is done baking?
A perfectly baked loaf should have a golden-brown crust and sound hollow when tapped. Use a food thermometer to check the internal temperature; it should read around 200°F for optimal doneness. These tips will help you achieve that perfect bake every time!
For further reading on bread storage and flour variations, check out King Arthur Baking and The Kitchn.
Conclusion on One-Day Sourdough Bread
Making one-day sourdough bread is a rewarding journey that fills your kitchen with delightful aromas and yields a delicious, crusty loaf. With just a few simple ingredients and steps, you can enjoy fresh bread without a lengthy wait. Dive into this method, and embrace your inner baker! For more tips on sourdough, check out King Arthur Baking.
One-Day Sourdough Bread
Equipment
- mixing bowl
- proofing basket
- Dutch oven
Ingredients
- 125 g active sourdough starter unfed, but bubbly and alive
- 500 g bread flour provides structure and chew
- 300 g water lukewarm is best
- 10 g salt enhances flavor
Instructions
- Begin your day around 8:00 AM by mixing the dough. In a large mixing bowl, combine the starter, bread flour, water, and salt. Use your hands to mix it together—it doesn’t need to be smooth, just enough to form a sticky ball.
- Once it’s mixed, cover the bowl with a towel or plastic wrap and let it rest for 30 minutes. This resting time (called “autolyse”) helps the flour fully absorb the water.
- After 30 minutes, perform a set of stretch and folds. Grab one side of the dough, stretch it up, and fold it over the center. Rotate the bowl and repeat three more times.
- Cover the dough again and let it rest for a few hours at room temperature.
- Once the dough has rested and has begun to rise, do a second round of stretch and folds. Let it rest again for 30 minutes.
- Gently shape the dough into a round or oval loaf. Place it into a proofing basket or a bowl lined with a floured kitchen towel.
- Let it rest for another hour at room temperature, covered.
- Once the dough has risen again, cover it and place it in the refrigerator for cold fermentation.
- When ready to bake, remove the dough from the fridge, score the top, and place it in a cold Dutch oven. Set the oven to 450°F and bake for 50 minutes with the lid on, then remove the lid and bake for an additional 10 minutes.


Leave a Reply