
Introduction to Perfecting Oven Spring in Sourdough Baking
The allure of a perfect oven spring: What is it?
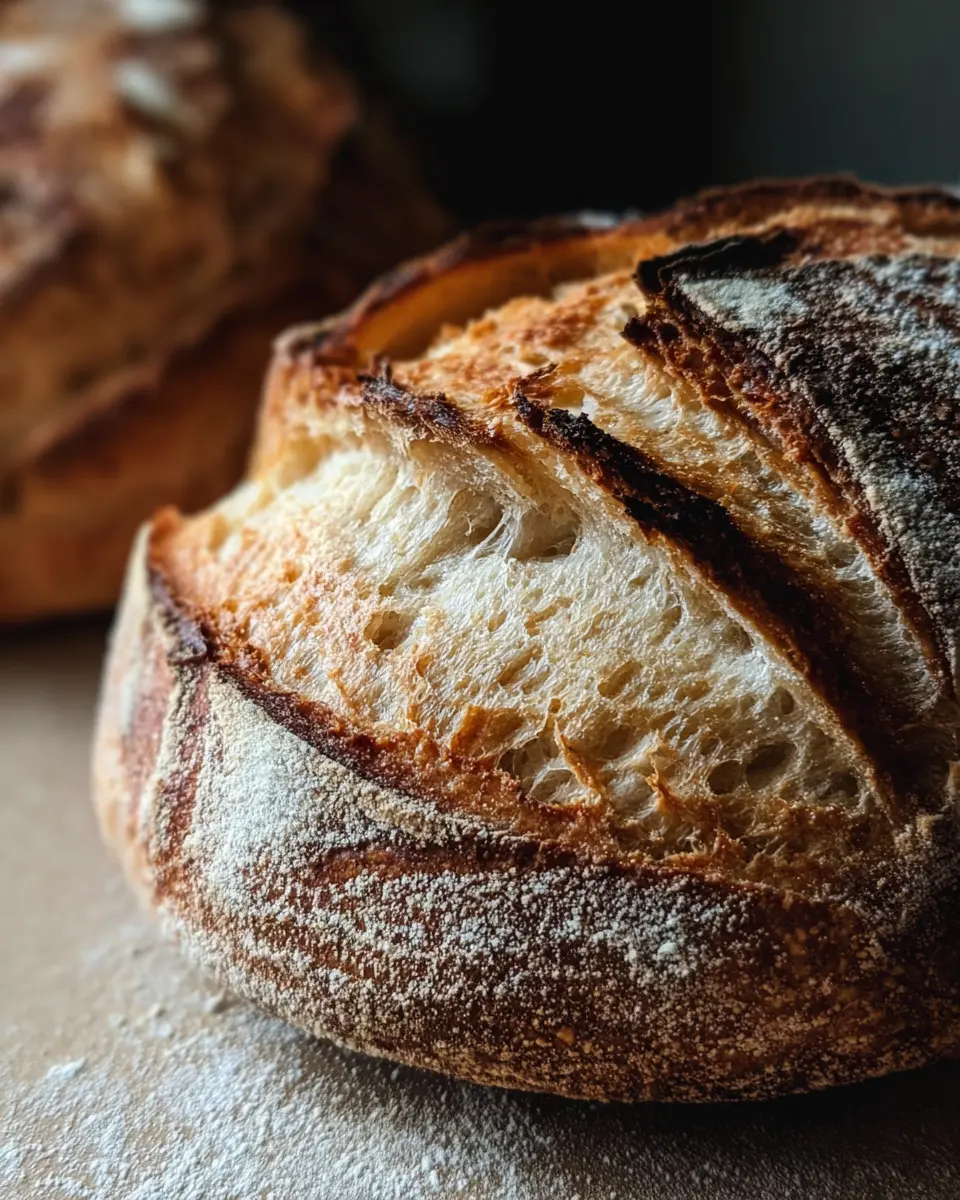
There’s something truly magical about the moment your sourdough loaves first hit the oven. If you've ventured into the world of sourdough baking, you may have heard the term oven spring. This is the moment when your loaves dramatically puff up as they bake, forming that coveted crust and airy interior that makes sourdough so special.
But what exactly causes this enchanting rise? It all comes down to fermentation, steam, and a little chemistry. As the dough heats up, gases created during fermentation expand, while steam builds within the loaf. If you've ever wondered why some loaves burst open beautifully while others remain flat, you’re not alone. Factors ranging from dough hydration to proper shaping can all influence the outcome.
To help you navigate this intricate process, I’ve compiled a comprehensive guide to perfecting oven spring, so you can achieve the ideal rise with each bake. No need to be intimidated! With practice and attention to detail, you too can enjoy baking perfect sourdough loaves that are not just delicious but visually stunning. For more in-depth tips, check out resources like King Arthur Baking or The Perfect Loaf.
Ingredients for Perfecting Oven Spring
Achieving that gorgeous oven spring in sourdough can be the difference between an ordinary loaf and a showstopper. Let’s break down the ingredients that are essential for this magic to happen.
Flour Types Matter
Using a combination of artisan flour and special patent flour creates both strong gluten development and an airy texture. The blend (⅓ artisan and ⅔ special patent from King Arthur) ensures that your dough has enough strength to hold the gases during baking.
Hydration and Starter Balance
This recipe calls for 800 g of water and 150 g of an active sourdough starter. High hydration is crucial as it encourages that lofty rise and improved crumb texture. Always ensure your starter is bubbly and at peak activity to boost fermentation.
Salt’s Role in Flavor and Structure
Adding 20 g of kosher salt not only enhances flavor but also strengthens the gluten matrix, helping retain the gas produced during fermentation. It’s the unsung hero of your loaf!
By paying attention to these ingredients, you're well on your way to perfecting oven spring and impressing your friends with exceptional sourdough. For further reading on dough hydration impact, you might find this King Arthur Flour article insightful!
Step-by-step Preparation for Perfecting Oven Spring
Perfecting oven spring in your sourdough baking can be a game changer. With the right steps, you’ll watch your loaves rise beautifully in the oven, creating that delightful airy crumb. Let’s break down this process step-by-step.
Measuring and Mixing the Dry Ingredients
Start with precisely measuring your dry ingredients. Using a kitchen scale ensures accuracy; you want to maintain the ideal flour-to-water ratio. Combine 1000 g of flour with 20 g of kosher salt in a large bowl. Mix them together thoroughly, ensuring that salt is evenly distributed, which you can easily do with a whisk. This foundational step sets the stage for a balanced flavor and texture in your dough.
Incorporating the Water to Create the Dough
Once your dry ingredients are ready, it’s time to add water. Measure out 800 g of water and pour it into the bowl with your dry mixture. Use your hands or a spoon to combine everything into a rough dough. It's okay if it seems a bit shaggy — that’s part of the charm of sourdough! This step is crucial as it hydrates the flour fully, which contributes to the dough's gluten development.
The Importance of Stretch and Folds
Now comes a technique that elevates the dough structure: stretch and folds. Over the next two hours, perform ten sets of stretch and folds. This technique not only strengthens the dough but also helps incorporate air, vital for achieving the perfect oven spring. As you grab a portion of dough and pull it, think of it as breathing life into your bread.
Bulk Fermentation: Letting the Dough Grow
Cover your bowl with a damp tea towel and let the dough rest for about 2.5 hours. During this bulk fermentation phase, the yeast will start feeding on sugars, releasing carbon dioxide and helping the dough rise. Keep an eye on your dough; it should roughly double in size. This growing period is essential — it develops flavor and enhances texture.
Shaping the Loaves
Once your dough has risen, it’s time to shape your loaves. Lightly flour your work surface and divide the dough into two equal portions. Gently shape each piece into a round loaf, allowing it to rest for 15 minutes before applying the "stitching technique" to trap air. This technique will help create a beautiful structure as the loaves proof and bake.
The Overnight Proofing Process
Next, place your shaped loaves in flour-dusted tea towels within bannetons, covering them with plastic wrap or a cloth. Refrigerating them overnight allows for a slow proofing process — this is where the magic of flavor enhancement occurs. The cooler temperatures slow down fermentation, leading to a more complex and delightful flavor profile.
Preheating the Dutch Ovens
Before you bake, it’s crucial to preheat your Dutch ovens. Heat them to 500°F for at least 30 minutes. This high temperature will help create that perfect oven spring as soon as you place your loaves inside, providing an immediate burst of heat that causes the bread to rise dramatically.
The Perfect Baking Technique
Finally, it’s time to bake! Sprinkle cornmeal on the bottom of your Dutch ovens, gently transfer the loaves using slings, score the tops, and mist with water to create steam. Cover and bake for 20 minutes at 500°F, then uncover and reduce the temperature to 450°F for another 20 minutes. This dual-phase baking allows for deep browning and a rustic crust.
By following these detailed steps, you’ll be well on your way to perfecting oven spring and savoring that delicious, homemade sourdough. Enjoy the process and remember, practice makes perfect! For more tips and inspiration, check out resources from reputable baking sites like King Arthur Baking or The Perfect Loaf. Happy baking!
Variations on Perfecting Oven Spring
Whole Grain and Seeded Sourdough
When you experiment with whole grain or seeded sourdough, you not only enhance flavor but can also create a more robust oven spring. Whole grains typically absorb more water, making hydration crucial. Try adding seeds like flax or sesame to harness their natural oils, which can help your loaves rise beautifully. For best results, remember to allow a longer bulk fermentation; this enables the dough's structure to develop and improves its ability to trap gas, leading to a magnificent oven spring.
Flavored Sourdoughs (Herbs, Cheese, etc.)
Incorporating flavorings such as fresh herbs or aged cheese can elevate your bread-making to new heights! Just be mindful of moisture content from these ingredients, as they might affect your dough's consistency. For example, if you’re adding cheese, opt for aged varieties that can hold up under heat. As you modify your recipes, keep experimenting with different hydration levels to retain that all-essential spring. It's a creative journey, and finding the right balance is part of the fun. Looking for more flavor inspiration? Check out this article from King Arthur Baking.
Baking Notes for Perfecting Oven Spring
Common pitfalls to avoid
When it comes to perfecting oven spring, there are a few common missteps that can hinder your potential. One major issue is under-proofing your dough. This can lead to reduced gas retention and less spring in the oven. Another pitfall is improper scoring; make sure your cuts are deep and at the right angles to allow for controlled expansion. Lastly, inadequate preheating of your oven can result in a sluggish rise, limiting that beautiful burst of height!
Tips on achieving ideal dough hydration
Dough hydration is crucial for achieving an impressive oven spring. Aim for a hydration level between 70% and 80% for an open crumb structure. To hit these targets:
- Use a digital scale for precise measurements.
- Gradually mix in water to observe the sticky texture of dough.
- Incorporate techniques like the autolyse method, allowing flour and water to rest, which can enhance gluten development.
For further insights, check out this guided tutorial on sourdough hydration. Remember, every ingredient plays a role, so stay tuned to your dough's behavior as you fine-tune your technique!

Serving Suggestions for Perfecting Oven Spring
Creative ways to enjoy your sourdough
Your freshly baked sourdough is perfect on its own, but it’s also a canvas for delicious creations. Try topping a warm slice with creamy avocado, a sprinkle of sea salt, and some chili flakes for a savory delight. Alternatively, slather it with herb-infused butter for a gourmet feel. Not to mention, a simple turkey bacon and chicken ham sandwich on sourdough can elevate lunch to new heights. For a sweet twist, consider pairing with homemade jam or drizzled honey.
Pairing options for flavor enhancement
To take your sourdough experience to the next level, consider these pairings:
- Cheeses: Aged cheddar or goat cheese enhances the flavor profile beautifully.
- Spreads: Pesto or hummus can add a punch of flavor without overpowering the bread.
- Soups: Enjoy it alongside a hearty tomato basil soup or a fragrant butternut squash bisque.
Exploring these ideas will not only honor your sourdough but also excite your taste buds.
Tips for Making Perfect Oven Spring
The importance of patience
When it comes to perfecting oven spring, patience truly pays off. Allow your dough adequate time to bulk ferment and proof; this not only strengthens gluten but also builds essential gases that contribute to a beautiful rise during baking. Try to resist the temptation to rush the process; your dough will reward you with a delightful, airy texture. As the old saying goes, good things come to those who wait!
How to know when your bread is done
Knowing when your bread is perfectly baked can be tricky. A great tip is to look for a deep, golden-brown crust and a hollow sound when you tap the bottom of the loaf. Additionally, using an instant-read thermometer can be a game-changer; bread is done when it reaches an internal temperature of 200°F to 210°F. With these techniques, you’ll consistently nail that coveted oven spring!
Time Details for Perfecting Oven Spring
Preparation time
Setting aside about 1 hour for preparation is key—it includes weighing your ingredients and mixing them into a rough dough.
Fermentation time
Don’t rush this part! The bulk fermentation takes approximately 2.5 hours, allowing flavors to develop beautifully.
Baking time
Baking is a crucial step—40 minutes total. First, 20 minutes covered at 500°F, followed by another 20 minutes uncovered at 450°F for that perfect crust.
Total time
From start to finish, you’re looking at a total time commitment of 13 hours, including proofing and cooling. Trust me, it’s worth every minute as you experience the joy of perfecting oven spring!
For further insights into sourdough techniques, check out resources like King Arthur Baking or The Bread Bakers Guild.
Nutritional Information for Perfecting Oven Spring
To understand how perfecting oven spring contributes to your sourdough experience, let’s dive into the nutritional details.
- Calories per slice: Each slice offers 210 calories, making it a satisfying part of your meal without being overly indulgent.
- Protein content: With 6 g of protein per slice, this bread supports muscle repair and keeps you feeling full longer.
- Sodium levels: At just 250 mg of sodium, it’s a heart-friendly option that balances flavor with health.
For a deeper look into sourdough nutrition, check out the USDA's nutritional guidelines for bread here. Balancing your dietary needs while enjoying delicious homemade sourdough can lead to a fulfilling baking journey!
FAQs about Perfecting Oven Spring
What contributes to a good oven spring?
Achieving that sought-after oven spring in sourdough bread begins with several key factors: the strength of your dough, proper hydration, and effective fermentation. A well-fed sourdough starter provides the necessary yeast and bacteria for a robust rise. Additionally, maintaining a humid environment in the oven helps create steam, which assists in the crust formation and expansion during baking. The initial high temperature is crucial for maximizing oven spring, so always preheat your oven and Dutch ovens appropriately.
How can I troubleshoot my sourdough bread?
If your sourdough isn’t rising as expected, start by assessing your ingredients and process. Factors like insufficient kneading or improper proofing time can impact the dough’s strength. Be sure your starter is active and bubbly before mixing. If you're looking for guidance, sites like The Perfect Loaf provide excellent troubleshooting resources.
Why is my sourdough not rising properly?
A common issue is using an inactive starter; ensure yours has been fed regularly and shows signs of life—bubbly and doubled in size. Additionally, consider your environment; yeast thrives in warmth but may struggle in overly cold conditions. Pay attention to the hydration level of your dough, as too little moisture can hinder growth. For more tips, check out King Arthur Baking's guides.
These insights will empower you in perfecting oven spring, elevating your sourdough bread game!
Conclusion on Perfecting Oven Spring
Achieving perfect oven spring is a delightful journey in sourdough baking. By focusing on the fermentation process, shaping techniques, and proper baking temperatures, you can elevate your loaves to new heights. Embrace patience and practice—soon, you’ll be rewarded with beautifully risen bread that excites the senses. Happy baking!
The Joy of Perfecting Oven Spring in Sourdough Baking
Equipment
- Dutch oven
- bowl
- scale
- bannetons
- tea towels
Ingredients
- 1000 g flour (mix of ⅓ artisan and ⅔ special patent flour from King Arthur)
- 800 g water
- 150 g active sourdough starter
- 20 g kosher salt
Instructions
- Weigh all dry ingredients in a bowl, then tare the scale and spray water directly into the bowl until everything is combined into a rough dough.
- Perform ten sets of stretch and folds over two hours, focusing on the first few sets for strength.
- Cover the bowl with a damp tea towel and allow the dough to sit for about 2.5 hours for bulk fermentation.
- Shape the loaf and let it rest for 15 minutes before using a stitching technique on the bottom to trap air and moisture.
- Place the loaves in flour-dusted tea towels inside bannetons, cover with plastic, and refrigerate overnight for proofing.
- Preheat Dutch ovens to 500°F for at least 30 minutes. Sprinkle cornmeal on the base, transfer loaves using slings, score the tops, and mist with water.
- Bake for 20 minutes at 500°F covered, then 20 minutes at 450°F uncovered. Cool completely on a wire rack before slicing.


Leave a Reply